
Every cabinetmaker and kitchen fitter knows this feeling. The tape measure-and-pencil method has been the industry standard for generations — and it’s the single biggest source of installation errors in cabinet hardware.
The problem isn’t your skill. The problem is the tool. When you’re measuring center-to-center distances across multiple doors, even a 1mm error compounds with every measurement. Add in the deflection from a standard drill bit walking on a smooth surface, and you’ve got a recipe for misaligned pulls that ruin the visual flow of an entire kitchen.
The Premium Aluminum Cabinet Hardware Jig eliminates these variables entirely. By providing a rigid, micrometer-accurate drill guide, this jig turns a high-stakes measuring exercise into a 30-second clamping operation that delivers perfect alignment every time.
Symptom Awareness — Why Your Current Method Is Failing
If you’re still using a tape measure, pencil, and combination square for cabinet hardware installation, you’re dealing with a familiar set of frustrations:
- Measurement creep: Across 20 cabinet doors, each measurement introduces a 0.5mm error. By the time you reach the far end of the kitchen, the pulls are visibly off-axis.
- Bit walk: Even with a center punch, drill bits have a tendency to wander on smooth cabinet surfaces. The result is an oval or misaligned hole that compromises the hardware fit.
- Non-square doors: Not every cabinet door is perfectly square. Relying on edge references can compound existing manufacturing tolerances.
- Flipping confusion: Left and right doors require mirrored hole positions. Without a jig, you’re essentially re-measuring every single door — multiplying the opportunity for error.
- Plastic template flex: Cheap plastic templates deform under clamp pressure or over time, introducing slop into the very tool that’s supposed to eliminate it.
If any of these sound familiar, it’s time to upgrade to a rigid, repeatable drilling system.
Diagnostic Fitment — Setting Up the Jig for Zero-Error Drilling
Before you clamp the jig to your first door, run through this quick setup sequence to ensure dead-accurate hole placement:
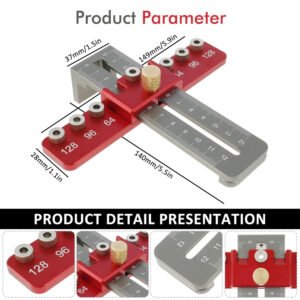
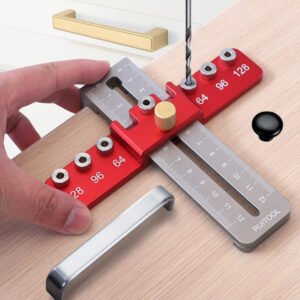
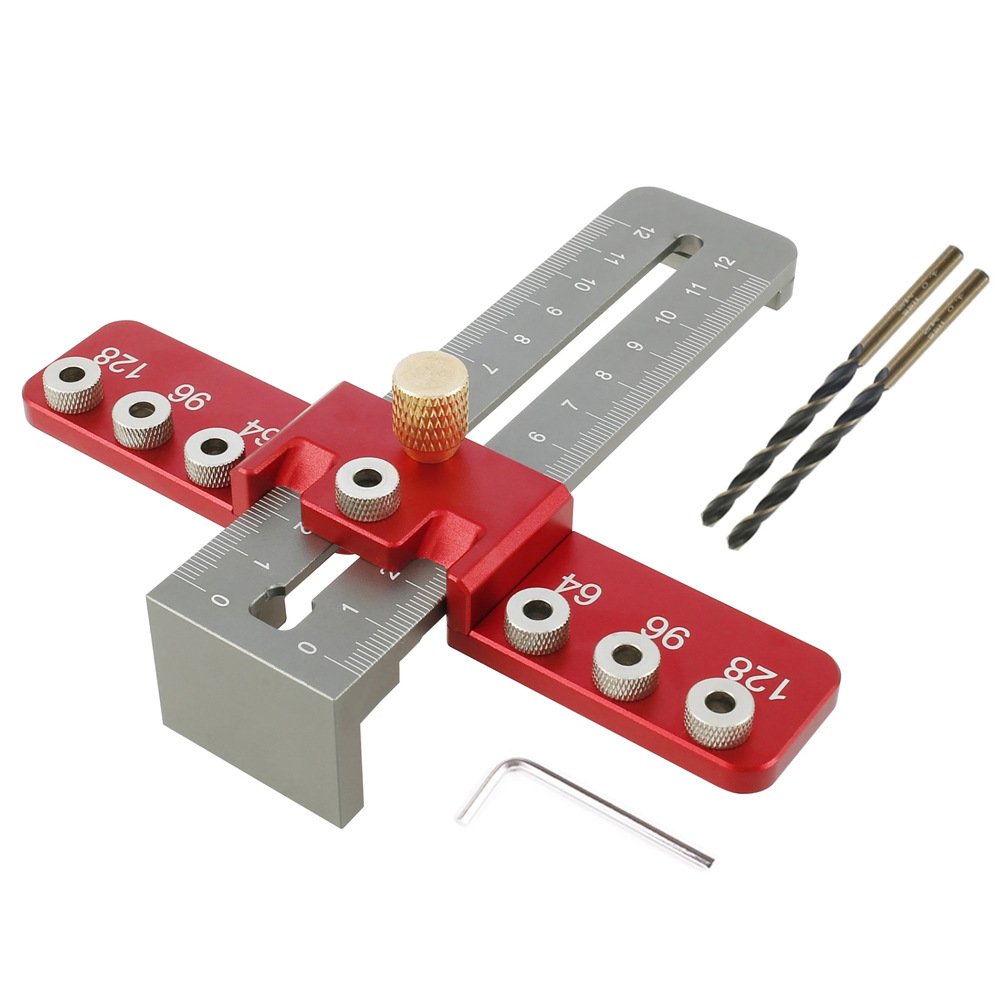
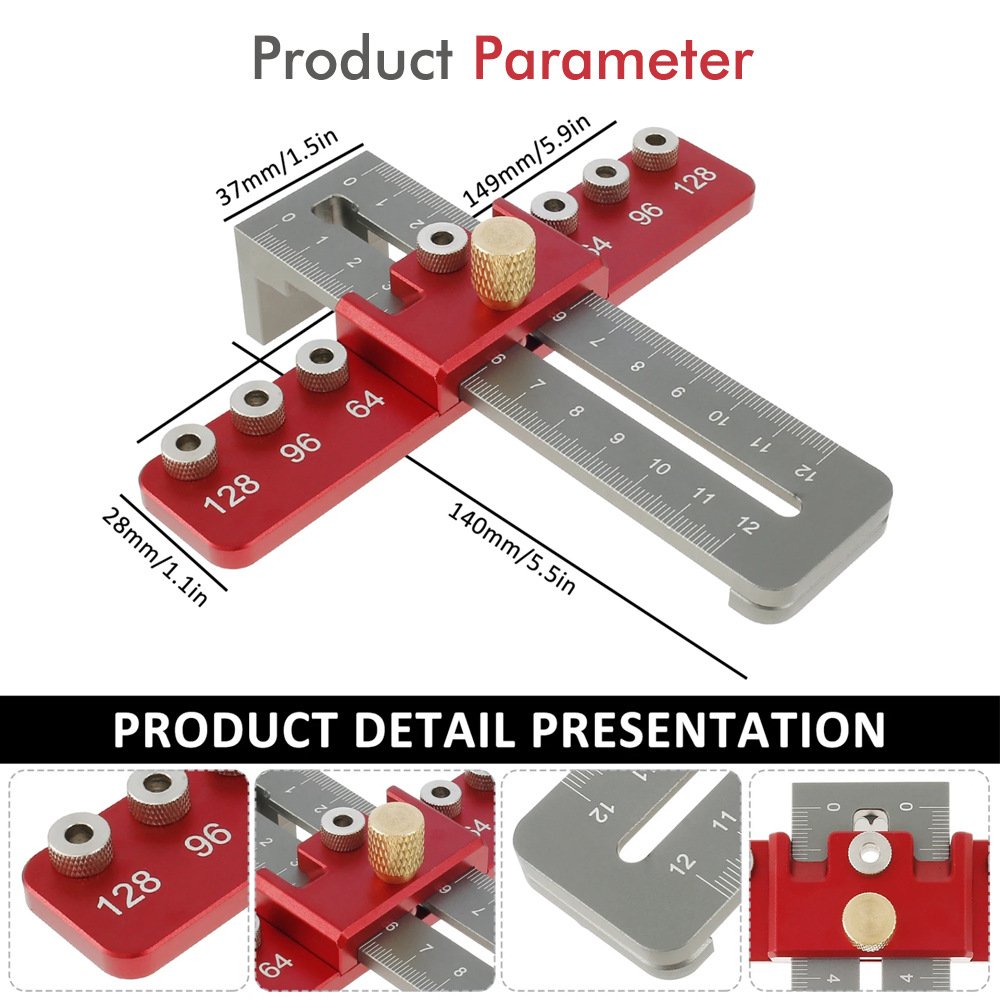
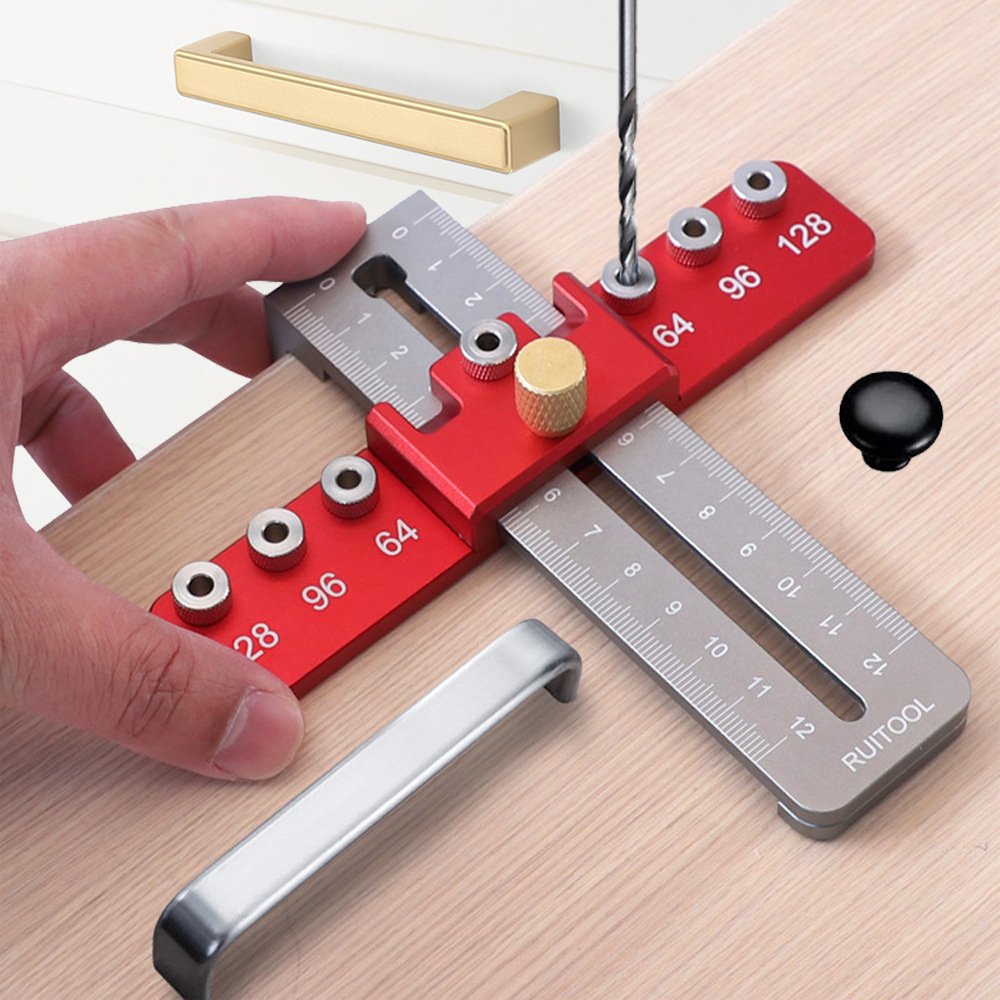
Use the sliding positioning blocks and laser-etched scales to set the exact distance between the two drill holes. The jig supports both metric and imperial measurements.
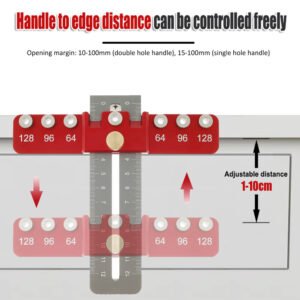
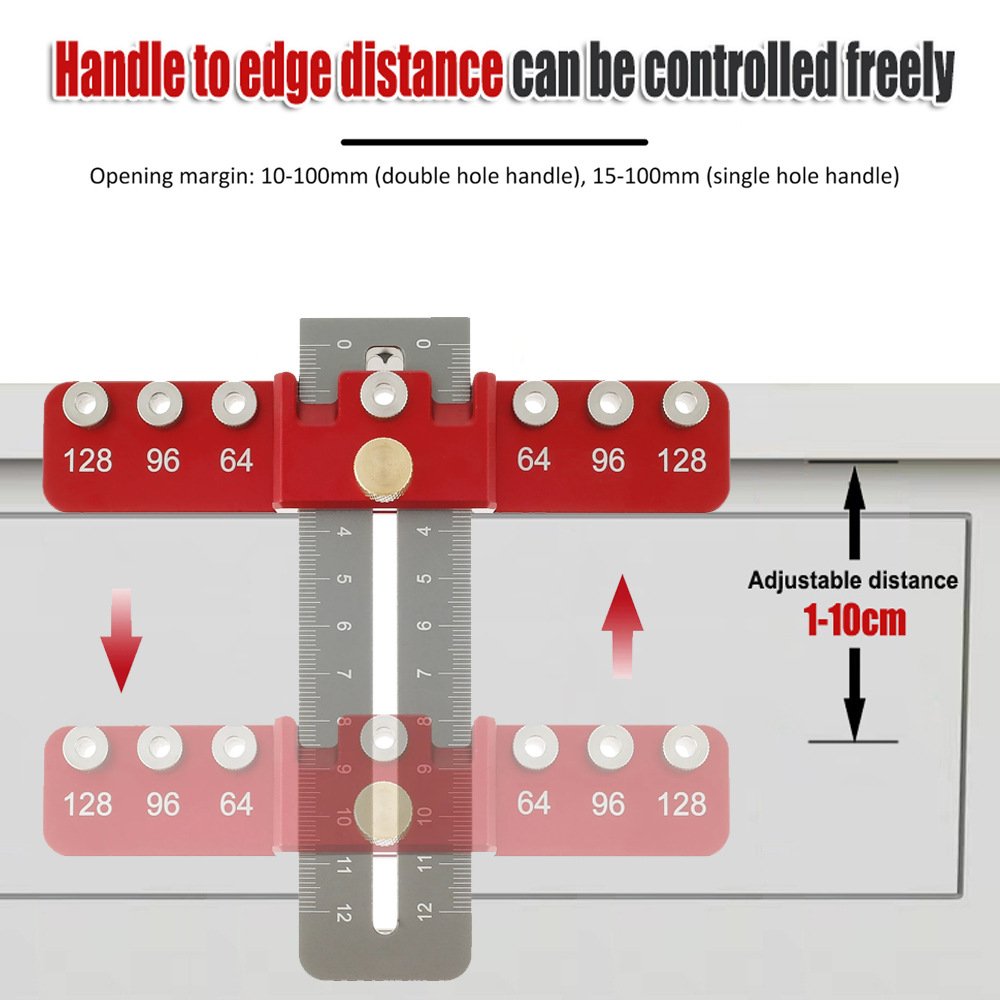
Adjust the depth stop to set the exact distance from the door edge to the first hole. Lock it down once — this setting applies to every door in the run.
Place the jig against the door edge at your desired height. The 300g aluminum body stays put — clamp it down firmly.
Specification Comparison — Precision Jig vs. Cheap Plastic Imitations
Here’s how the FixPartHub Premium Cabinet Hardware Jig stacks up against the flimsy plastic templates and DIY methods that fail under real-world use:
| Parameter | Cheap Plastic Template / DIY Method | FixPartHub Precision Replacement ✅ |
|---|---|---|
| Material & Rigidity | Plastic – flexes under clamp pressure, warps over time | 300g CNC-machined aluminum – zero deflection |
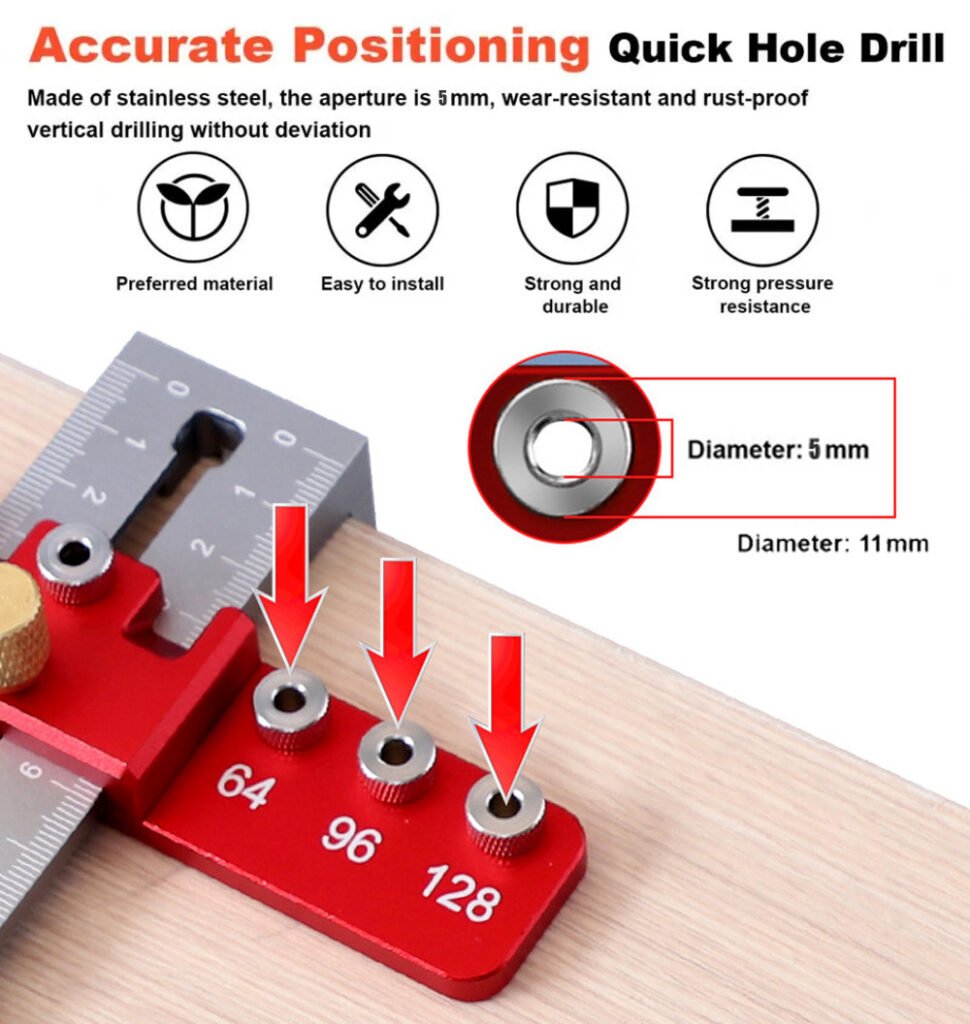
| Drill Guide Durability | Unreinforced plastic – bit chews into housing | Hardened steel bushings – permanent precision |
| Scale Readability | Painted or stamped – wears off | Laser-etched metric & imperial – permanent |
| Mirror Positioning | Re-measure every door – error accumulation | True reversible design – flip and drill |
| Weight / Stability | Lightweight – shifts during drilling | 300g – stays put under pressure |
Teardown & Setup Workflow — From Box to First Hole
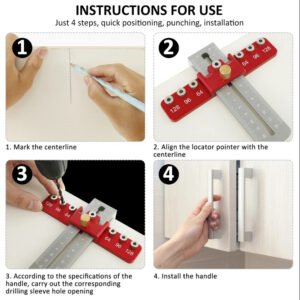
Follow this sequence to set up the jig and drill your first door with perfect accuracy:
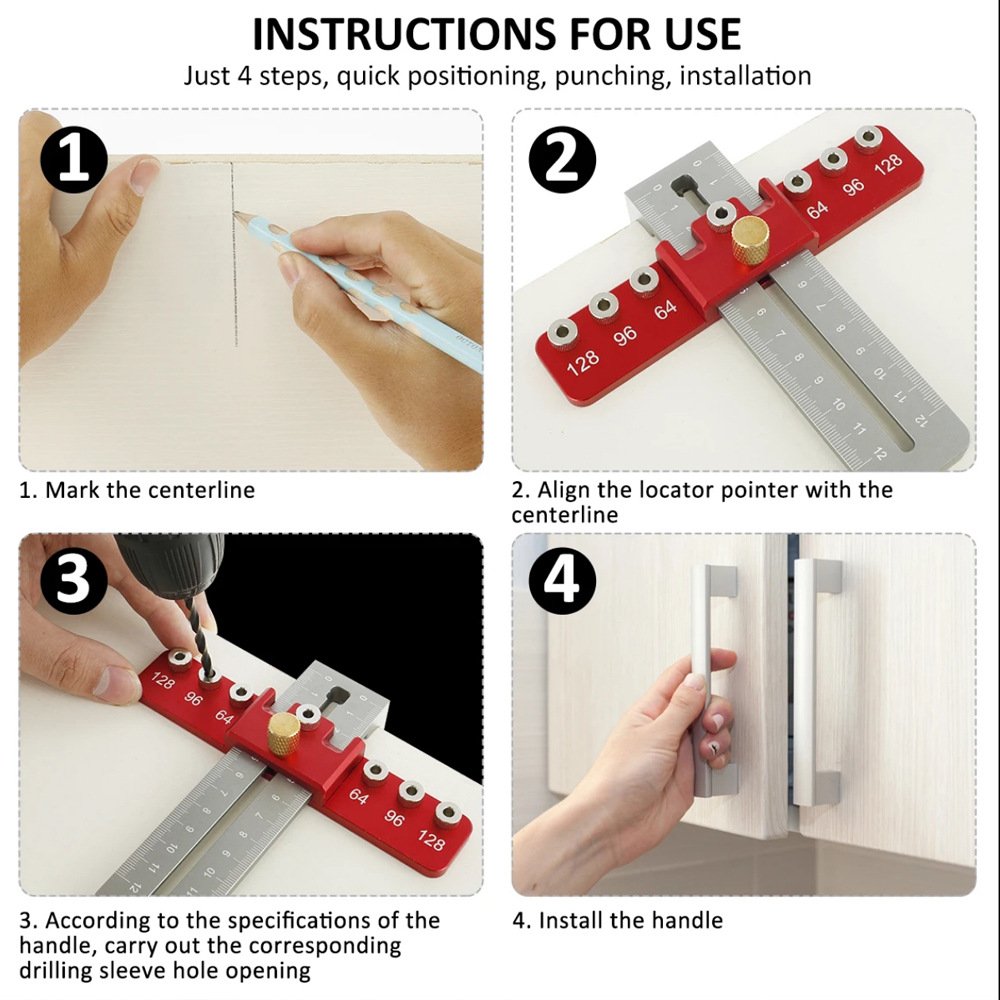
Remove the jig from its protective case. Verify that the sliding positioning blocks move freely and the hardened steel bushings are clean and free of debris.
Using the laser-etched scales, set the center-to-center distance of your specific drawer pull or handle. Lock the sliding blocks securely in place.
Place the jig against the door edge at your desired height. The integrated stop ensures consistent edge offset on every door.
Drill through both hardened steel bushings. Remove the jig, flip it for the opposite door, and drill the mirrored position without recalibrating.
Reassembly & Calibration — Achieving Perfect Alignment Across the Full Run
Once you’ve calibrated the jig on a test piece, follow this protocol to ensure flawless alignment across every door in your project:
- Clamp pressure: The 300g aluminum body is heavy enough to stay in position, but always use a clamp for consistent seating. Hand pressure alone can introduce subtle movement.
- Drill speed & feed: Use a sharp brad-point bit at moderate speed. Too fast and you’ll burn the wood; too slow and the bit will bind. Let the hardened steel bushings do their job.
- Same door edge reference: Use the same reference edge (top, bottom, or side) on every door to maintain consistent pull height across the full run.
- Re-calibration check: After every 10-12 holes, verify that the sliding blocks haven’t shifted due to vibration. The locking mechanism is robust, but a quick visual check is cheap insurance.
- Preventative maintenance: Clean the hardened steel bushings with compressed air after each use. Debris in the bushings can cause the drill bit to bind or wander.
Yoast FAQ
❓ Q: What drawer pull and handle sizes does this jig support?
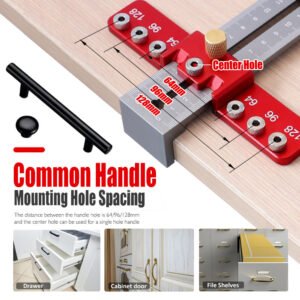
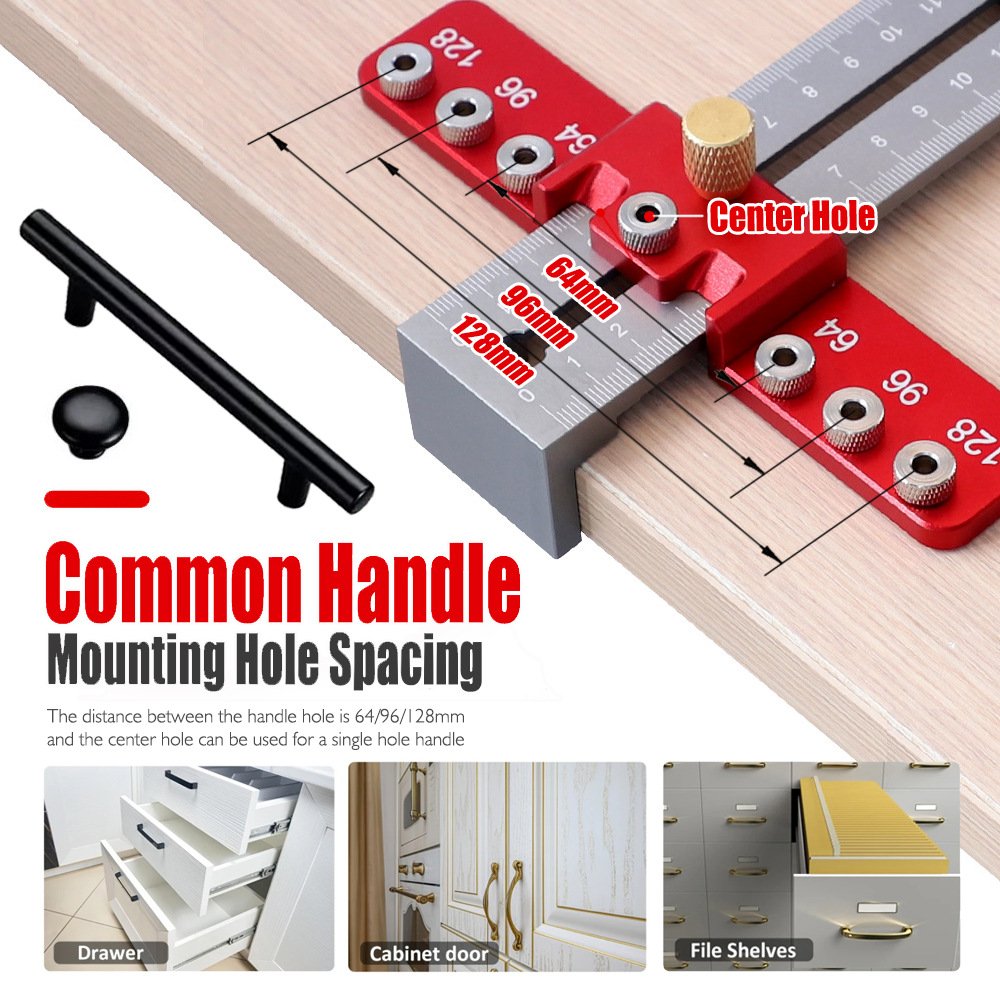
A: The jig accommodates standard center-to-center distances from 2-1/2″ (64mm) to 5″ (128mm) and edge offsets from 1/2″ to 2″. The sliding positioning blocks allow for continuous adjustment within this range, covering over 95% of common cabinet hardware configurations.
❓ Q: Can I use this jig on both hinged doors and drawer fronts?
A: Yes. The jig is designed for both cabinet doors and drawer fronts. The reversible design ensures perfect mirrored hole placement on left and right doors, while the edge reference works equally well on drawer fronts.
❓ Q: Why is the jig made of aluminum instead of plastic?
A: Plastic templates flex under clamp pressure, warp over time, and the drill guide holes wear out as the bit chews into them. The 300g aluminum body eliminates flex, provides absolute dimensional stability, and the hardened steel bushings ensure permanent precision. This jig will outlast dozens of plastic templates.
❓ Q: Will the drill bushings wear out over time?
A: The bushings are manufactured from hardened steel specifically selected for wear resistance. With normal use, they will maintain their precision for thousands of drilling operations. If they do eventually wear, they are replaceable components.
Safety & Maintenance Notes
- 🔴 Always secure the workpiece — the jig clamps to the door, but the door itself must be secure or held firmly.
- 🧤 Wear eye protection — wood chips and metal shavings can be ejected at speed.
- 🔧 Use sharp drill bits — a dull bit will cause the drill to bind, increasing the risk of bit breakage and marring the workpiece.
- 📐 Verify calibration after long runs — vibration can cause the sliding blocks to shift. A quick check every 10 holes prevents cumulative error.
- ✅ Clean the jig after each use — wipe down the aluminum body and blow out the bushings with compressed air. Store in the protective case to prevent damage.
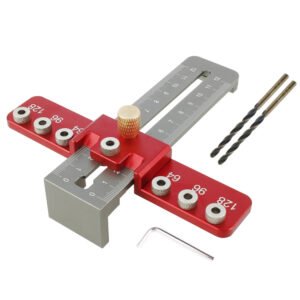
Premium Aluminum Cabinet Hardware Jig | Drawer Pull & Handle Drill Guide | FixPartHub
- 🔥 Zero-Mistake Installation: Eliminate the anxiety of ruining expensive custom cabinet doors. This precision drill guide allows you to perfectly align and mount drawer pulls, knobs, and handles in seconds without ever using a tape measure.
- 🏗️ Aerospace Aluminum Construction: Ditch the flimsy plastic templates that flex and strip out over time. This heavy-duty 300g jig is CNC-machined from solid aluminum alloy, providing lifetime rigidity and absolute dimensional stability.
- 📐 Micrometer-Level Adjustability: Features high-contrast, laser-etched metric and imperial scales. The sliding positioning blocks lock down tightly, allowing you to set exact hole center-to-center distances and edge offsets instantly.
- 🔄 True Reversible Design: Set your hardware dimensions once, drill your first door, and simply flip the jig over to drill the exact mirrored position on the opposite cabinet door without re-measuring or recalibrating.
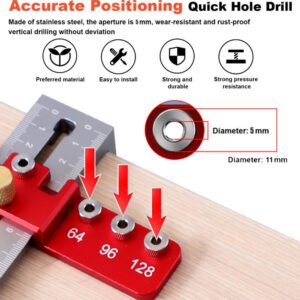
- 🛠️ Hardened Drill Bushings: The precision drill guide holes are reinforced with hardened steel bushings. This prevents your drill bit from chewing into the jig housing, ensuring a dead-straight, perfectly perpendicular hole every single time.
| Buy More, Save More | Quantity | Discount |
|---|---|---|
| Bulk Discount | 2 | 5% |
| Bulk Discount | 3 – 5 | 10% |
| Bulk Discount | 6 – 19 | 15% |