
Door hardware operates on strict physical tolerances. If your cross-bore (the main handle hole) and edge-bore (the latch hole) are misaligned by even a fraction of a degree, the internal actuator binds against the chassis sleeve. Freehanding these cuts with a spade bit and a tape measure is a structural gamble that usually ends in ruined millwork. To guarantee a frictionless dead-center plunge, you must mechanically lock your cutting path to the door slab. The industry standard protocol requires a heavy-duty Door Latch Lock Installation Kit.
Diagnostic Data: Mechanical Jigs vs. Freehand Failures
Let us evaluate the machining data and look at why freehand lock installation inevitably leads to cylinder binding and hardware failure.
| Machining Method | Lateral Deflection Risk | Perpendicular Accuracy | Veneer Blowout Probability |
|---|---|---|---|
| Freehand Spade Bit + Chisel | Critical. Drill bit tracks with the wood grain. | Poor. Reliant entirely on operator posture. | Extremely High. |
| Cheap Plastic Hole Saw Guide | Moderate. Plastic chassis flexes under drill torque. | Fair. | Medium. |
| Precision Lock Installation Kit | Zero. Steel guide bushings dictate the plunge. | Perfect dead-center 90-degree lock. | ✅ Eliminated. |
Teardown & Machining Workflow: Calibrating the Door Edge
Proper hardware deployment requires a sequenced machining workflow. Bypassing these steps will result in off-axis latch holes.
⚙️ Phase 1: Backset Calibration
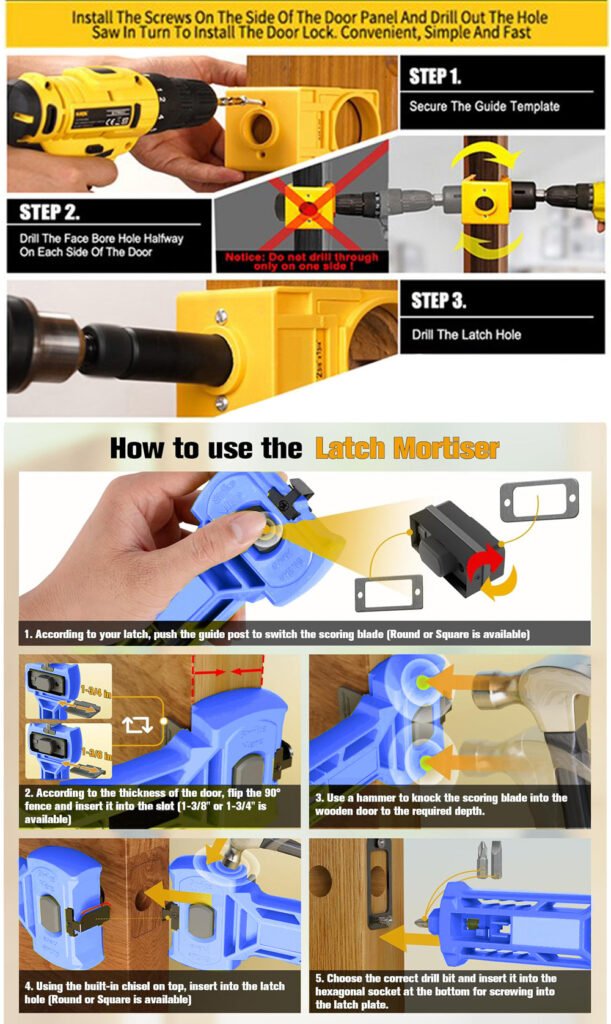
Standard OEM door hardware uses either a 2-3/8 inch or 2-3/4 inch backset. Before clamping the jig, adjust the mechanical slider on the chassis to match your specific latch length. Lock the alignment pins tight against the door edge to trap the slab entirely on the Z-axis.
⚙️ Phase 2: Cross-Bore Extraction
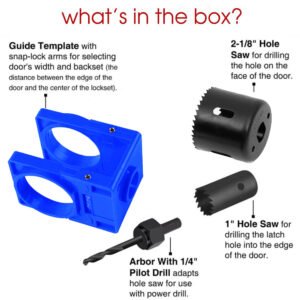
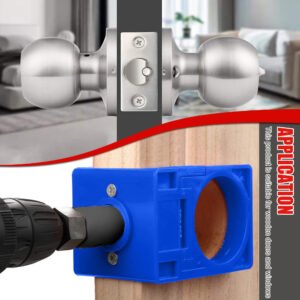
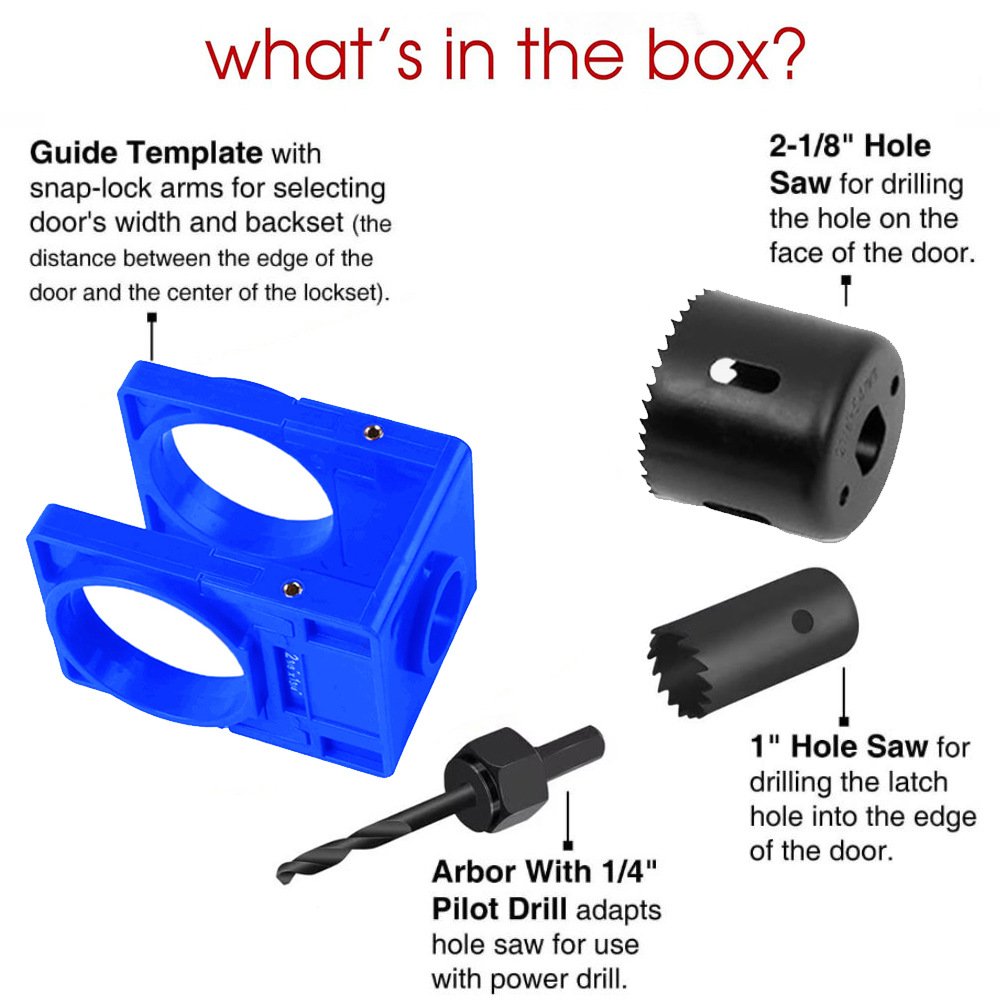
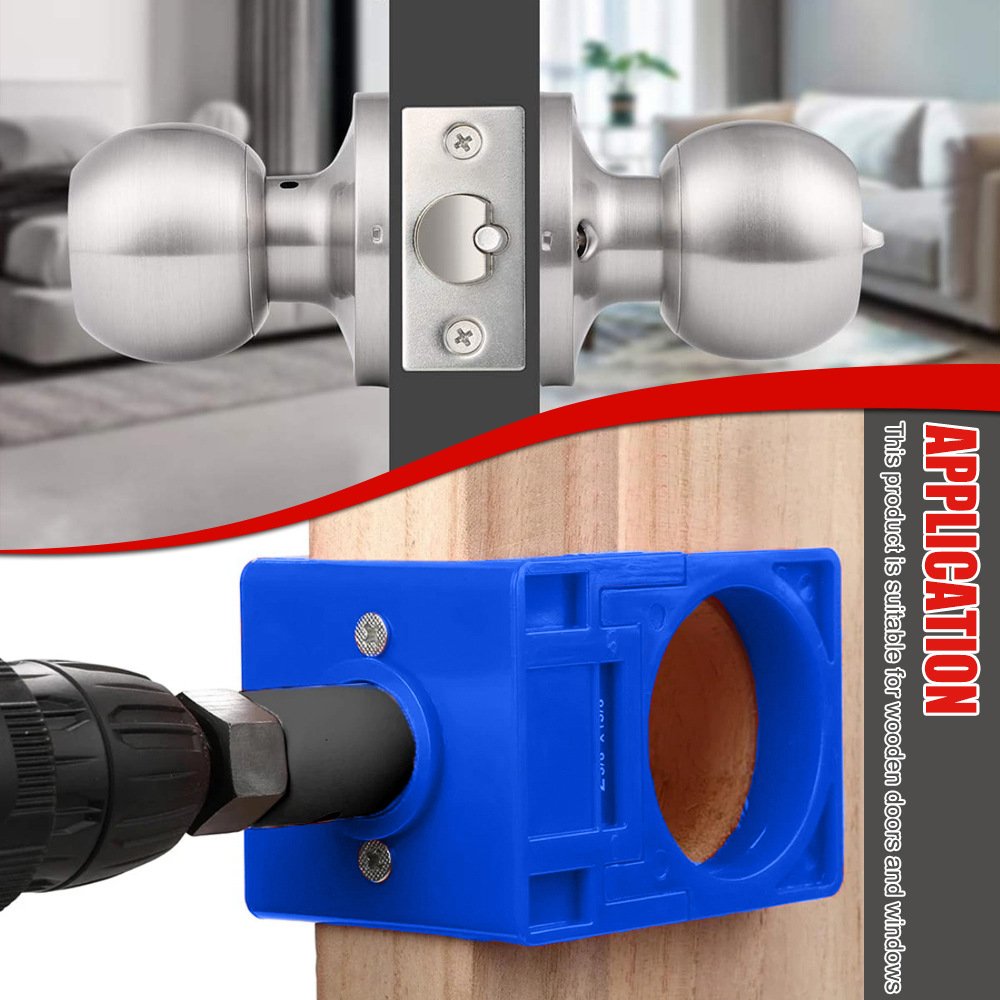
Chuck the heavy-duty 2-1/8 inch hole saw into your universal compatible drill. Insert the pilot bit into the hardened steel guide bushing on the jig. Apply steady, high-RPM forward pressure. Let the teeth of the saw dictate the feed rate; do not force the tool.
⚙️ Phase 3: Latch Edge Plunge
Switch to the 1-inch edge boring bit. Because the main cross-bore is already cleared, the edge bit will punch cleanly through to the central cavity without binding on internal wood chips. The jig guarantees the edge hole intersects the main bore at a perfect 90-degree angle.
Reassembly & Calibration: Final Hardware Torque
Once the milling is complete, hardware insertion requires strict attention to torque specs to avoid warping the internal chassis.
- Actuator Testing: Insert the latch mechanism and dry-fit the handle chassis. Actuate the lever. If you feel any grinding or metal-on-metal resistance, the edge bore has residual sawdust packing the cavity. Clear it out completely with compressed air.
- Faceplate Flushness: The latch faceplate must sit dead-flush with the door edge. If it protrudes, it will drag on the strike plate and bind the door in the frame. Mill the rectangular recess with a sharp mortise chisel or a compact router.
- Torque Warning: Stop stripping your mounting screws. When driving the faceplate screws into dense oak or maple, always drill a 1/16-inch pilot hole and coat the screw threads with paste wax. High-torque impact driving into raw hardwood will instantly shear the screw heads off.
Always measure twice. Check the packaging of your OEM hardware or measure the physical latch from the center of the actuator hub to the flat faceplate. Set your jig to match (either 2-3/8″ or 2-3/4″). If you bore the wrong backset, the door is essentially ruined and requires a massive dowel plug to fix.
Yes. Precision lock installation kits utilize bi-metal hole saws specifically engineered to cut through steel skins, fiberglass shells, and solid wood cores. Do not use cheap carbon-steel hole saws on a metal-clad door, as the teeth will instantly strip off.
If your bores are perfectly square but the lock still binds, the fault lies in the strike plate alignment on the jamb. Ensure the door hinges are not sagging under load and that the strike plate cavity is milled deep enough to allow full extension of the deadbolt locking pin.
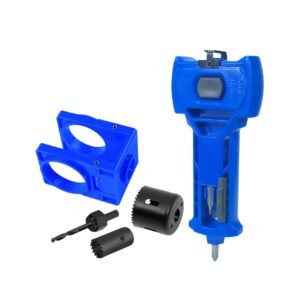
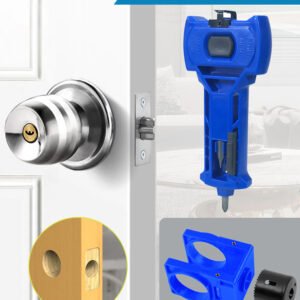
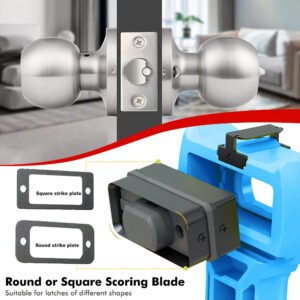
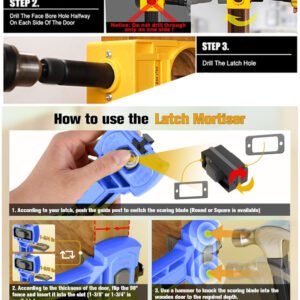
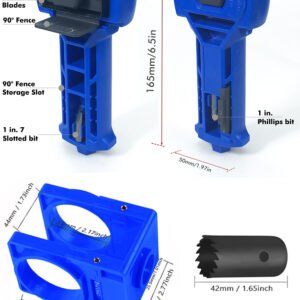
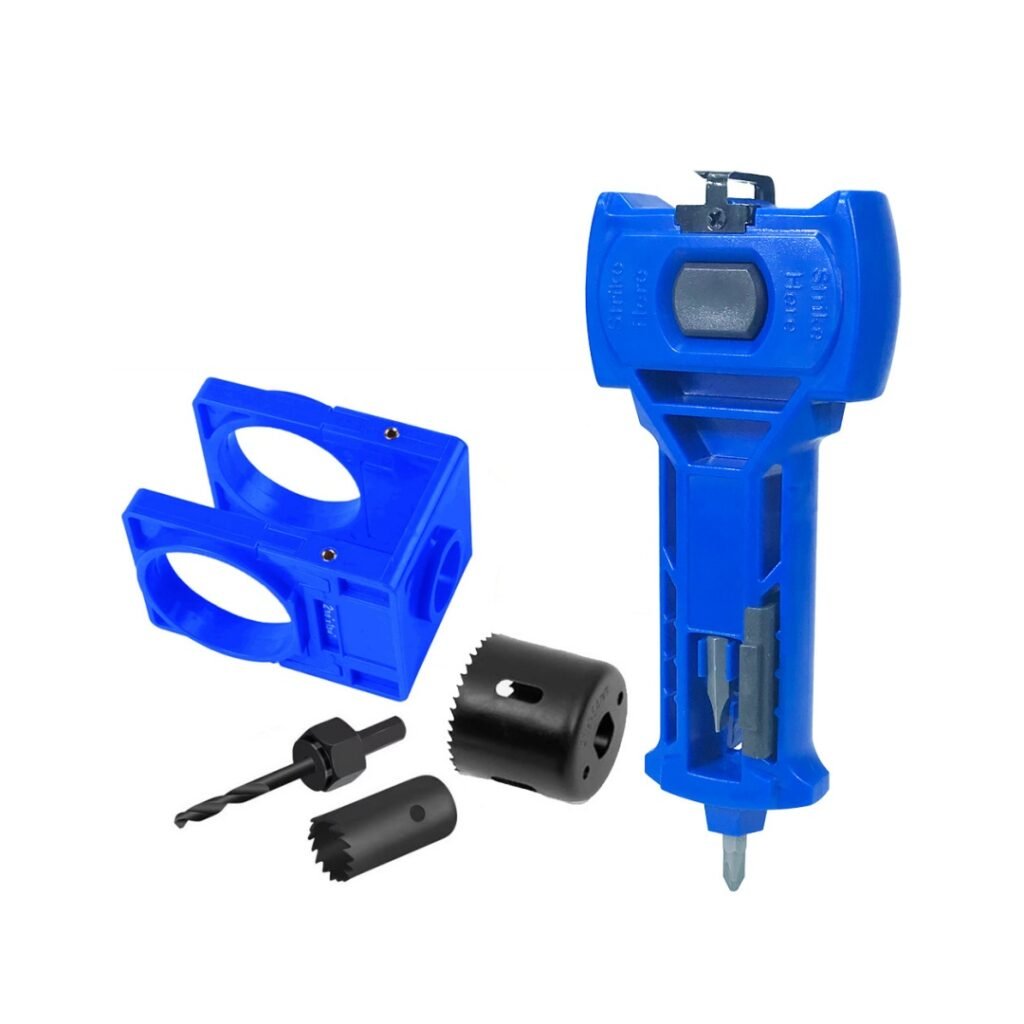
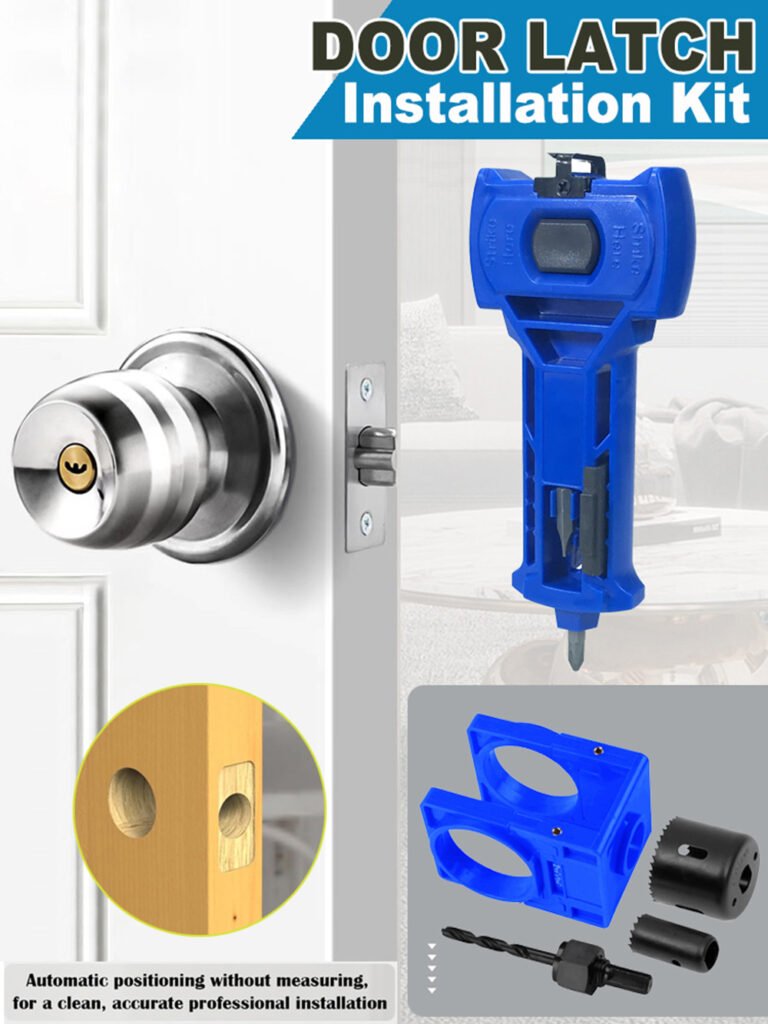
Premium Door Latch & Lock Installation Kit | Hole Saw & Mortise Chisel Guide Set | FixPartHub
- 🔒 Dead-Center Accuracy (No Slippage): Advanced self-centering template clamps directly onto the door profile. Eliminates shaking, walking, or misaligned holes common with hand-measured layouts.
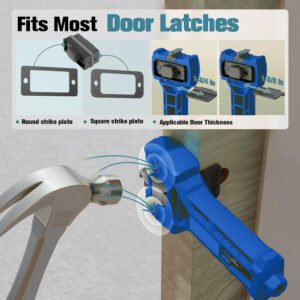
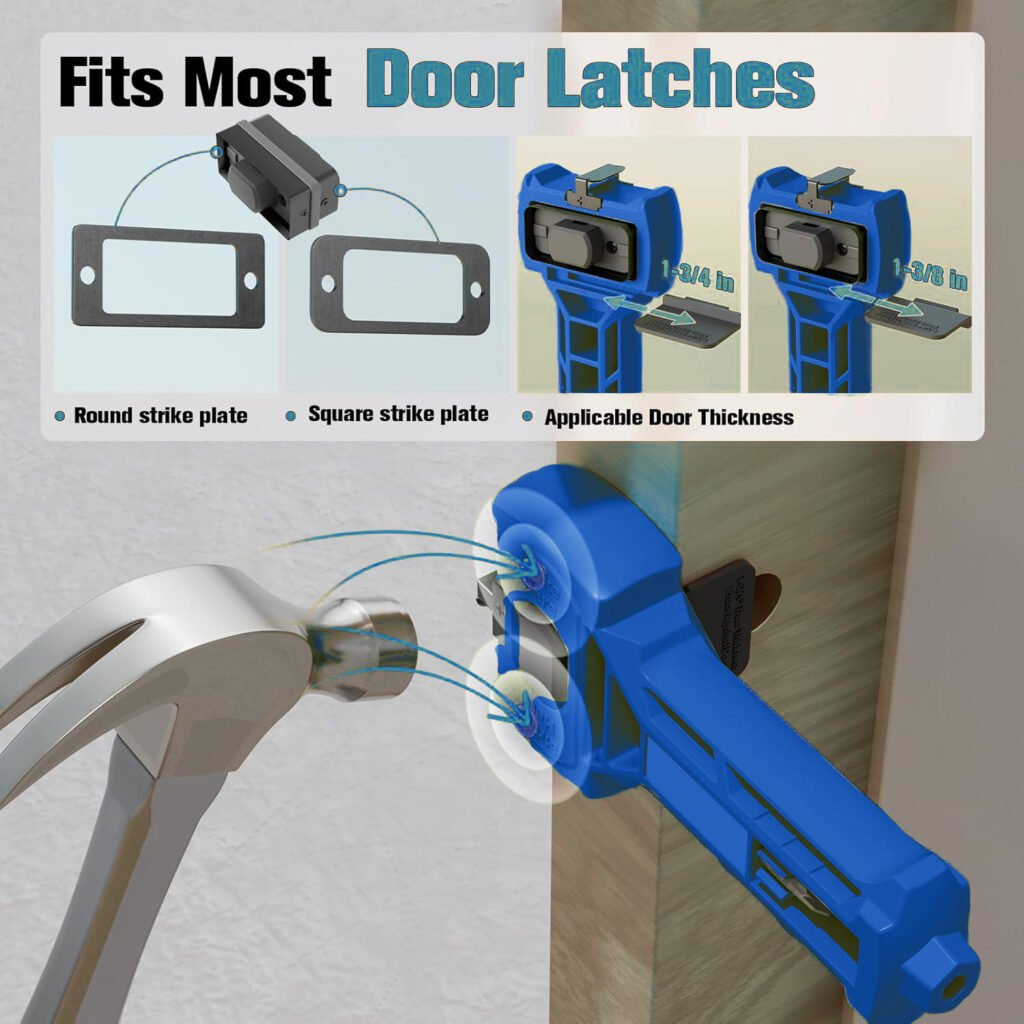
- 🚪 Auto-Adjusting Door Thickness: Seamlessly locks onto both standard interior 1-3/8″ (35mm) and heavy exterior 1-3/4″ (45mm) thick doors with a quick-shifting mechanical slide.
- 📐 Dual Backset Synchronization: Easily toggles between standard 2-3/8″ (60mm) and 2-3/4″ (70mm) backsets to accommodate 99% of residential deadbolts and spherical door knobs.
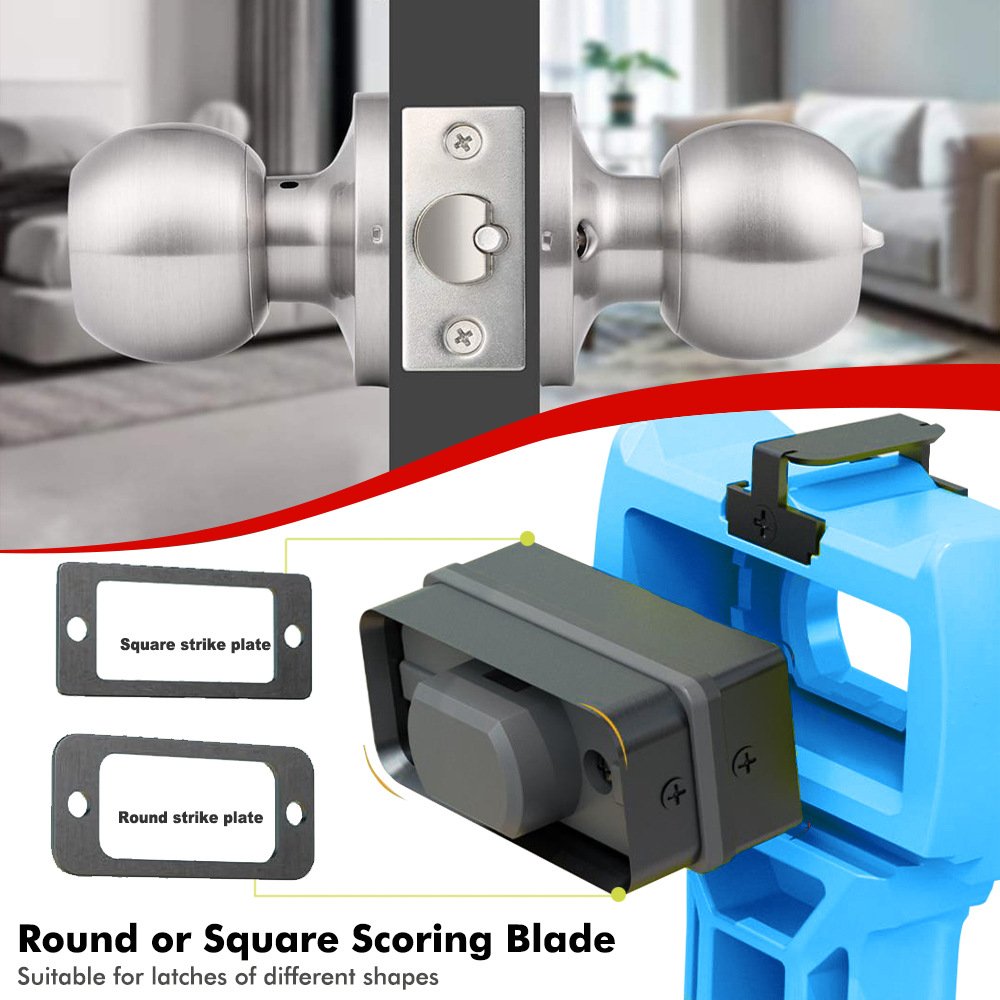
- ⚙️ Clean Mortising (Integrated Chisel Guide): Includes a custom scoring strike plate jig that allows you to easily remove wood material from the edge for a perfectly flush latch fit.
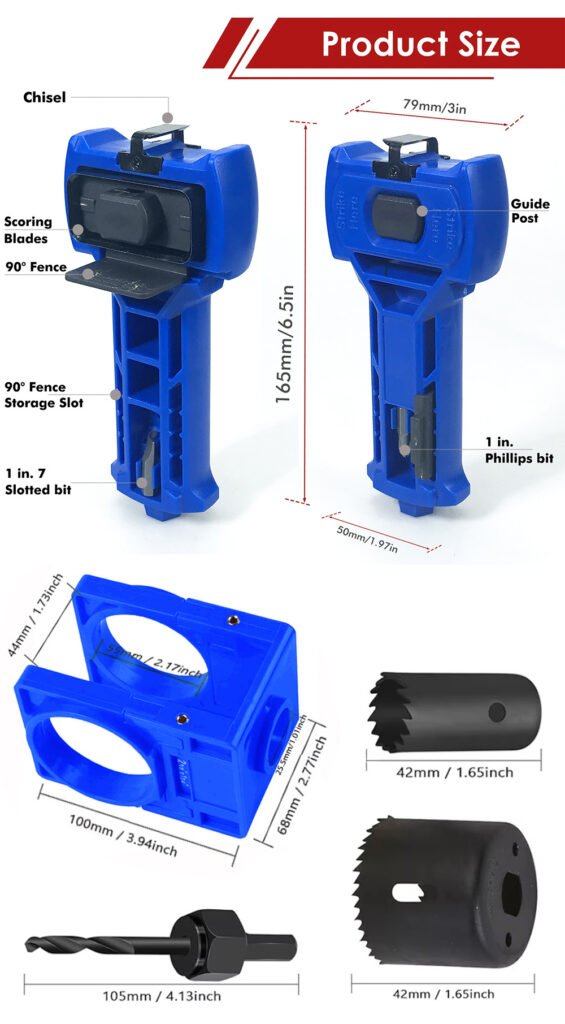
- 📦 Complete Heavy-Duty Kit: Comes loaded with high-speed steel hole saws, mandrel, guide jig, and the edge-marking mortise kit inside a rugged shop organizer case.
| Buy More, Save More | Quantity | Discount |
|---|---|---|
| Bulk Discount | 2 | 5% |
| Bulk Discount | 3 – 5 | 10% |
| Bulk Discount | 6 – 19 | 15% |