
Every power carver faces the same bottleneck: manual gouges are precise, but they’re brutally slow for bulk material removal. The solution isn’t a $1,200 carving machine or a five-year apprenticeship with a mallet and chisel — it’s mounting the right cutting geometry directly onto your existing angle grinder.
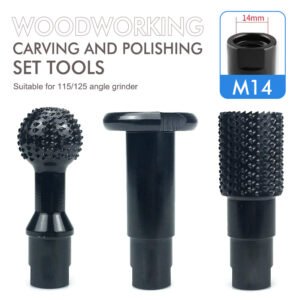
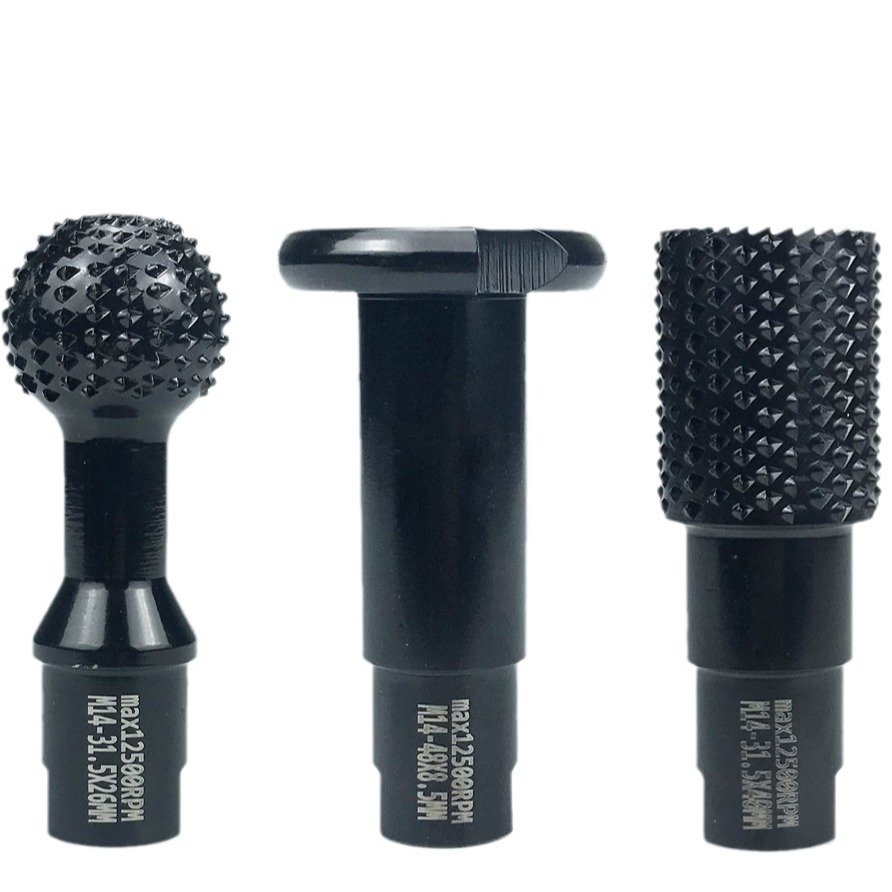
The 3‑Piece Wood Rotary Ball Gouge & Slotting Burr Kit transforms your standard angle grinder into an industrial‑grade power carving workstation. Using a high‑density matrix of quenched carbon steel cutting teeth, this trilogy of attachments allows you to scoop out deep recesses, carve complex slotting mortises, and plunge‑ream rough openings in hardwoods and softwoods in a fraction of the time it takes with hand tools.
This guide walks through the diagnostic setup, installation workflow, and operational best practices for these heavy‑duty rotary carving attachments — so you can start shaping wood at grinder speed without sacrificing control or safety.
Symptom Awareness — Why Your Current Carving Workflow Is Broken
If you’re still hollowing bowls, sculpting spoons, or shaping rustic furniture with traditional gouges and rifflers, you’re dealing with familiar frustrations:
- Physical exhaustion: Manual gouging requires brute force. After an hour of hollowing a single bowl, your forearms and shoulders are spent — and you’re only halfway done.
- Time sink: A single deep hollow that takes 10 minutes with a rotary burr can take 3 hours with a hand gouge. That’s not skill — that’s inefficiency.
- Inconsistent results: Hand‑carved surfaces are only as consistent as your arm strength. Uneven pressure creates scalloped surfaces that require excessive sanding to flatten.
- Tool resharpening downtime: Every 20-30 minutes of hand carving, you stop to hone your gouge. Rotary burrs stay sharp for hours of continuous cutting.
- Limited reach: Hand gouges can’t easily reach deep into concave forms or tight undercuts. Rotary burrs with extended shanks access areas manual tools can’t touch.
If any of these sound familiar, it’s time to switch from manual to rotary stock removal.
Diagnostic Fitment — Selecting the Right Thread Size for Your Grinder
Before you mount the kit, confirm the spindle thread specification on your angle grinder. The wrong thread size means the burr won’t seat — or worse, it will spin off during operation.
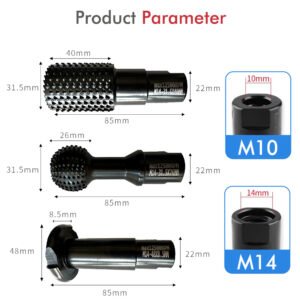
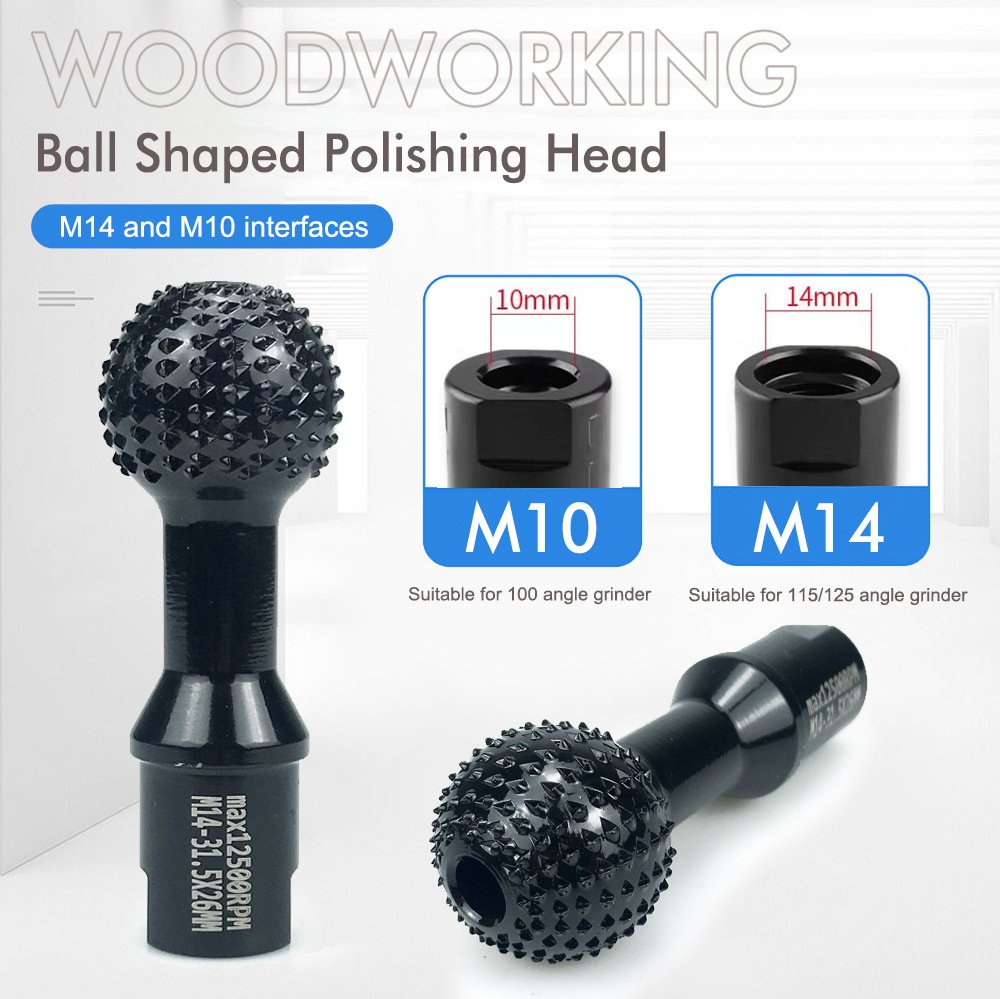
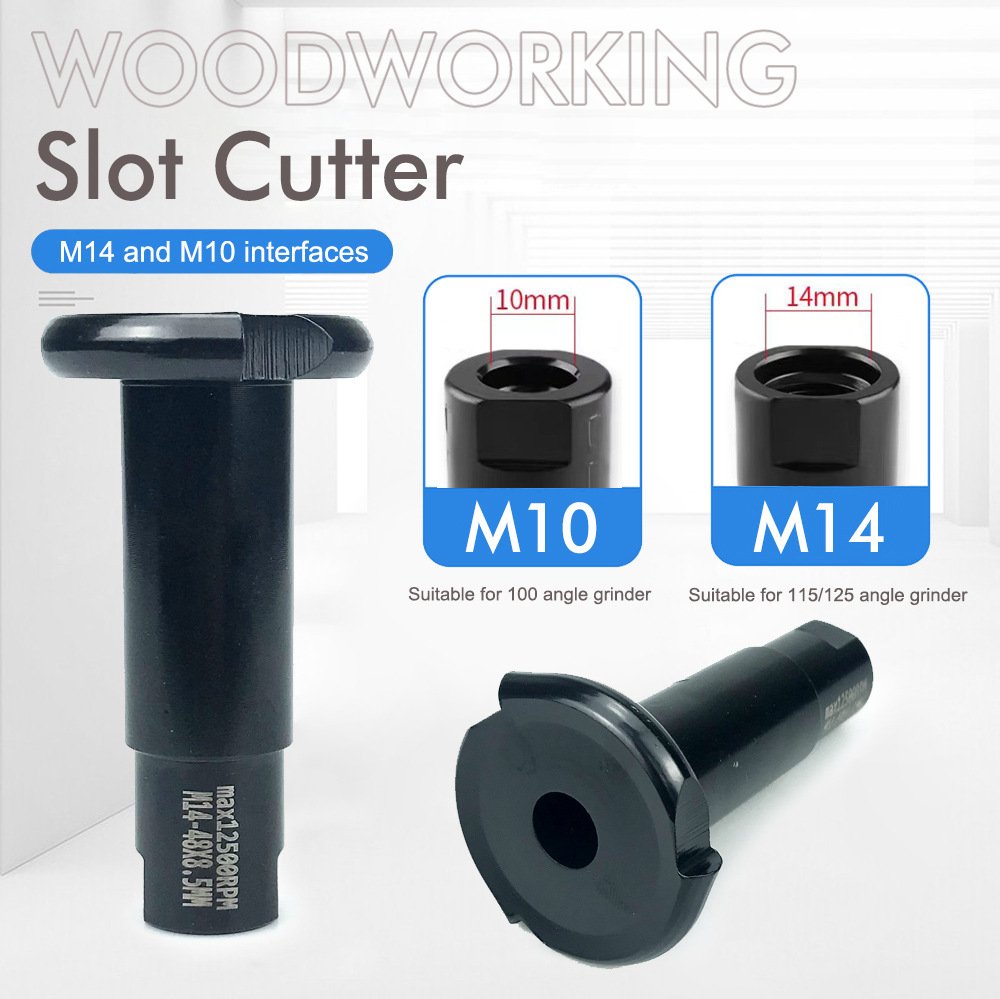
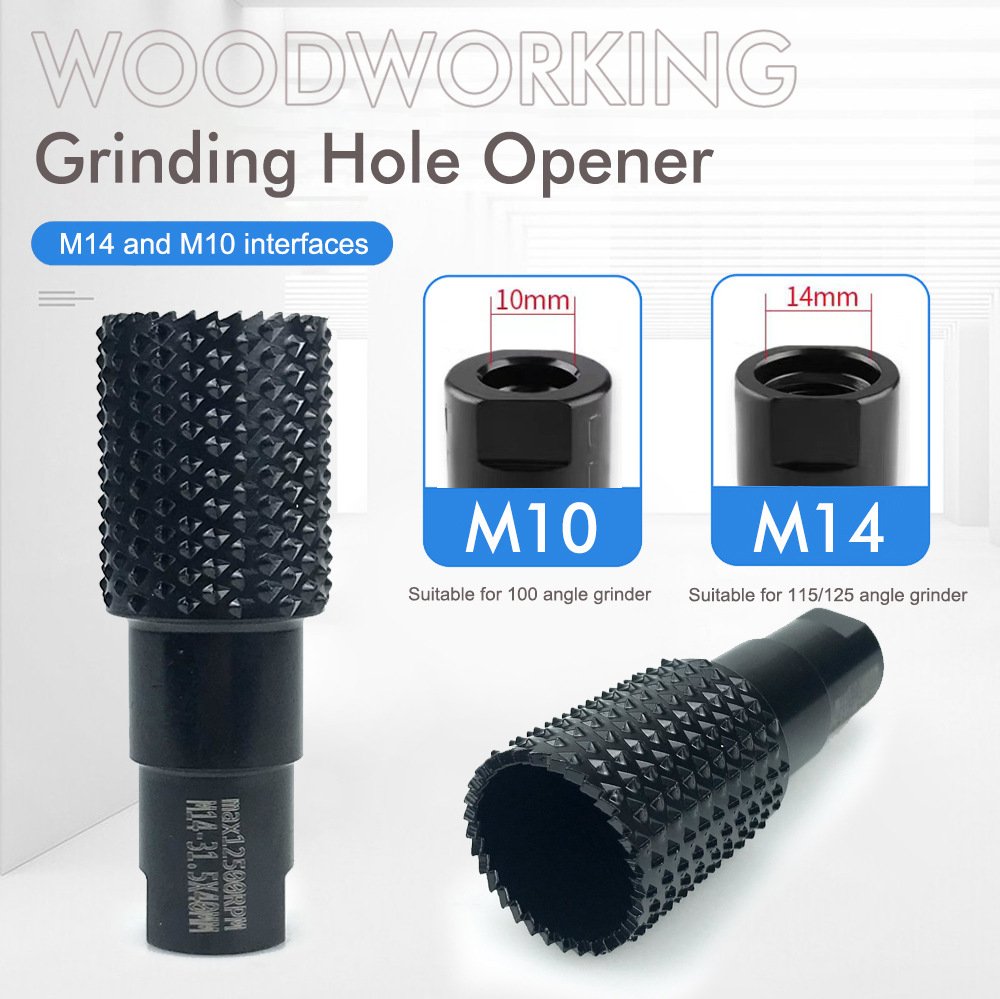
Typically used on standard 100mm (4‑inch) compact angle grinders popular in Asian and some European markets. If your grinder is a compact 4″ model, this is likely your size.
The standard specification for European, British, and Australian 115mm/125mm (4.5″ and 5″) professional angle grinders. This is the most common size for pro‑grade tools.
For North American standard 5/8″-11 spindles, an inexpensive thread adapter sleeve is required. Check your grinder’s thread pitch and diameter before ordering.
Specification Comparison — Rotary Burrs vs. Traditional Hand Gouges
Here’s how the FixPartHub rotary carving kit stacks up against traditional hand gouges and generic abrasive sanding drums:
| Parameter | Traditional Hand Gouges | Rotary Burr Kit ✅ |
|---|---|---|
| Stock Removal Speed | Slow — 2-3 hours per deep bowl | Fast — 10-15 minutes per deep bowl |
| Physical Effort | High — forearms and shoulders fatigued | Low — grinder does the work |
| Tool Life Between Sharpening | 20-30 minutes — constant honing | Hours — quenched carbon steel teeth |
| Kickback / Grab Risk | Low — hand tools are inherently slower | Controlled — anti‑grab ball geometry |
| Learning Curve | Steep — years of practice for proficiency | Moderate — intuitive with proper grip |
Teardown & Setup Workflow — From Box to First Carving
Follow this step‑by‑step sequence to mount the attachments, set up your grinder, and start shaping wood safely:
Remove the battery pack (cordless) or unplug from mains (corded). Allow the grinder to cool before handling the spindle.
Remove the grinding disc and retaining nut. Set aside the guard — for carving, the guard is removed to provide unobstructed access.
Thread the rotary burr onto the spindle until it seats firmly against the shoulder. Hand‑tighten, then secure with the provided wrench — 8–10 Nm (70–88 in‑lbs).
Reconnect power. Run the grinder at low speed for 5 seconds — listen for unusual vibration or noise. If smooth, proceed to carving.
Reassembly & Calibration — Operational Best Practices
Once the burr is mounted, follow this carving protocol to maximize both control and material removal efficiency:
- Two‑handed grip: Angle grinders at 11,000 RPM with large‑diameter burrs generate significant torque. Always use the auxiliary handle — both hands on the tool at all times. No exceptions.
- Light pressure — let the teeth cut: The carbon steel teeth are designed to shave wood fibers. Forcing the burr into the wood generates heat, burns the surface, and dulls the teeth faster. Use moderate, consistent pressure — the grinder’s weight is often sufficient.
- Direction of rotation: The burr rotates in the same direction as the grinder’s spindle. Feed the burr into the wood so the rotation pulls the tool forward — this prevents the attachment from “climbing” out of the cut.
- Start with the cylindrical burr for rough stock removal and establishing depth. Switch to the ball gouge for hollowing and contouring. Finish with the tapered reamer for details, undercuts, and deburring.
- Clean resin buildup — when working with resinous woods like pine, sap can bake into the micro‑grooves. Soak the cold attachments in a commercial pitch cleaner or solvent for 10 minutes, then brush out with a brass wire brush.
- Preventative maintenance: After every 30 minutes of continuous carving, stop and inspect the teeth for resin buildup or dulling. Clean or rotate attachments as needed. Check the grinder’s bearings for heat — if the housing is too hot to touch, allow it to cool.
Yoast FAQ
❓ Q: What thread sizes are available for this rotary carving kit?
A: The kit is available in two internal thread variants: M10 and M14. M10 threads are typically utilized on 4‑inch (100mm) compact angle grinders, while M14 threads are the standard sizing for European and international 4.5‑inch and 5‑inch (115mm/125mm) professional angle grinders. For North American 5/8″-11 spindles, an inexpensive thread adapter sleeve is required.
❓ Q: Can I use these rotary burrs on wood containing hidden structural nails?
A: No. These tools are engineered strictly for non‑metallic organic materials. Hitting a hardened steel nail or screw at 11,000 RPM will immediately dull or break the carbon steel cutting teeth and can create a violent, hazardous kickback. Always scan recycled lumber with a metal detector first.
❓ Q: Does the ball gouge dig in unpredictably during freehand sculpting?
A: No. The spherical head utilizes an advanced anti‑grab design layout. The teeth are calibrated to shave off shallow, uniform layers per rotation. This prevents the attachment from plunging aggressively or locking into the wood grain, ensuring smooth and fluid user navigation.
❓ Q: Can these tools be used to carve plastics, acrylics, or ice?
A: Yes. While optimized for hardwoods (oak, walnut, maple) and softwoods, the aggressive tooth pattern works exceptionally well for ice sculpting, shaping dense plastics, fiberglass, and polyurethane foams. Do not use on any metal or masonry surfaces.
Safety Notes
- 🔴 Always disconnect power before mounting or adjusting any rotary carving attachment.
- 🛡️ Wear full PPE — wrap‑around eye protection, dust filtration mask, and heavy shop gloves. Wood chips and dust are generated at high velocity.
- ⚙️ Never exceed 11,000 RPM — the carbon steel teeth are rated for this maximum speed. Exceeding the rating can cause tooth failure and projectile hazards.
- 🔧 Inspect teeth before each use — check for dulling, chipping, or resin buildup. A compromised tooth can cause the burr to bind or break.
- 📐 Secure the workpiece — clamps or a bench vise are essential. Free‑handing the workpiece while operating a high‑speed grinder is a serious safety risk.
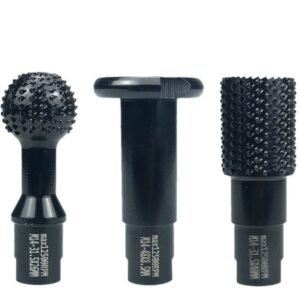

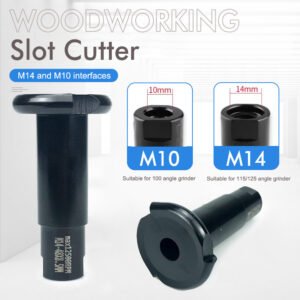
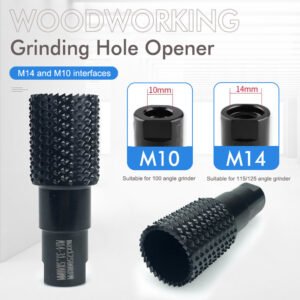
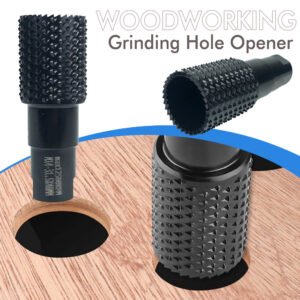


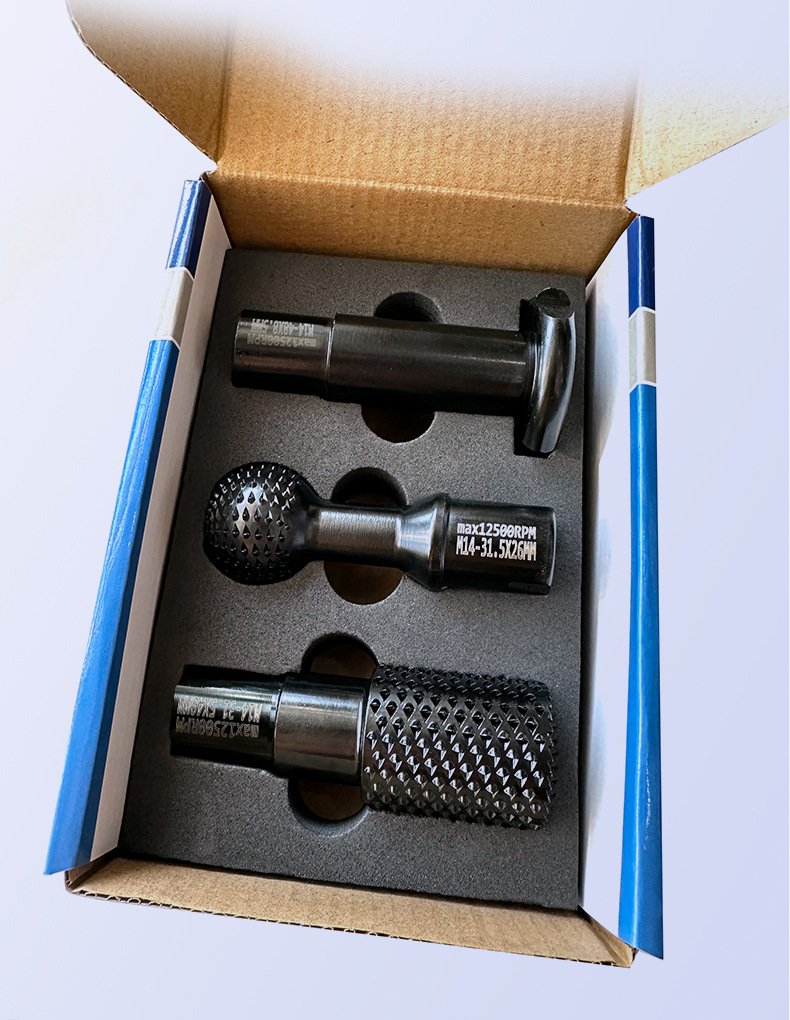
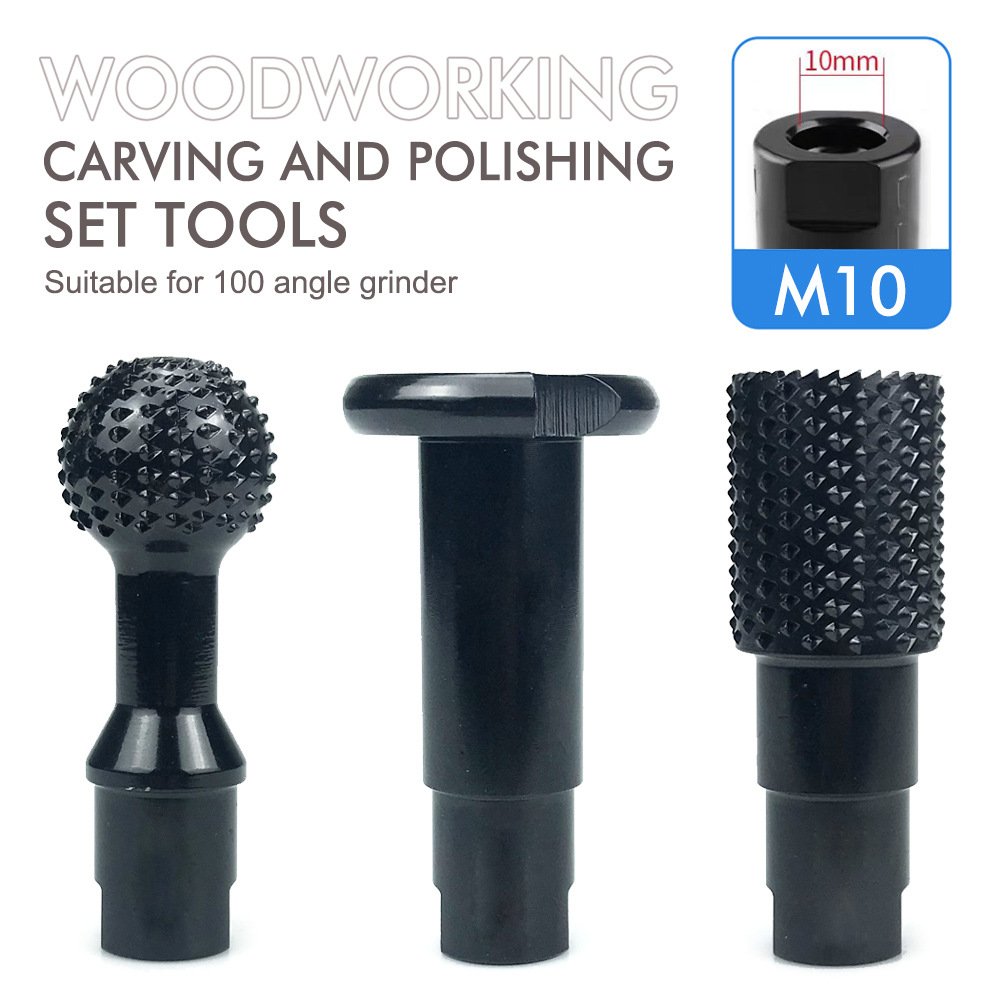
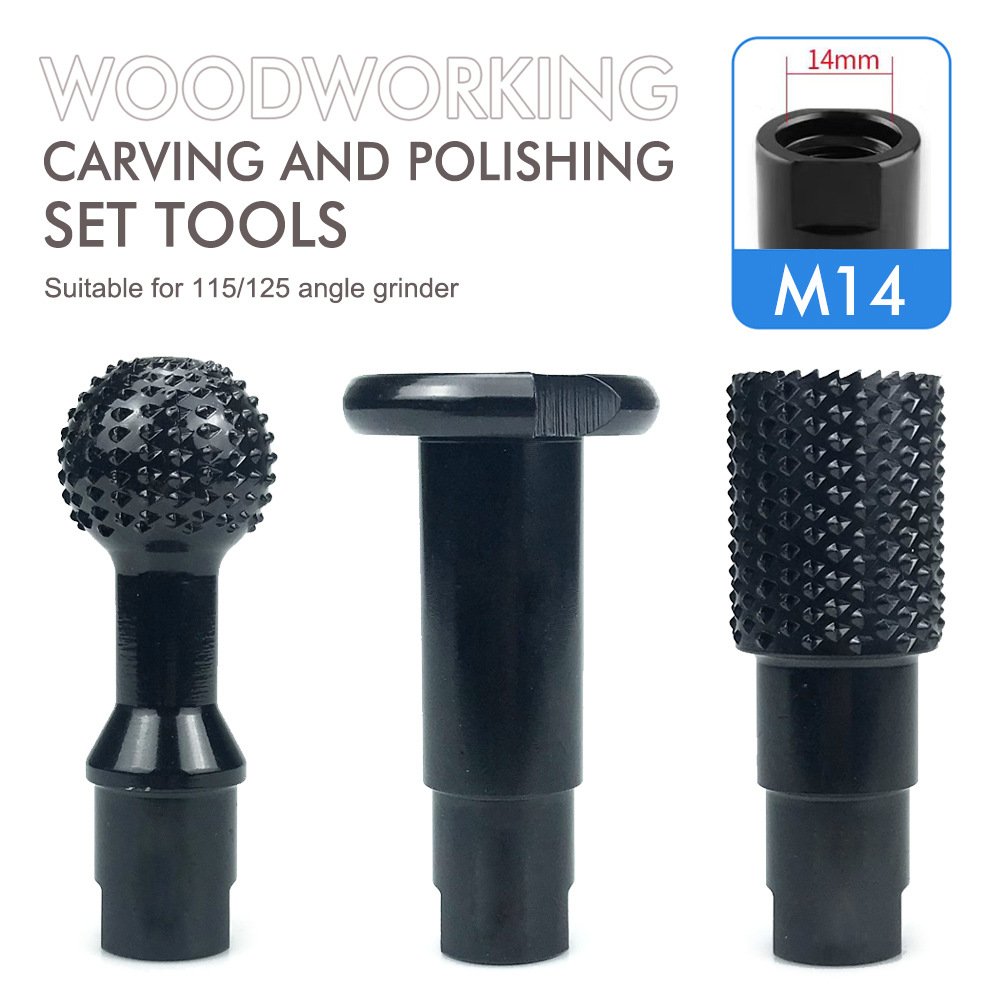
Premium 3-Piece Wood Rotary Ball Gouge & Slotting Burr Kit | Heavy-Duty Power Carving Attachments | FixPartHub
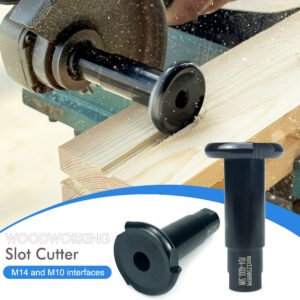
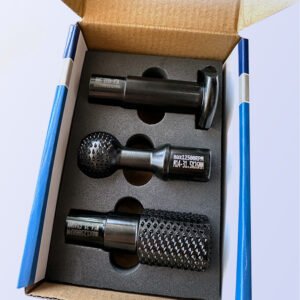
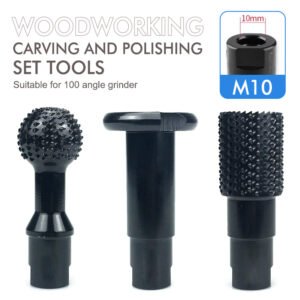
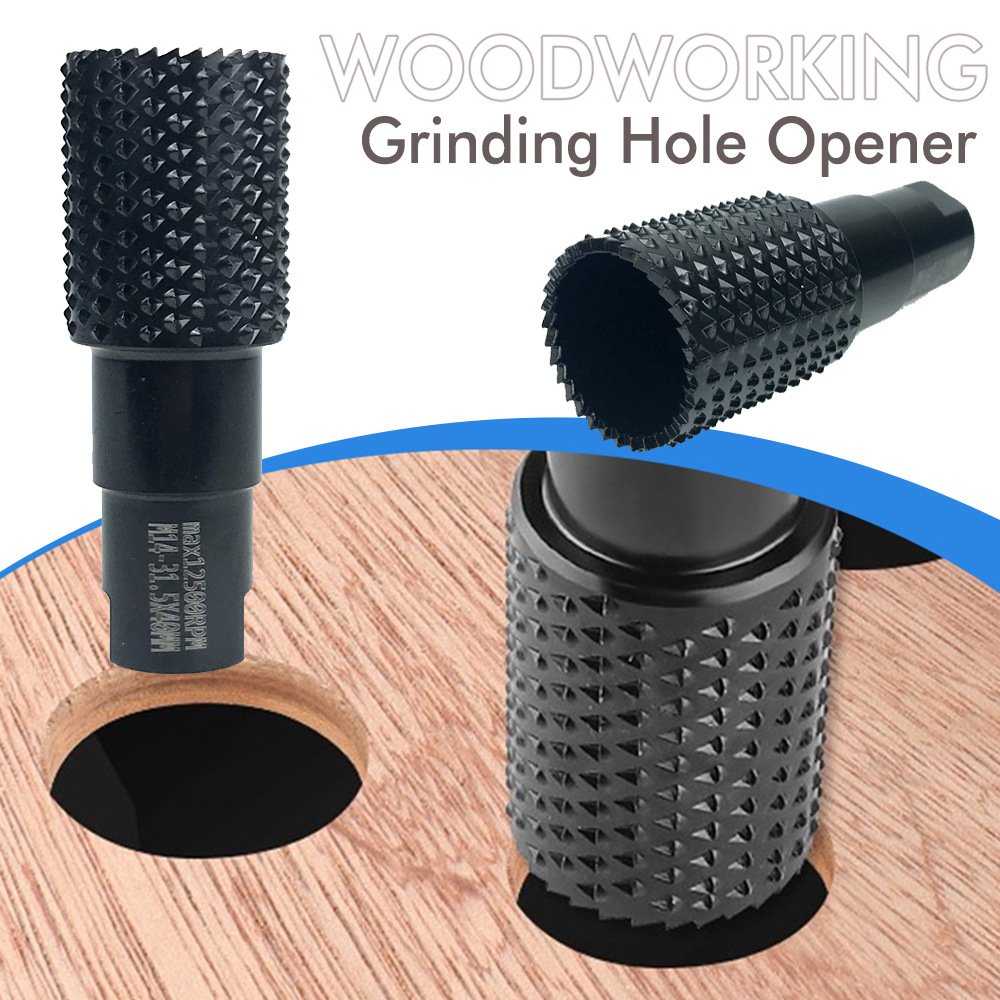
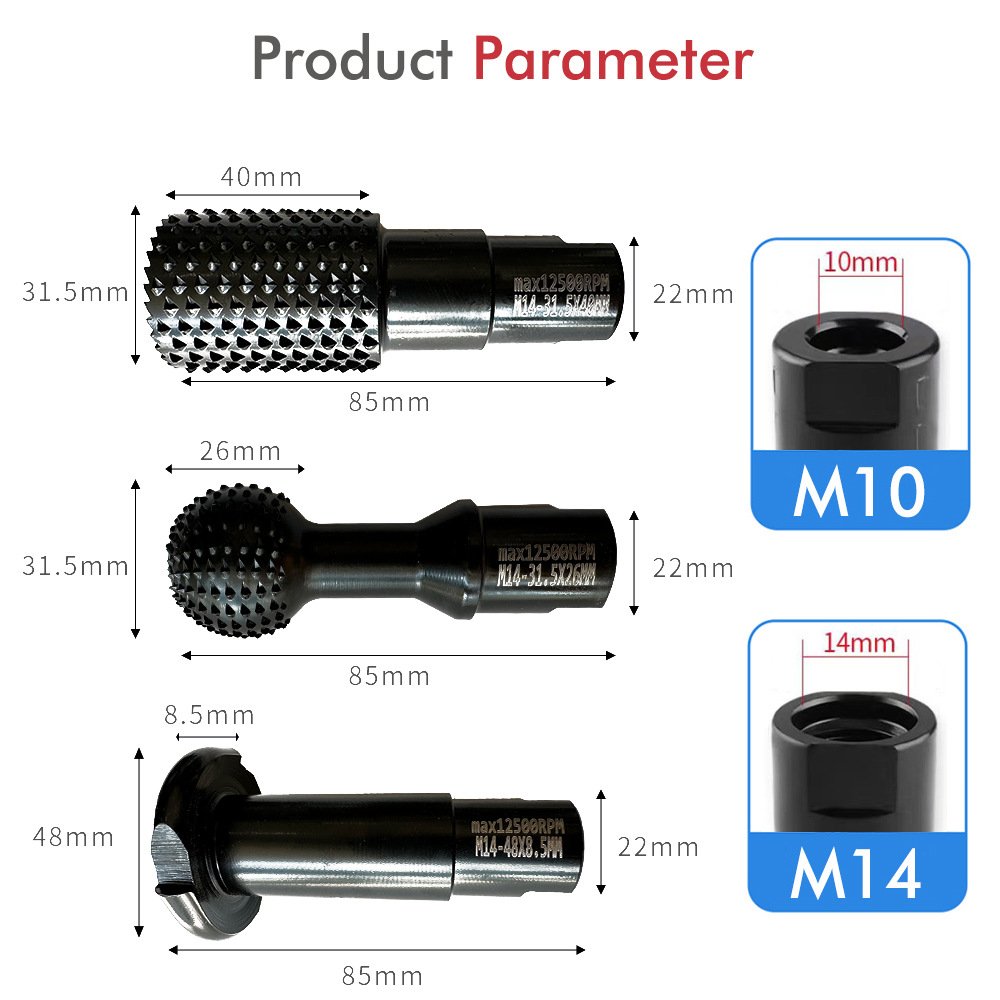
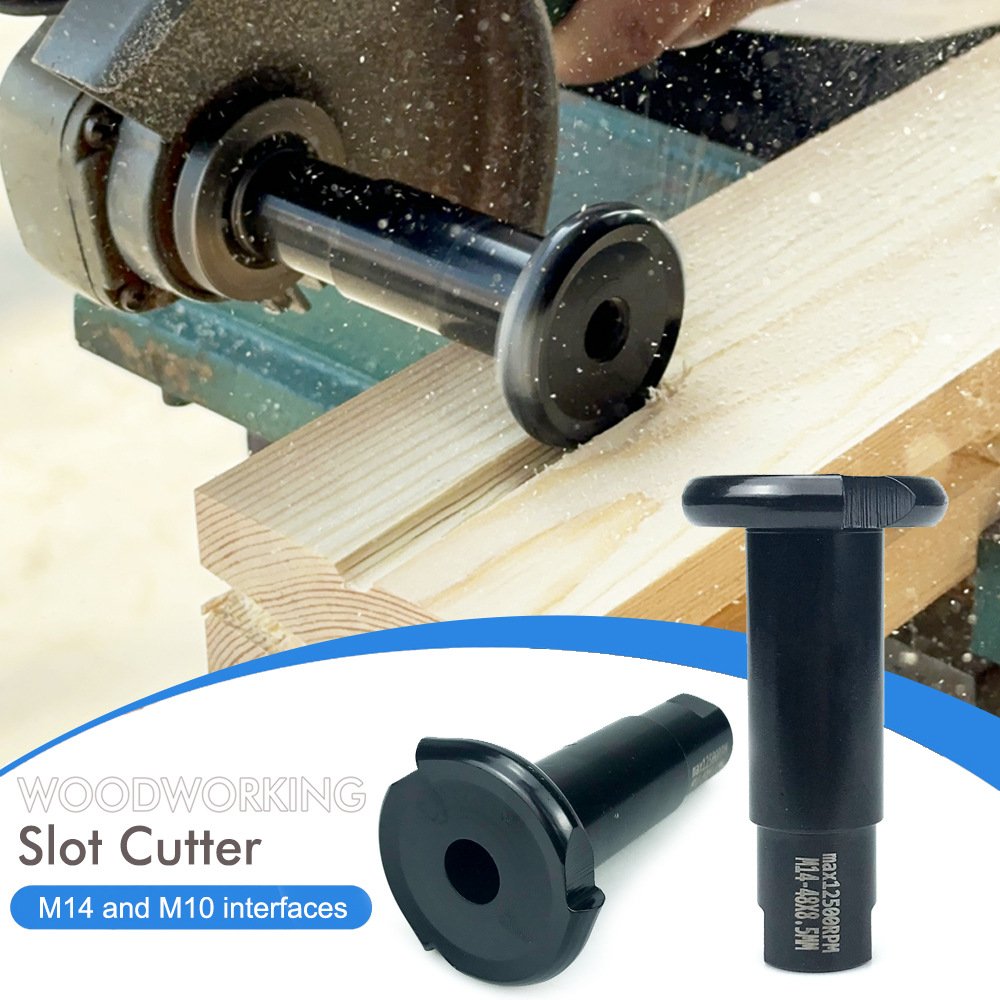
- 🔥 3-in-1 Power Carving Powerhouse: Stop spending hours manually chiseling hard lumber. This premium workshop kit features a rotary ball gouge for hollowing, a cylindrical slotting mill for channeling, and a tapered reamer for rapid hole enlarging.
- 💎 Carbon Steel Fine-Tooth Matrix: CNC-machined from industrial-grade carbon steel and hardened via quenching. Hundreds of aggressive micro-teeth scrape away wood fibers instantly while outlasting traditional sanding drums.
- 📐 Anti-Grab Ball Architecture: The unique spherical head of the ball gouge prevents the tool from digging too deeply or aggressively catching the grain, providing smooth, fluid, hand-guided control during freehand sculpting.
- ⚙️ Seamless Angle Grinder Integration: Available in precise M10 and M14 internal thread specifications, dropping directly onto your existing angle grinder spindle flange without the need for loose, wobbly adapters.
- 🪵 Master Sculptor’s Companion: The ultimate professional tool set for hollowing out wooden spoons, sculpting custom log bowls, shaping acoustic guitar braces, contouring rustic furniture, and heavy-duty root carving.
| Buy More, Save More | Quantity | Discount |
|---|---|---|
| Bulk Discount | 2 | 5% |
| Bulk Discount | 3 – 5 | 10% |
| Bulk Discount | 6 – 19 | 15% |