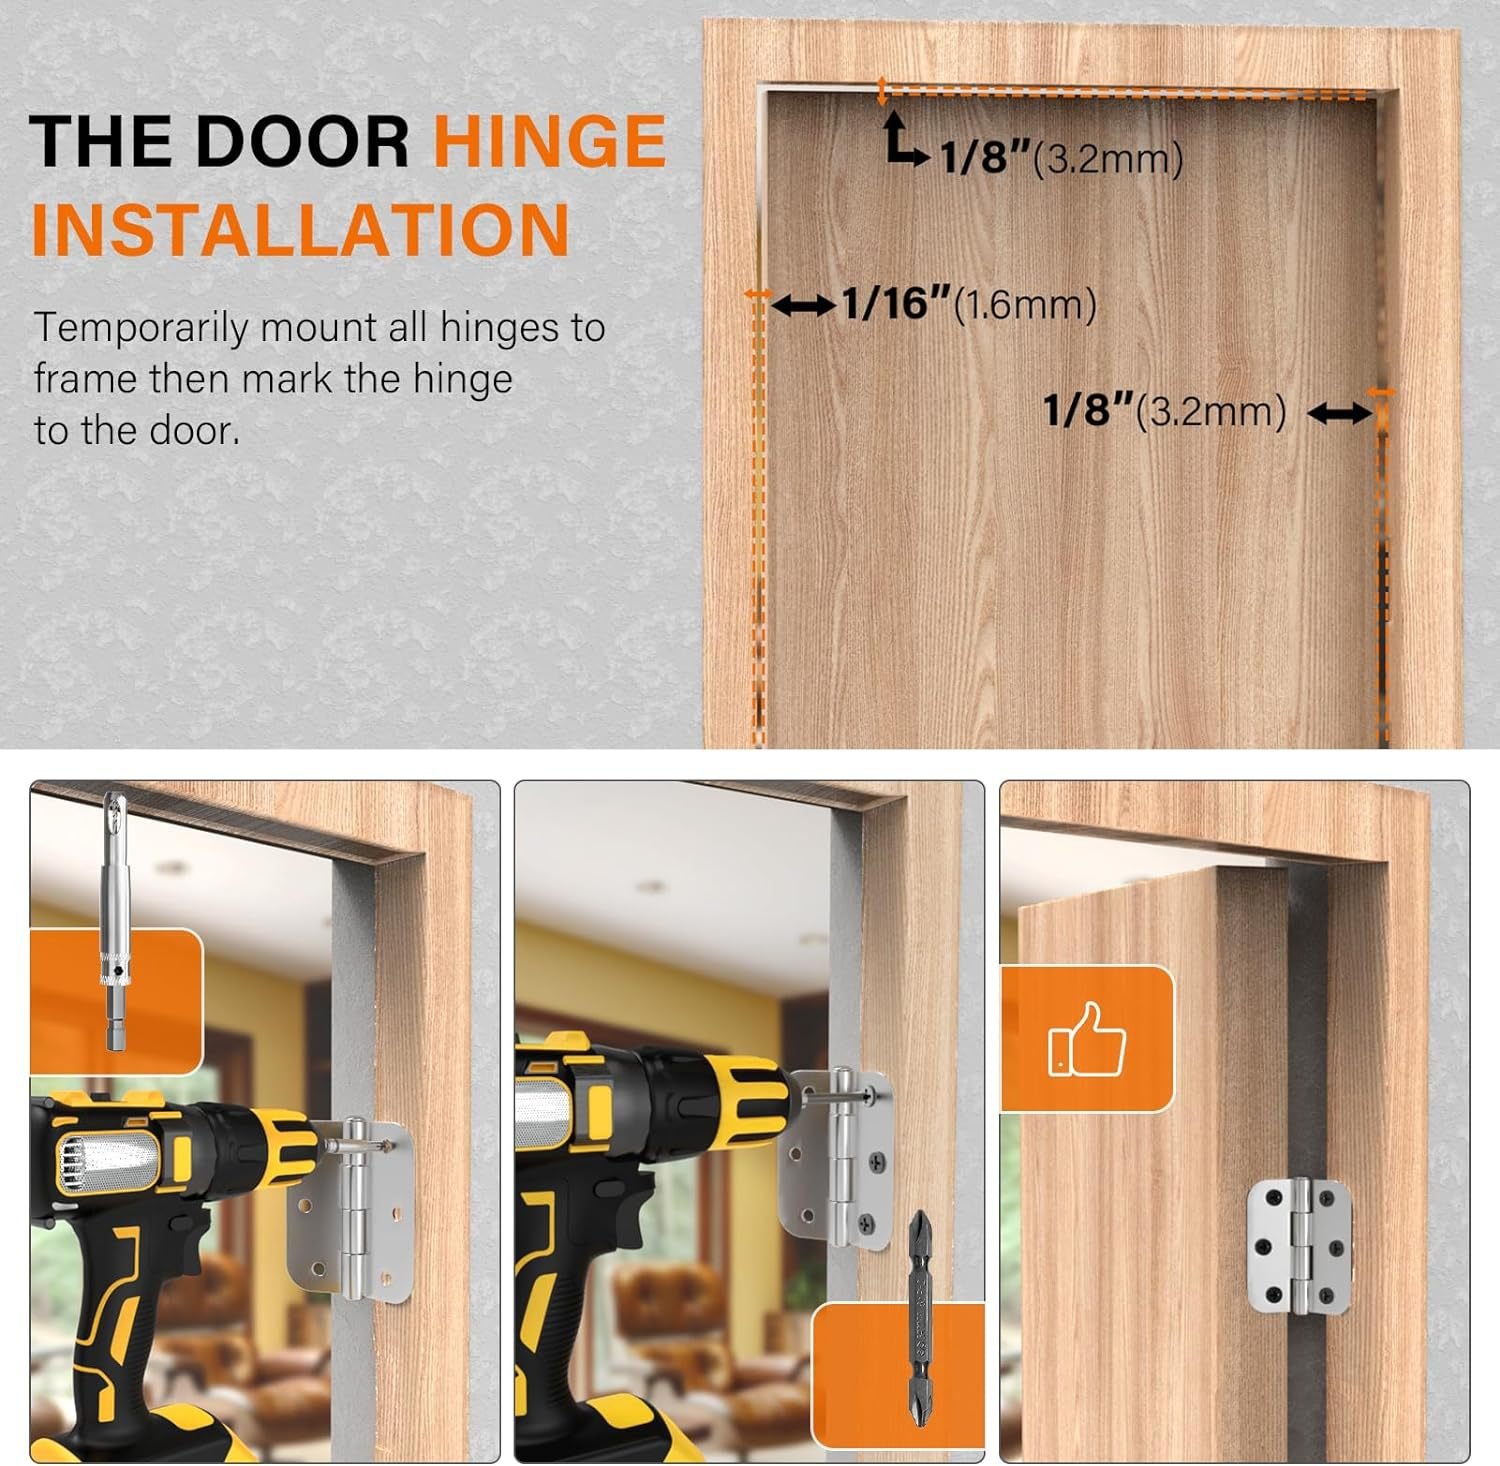
Hanging a new door is a test of precision. If your hinge mortise is even a millimeter too deep, too shallow, or misaligned, the door will bind against the frame, swing open on its own, or refuse to latch completely.
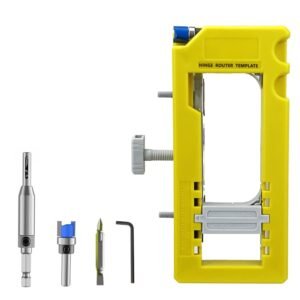
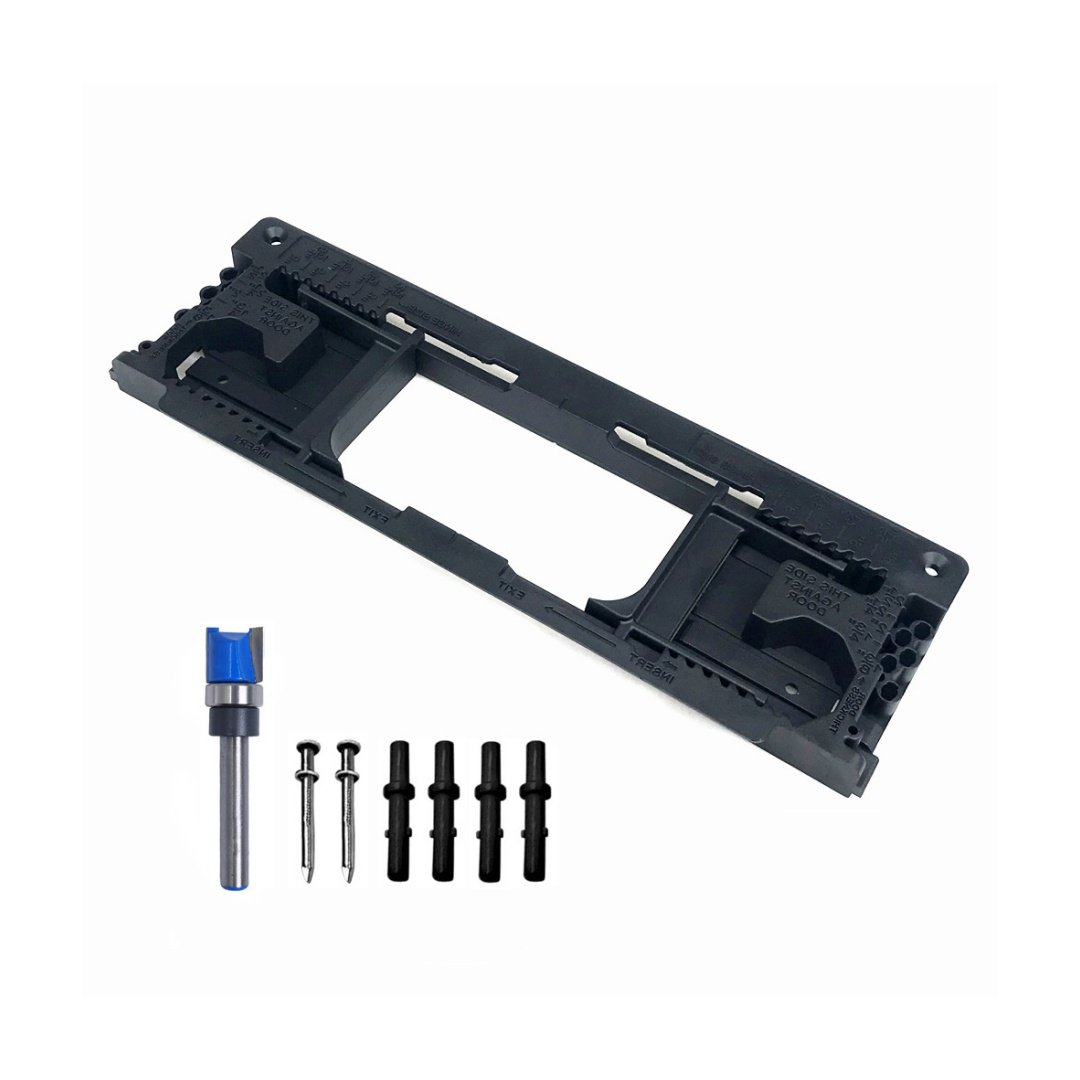
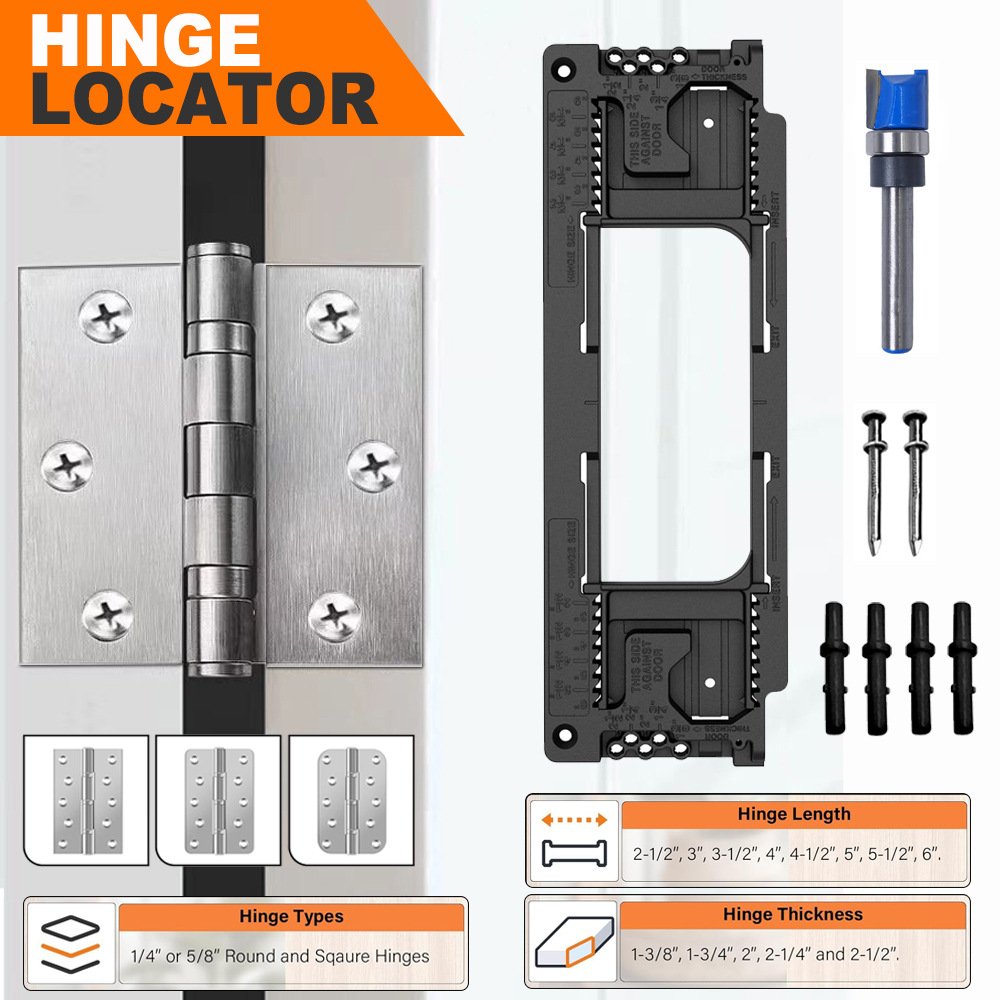
Chiseling out hinge pockets by hand is slow, risky, and often leads to splintered wood. The Premium Door Hinge Router Template Kit | FixPartHub Edition transforms a frustrating hour-long chore into a flawless 5-minute task. By clamping this rigid guide directly to your door or jamb, your compact router is restricted to carving out the exact dimensions of your hardware, ensuring a seamless, flush fit on the very first try.
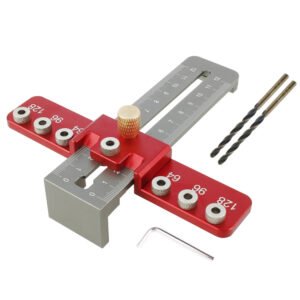
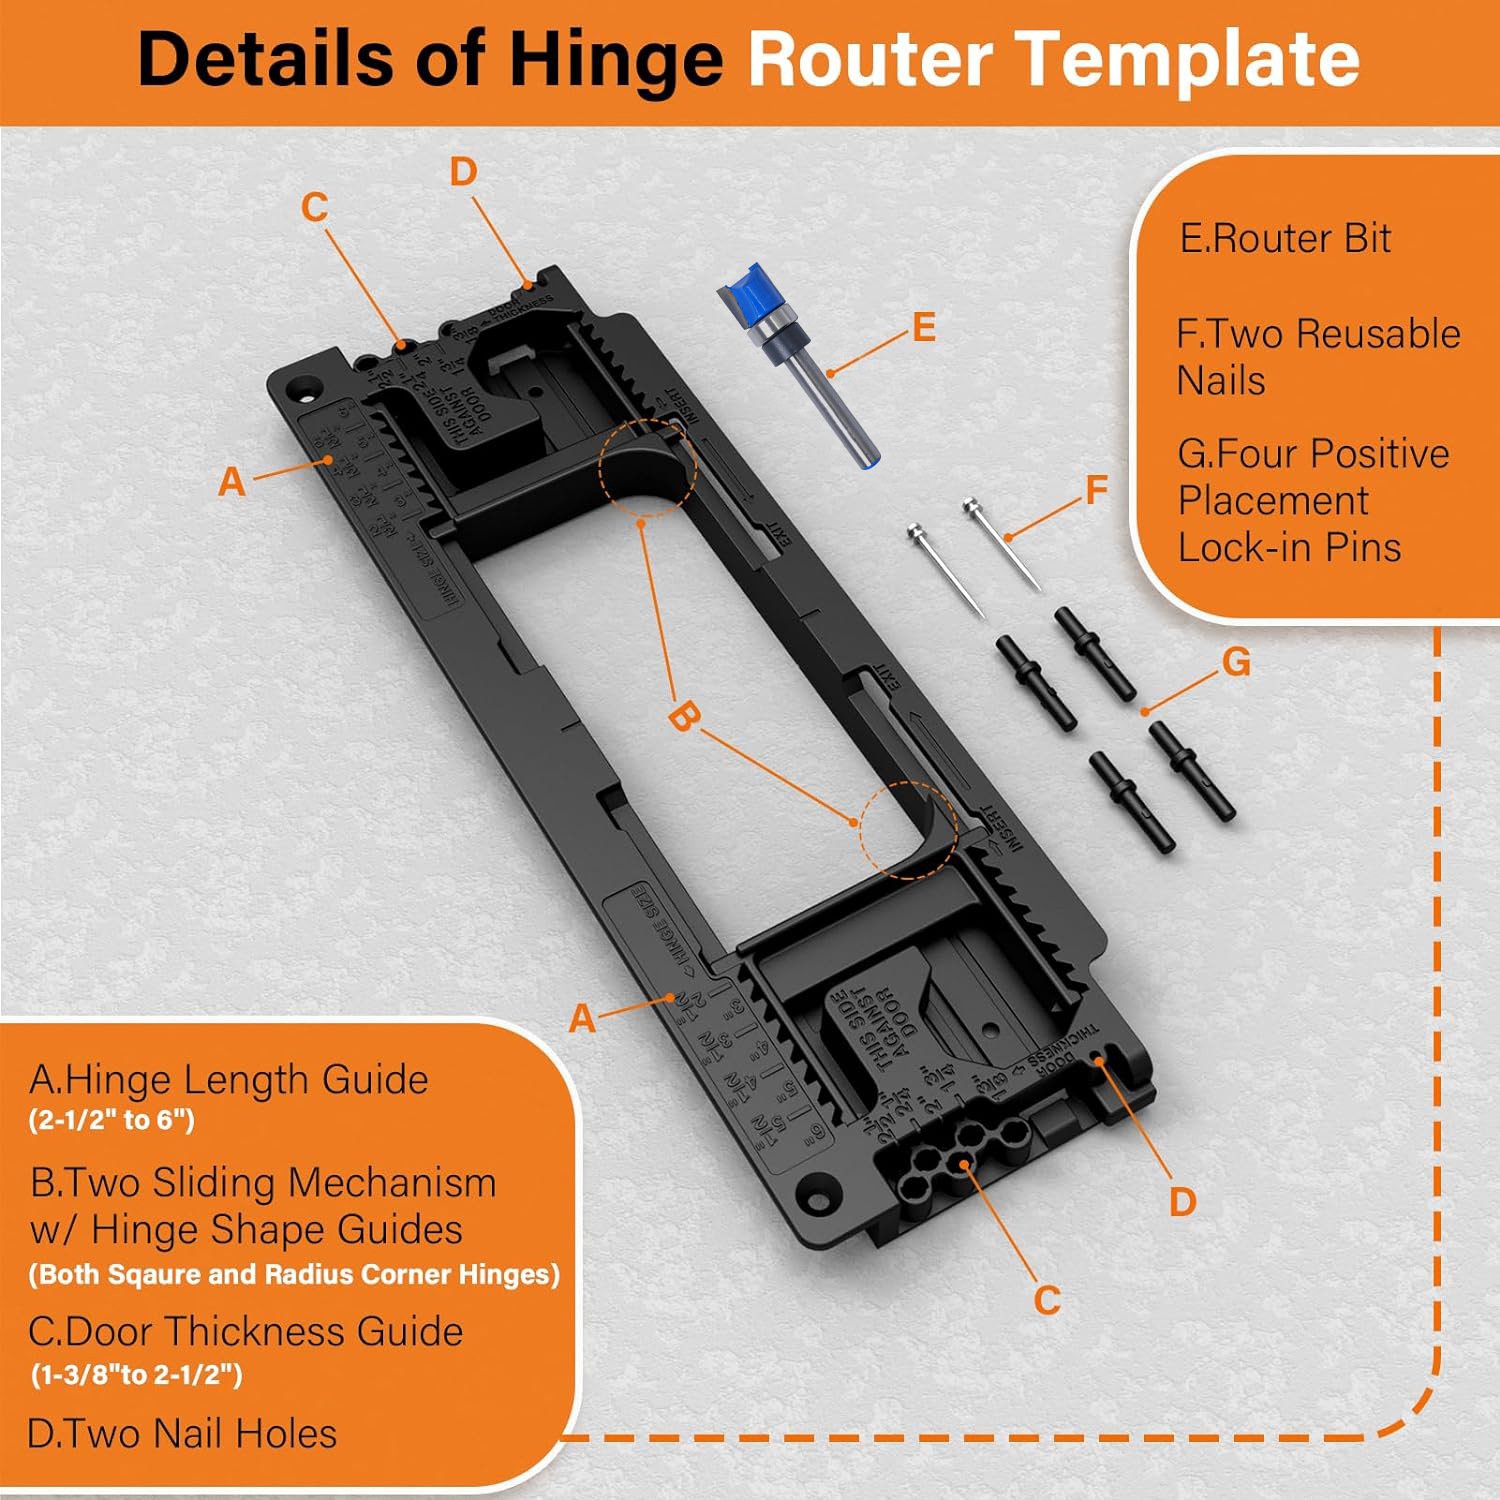
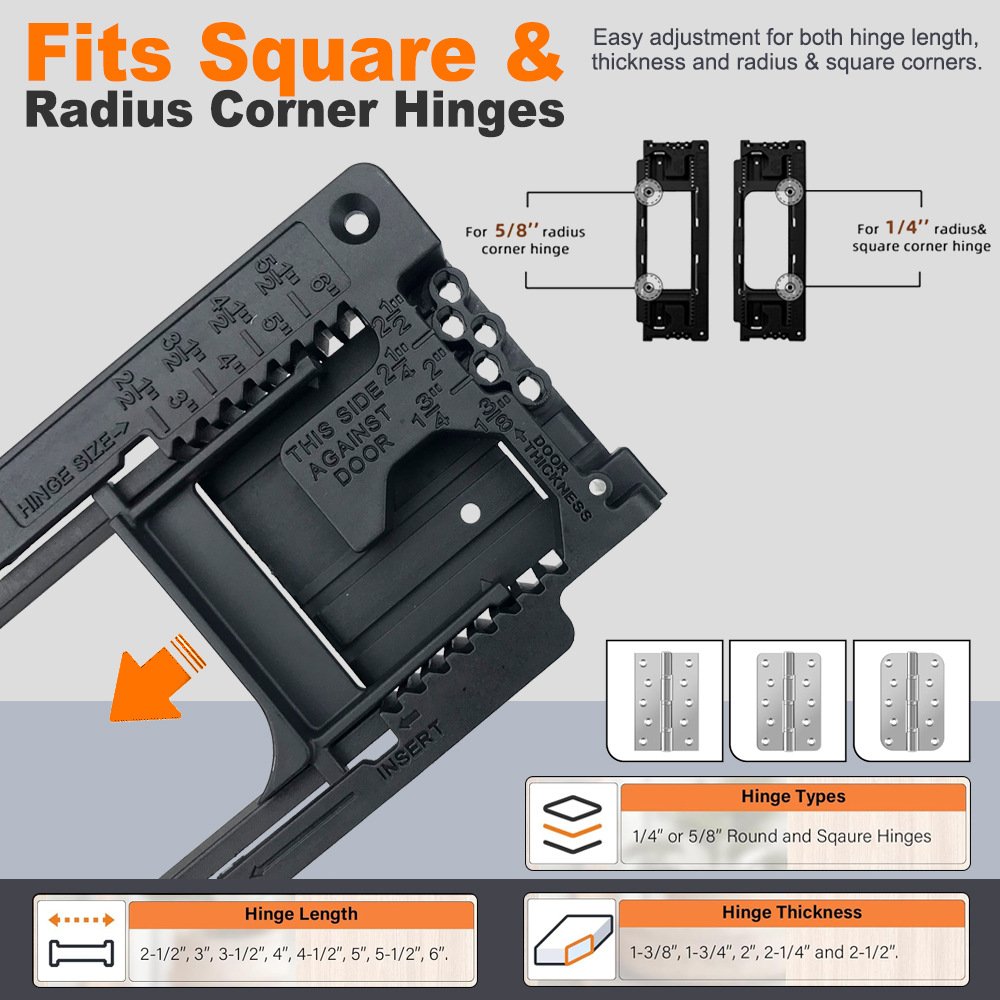
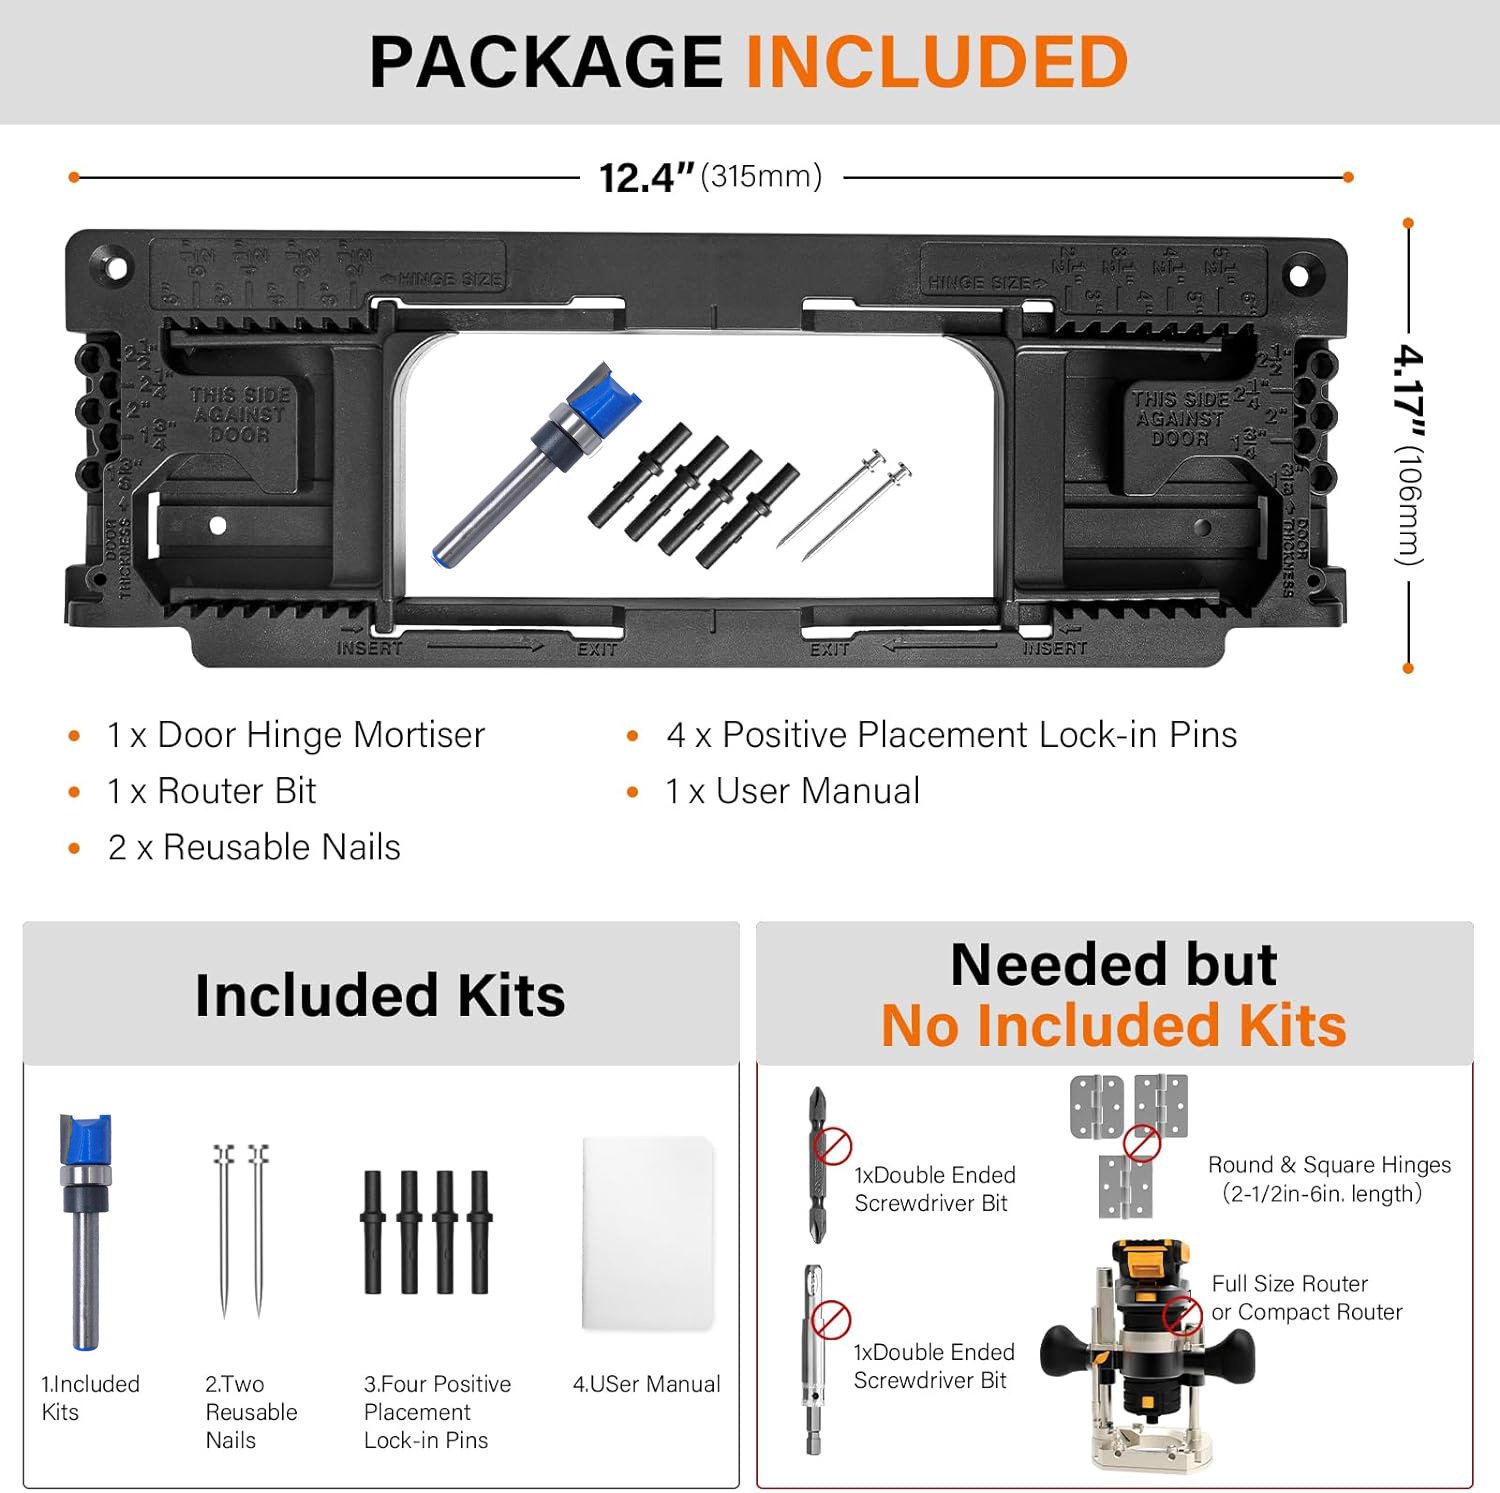
Supports 3″, 3.5″, 4″, 4.5″, and 5″ hinges with quick-drop indexing pins.
Included Vix-style pilot bit guarantees screws drive perfectly straight.
No need for extra C-clamps. The jig locks itself onto the door edge securely.
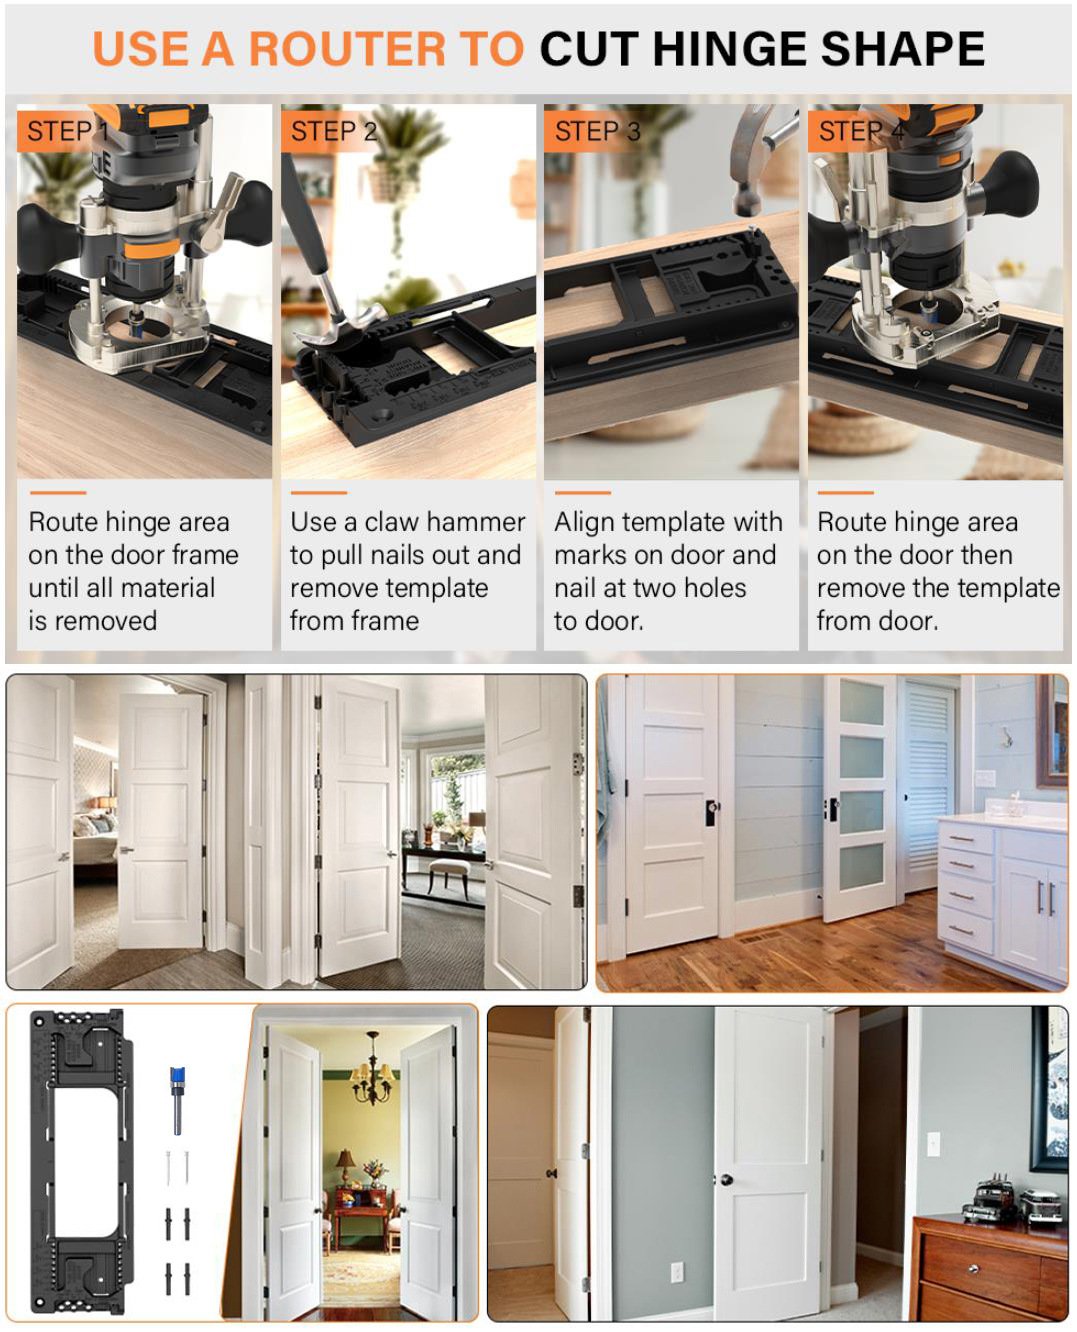
Step-by-Step Mortising Guide
Achieve factory-grade door edges without being a master carpenter. Here is the standard workflow:
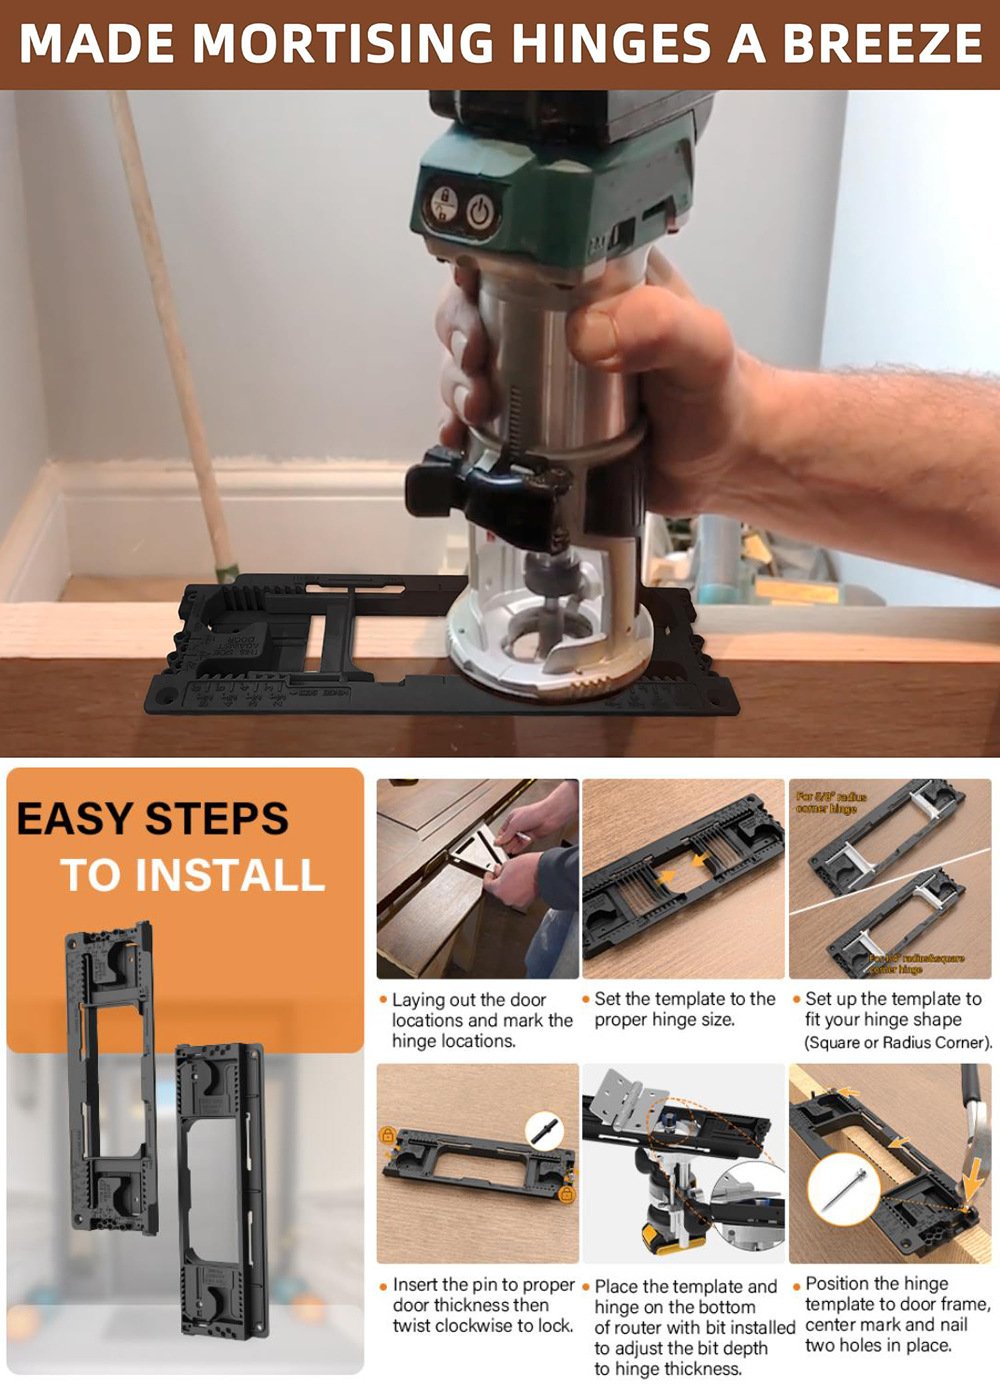
- Configure the Jig: Select the size and corner radius of your hinges. Drop the selector pins into the corresponding slots on the template. Adjust the thickness knobs to match your door (1-3/8″ or 1-3/4″).
- Clamp and Lock: Slide the jig onto the edge of the door or the door jamb, align it with your hinge layout marks, and turn the integrated clamping knobs to secure it. No extra clamps required.
- Route the Mortise: Insert the included bearing-guided router bit into your compact or plunge router. Set the depth to match the thickness of your metal hinge. Turn on the router and follow the template walls to clear out the wood.
- Drill Pilot Holes: Leave the jig in place. Place your metal hinge into the freshly cut mortise, and use the included self-centering drill bit to pre-drill your screw holes dead-center.
⚠️ Router Setup Warning:
Before turning on your router, always double-check your bit depth on a piece of scrap wood. The bearing on the router bit must ride smoothly along the inside edge of the plastic template. Plunging too deep too fast can cause the bit to chew into the jig itself.
Tech Q&A: Workshop Engineering Insights
❓ Q: What if my hinges have perfectly square corners instead of rounded ones?
A: Because a spinning router bit is round, the jig will leave a small radius in the corners of your mortise. If you are installing square hinges, simply route the mortise as usual, then use a standard wood chisel or a corner chisel tool to quickly square up the four corners with a single tap.
❓ Q: Does this template work on the door frame/jamb, or just the door itself?
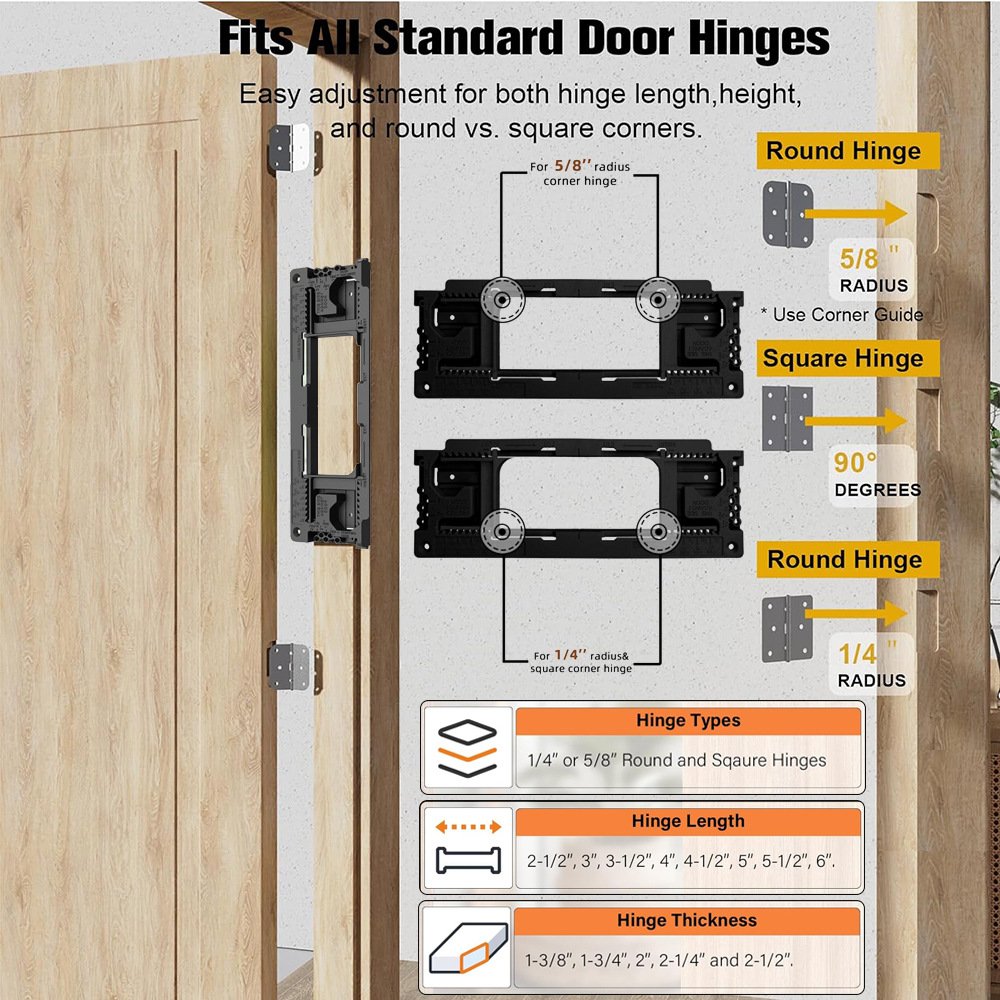
A: It is designed for both! You can remove the edge-guide stops, allowing the template to lay perfectly flat against your door jamb (the frame attached to the wall) to route matching mortises.
❓ Q: Do I need a specific brand of router to use this jig?
A: No. The system is universally compatible. As long as you have a standard compact (palm) router or a mid-size plunge router that accepts a 1/4-inch shank bit (the standard size for most trim routers), you can use the router bit included in our kit.
The jig features quick-adjust drop-in pins that configure the template for 3″, 3-1/2″, 4″, 4-1/2″, and 5″ hinges. It also supports both standard 1/4″ and 5/8″ radius round-corner profiles.
Yes. Unlike many standalone templates, this complete kit includes a high-speed steel router bit equipped with a top bearing guide, as well as a specialized self-centering hinge drill bit (Vix bit) to ensure your screws do not pull the hinge off-center.
No. The integrated clamping system utilizes non-marring, rubberized contact pads that grip the wood securely without leaving indentations or scratching the paint or finish on your door.