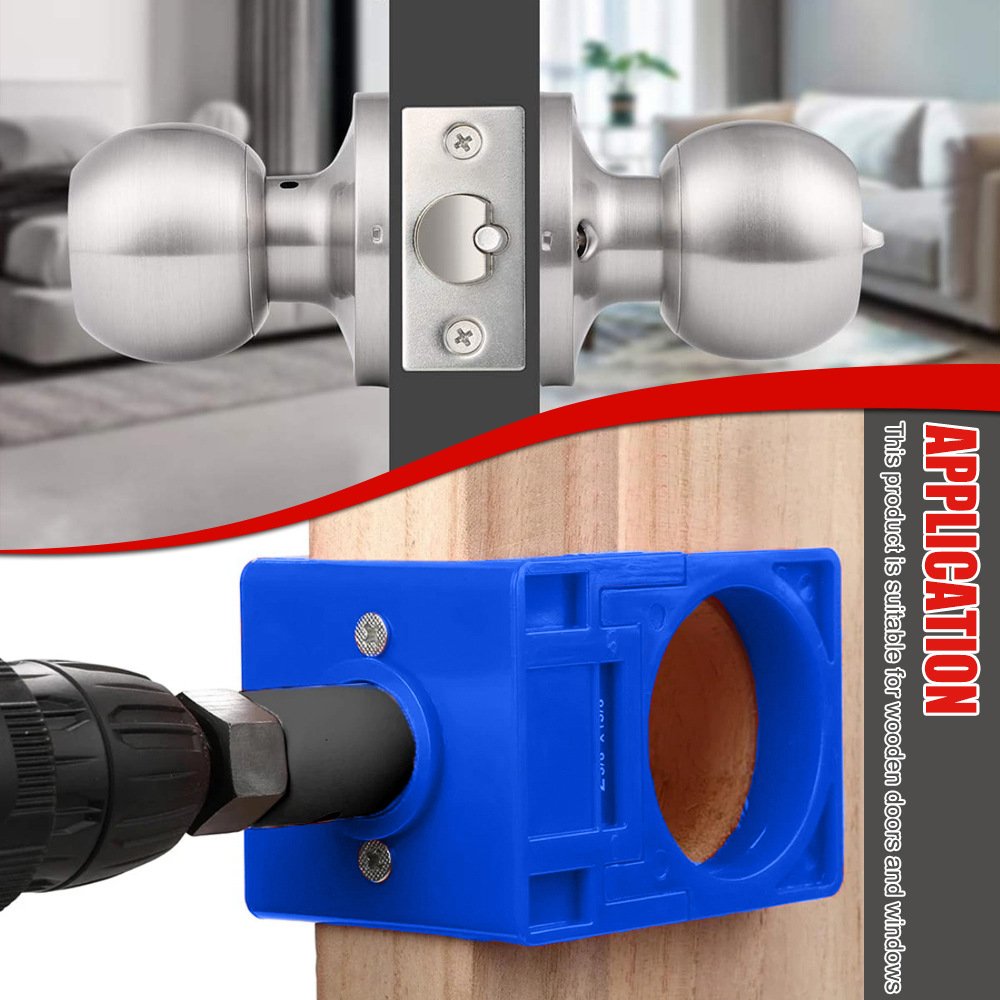
We have all been there: you try to drill a fresh hole for a new deadbolt using a standard tape measure and pencil, only for the hole saw to skate across your expensive hardwood door, leaving a massive, unrepairable gouge.
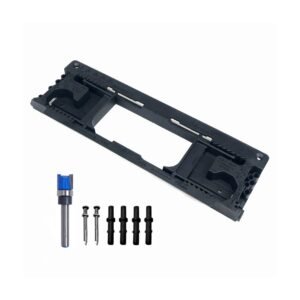
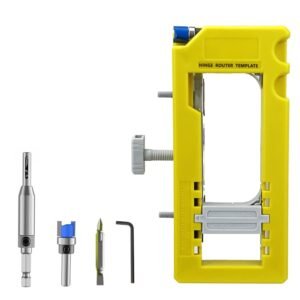
Worse, if the hole is even 2mm off-center, the internal latch mechanism binds, forcing you to jiggle the key every single time you want to enter your home. The Premium Door Latch & Lock Installation Kit | FixPartHub Edition removes human error entirely. By locking a rigid, heavy-duty guidance clamp directly onto the door frame, it guides your hole saws perfectly square to the face and edge of the door every single time.
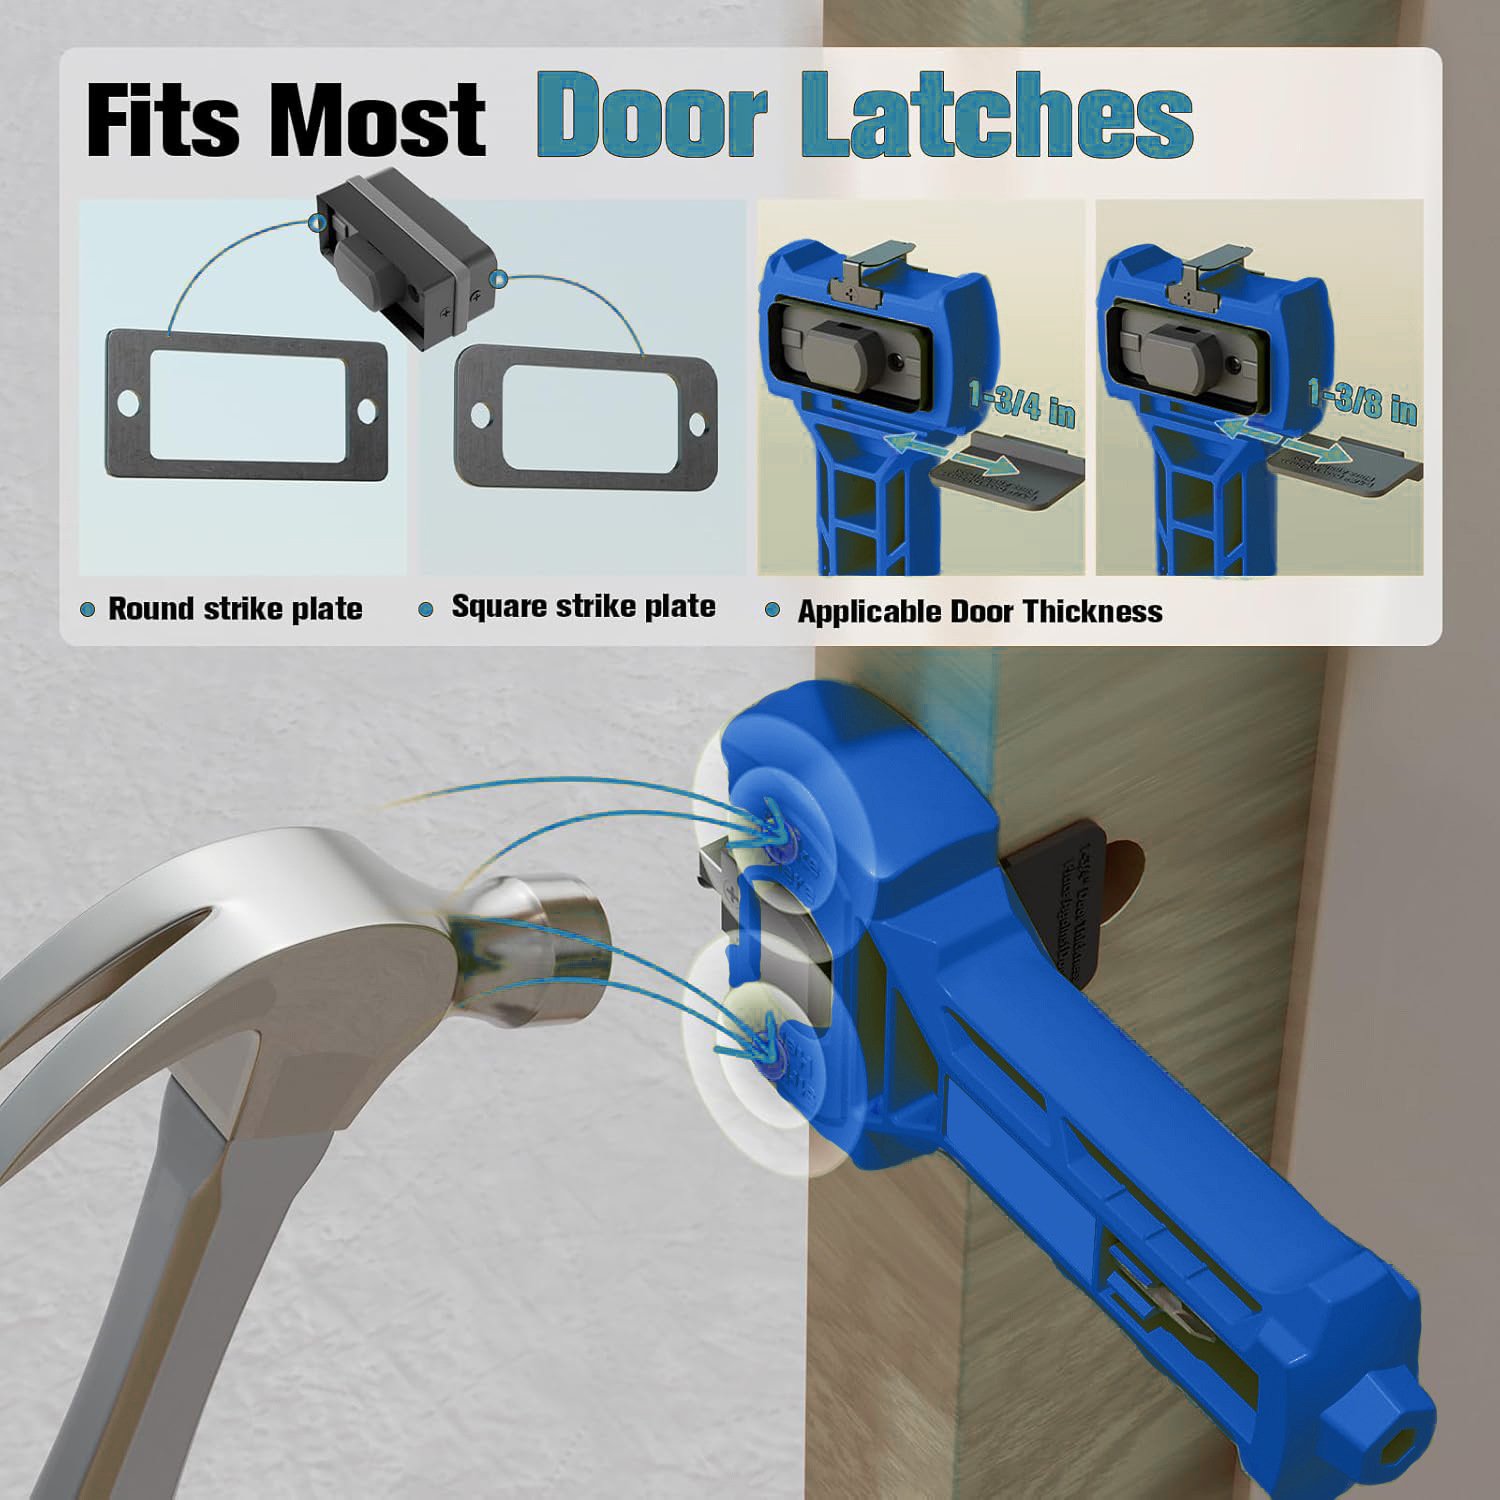
Perfectly locks onto standard 1-3/8″ and 1-3/4″ interior and exterior doors.
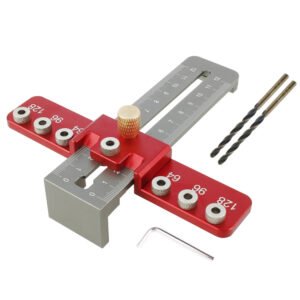
Built-in selector switches quickly between 2-3/8″ and 2-3/4″ latch settings.
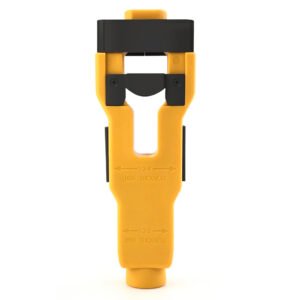
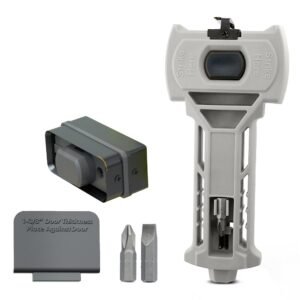
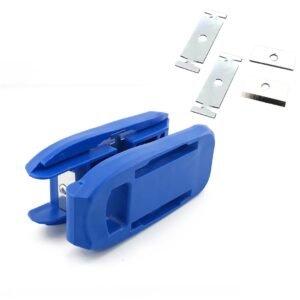
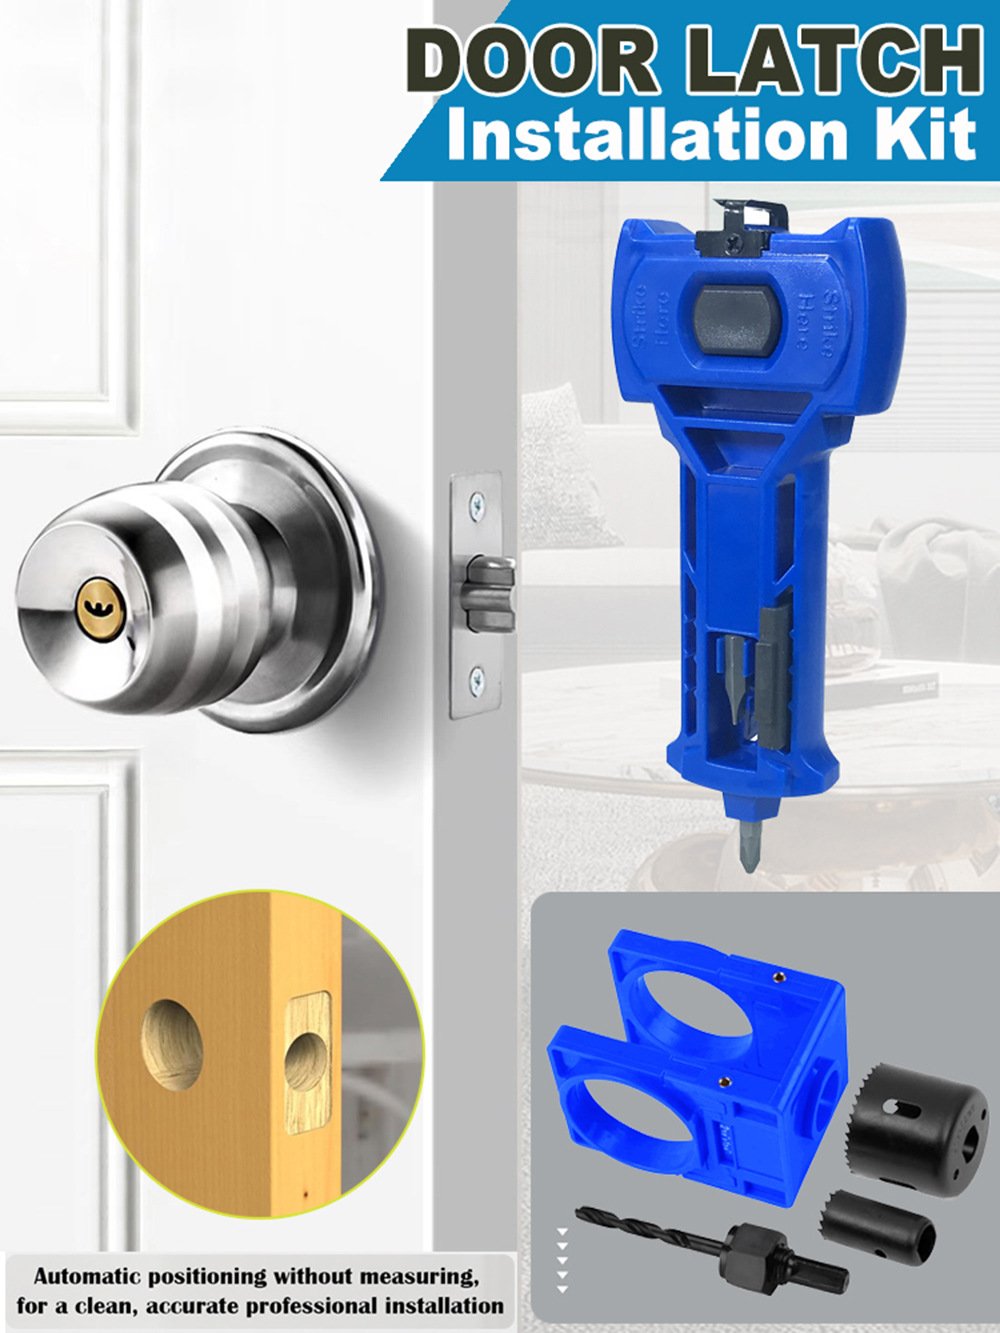
Integrated strike plate tool allows quick, effortless flush-mount material removal.
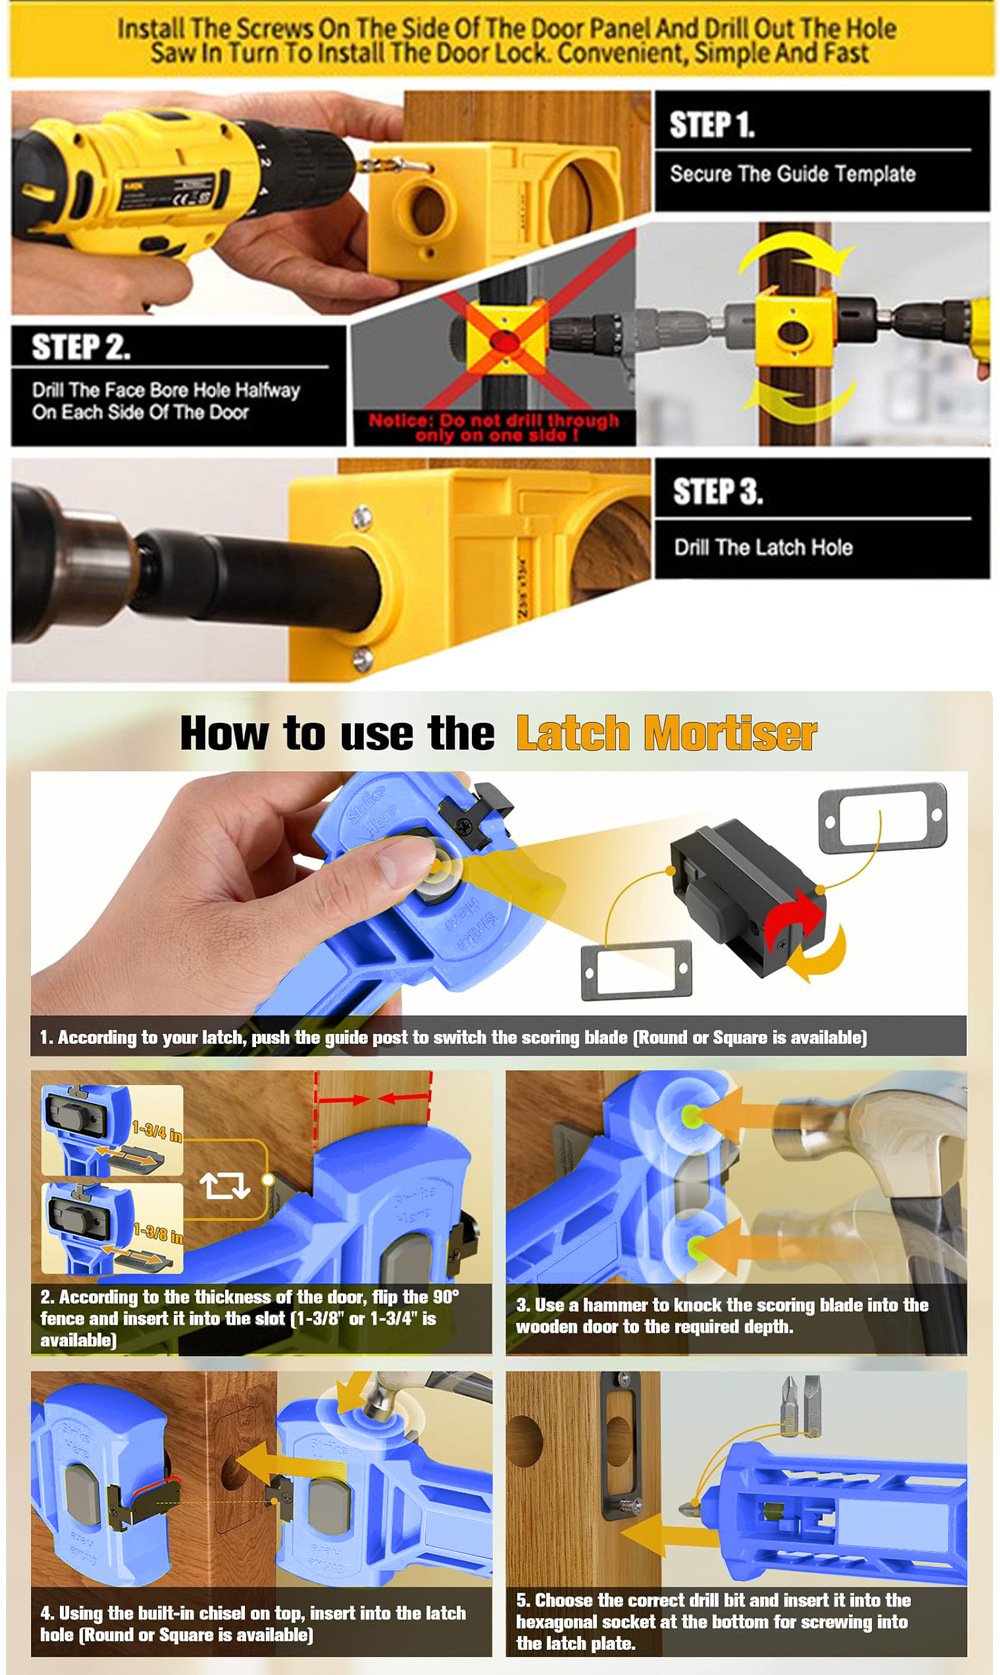
Step-by-Step Installation Instructions
Whether you are replacing an old spherical handle or boring out a raw solid wood slab, follow this sequence used by professional locksmiths:
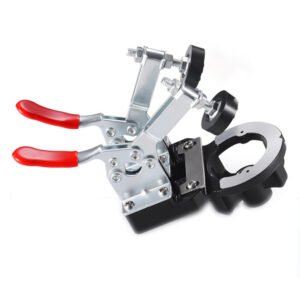
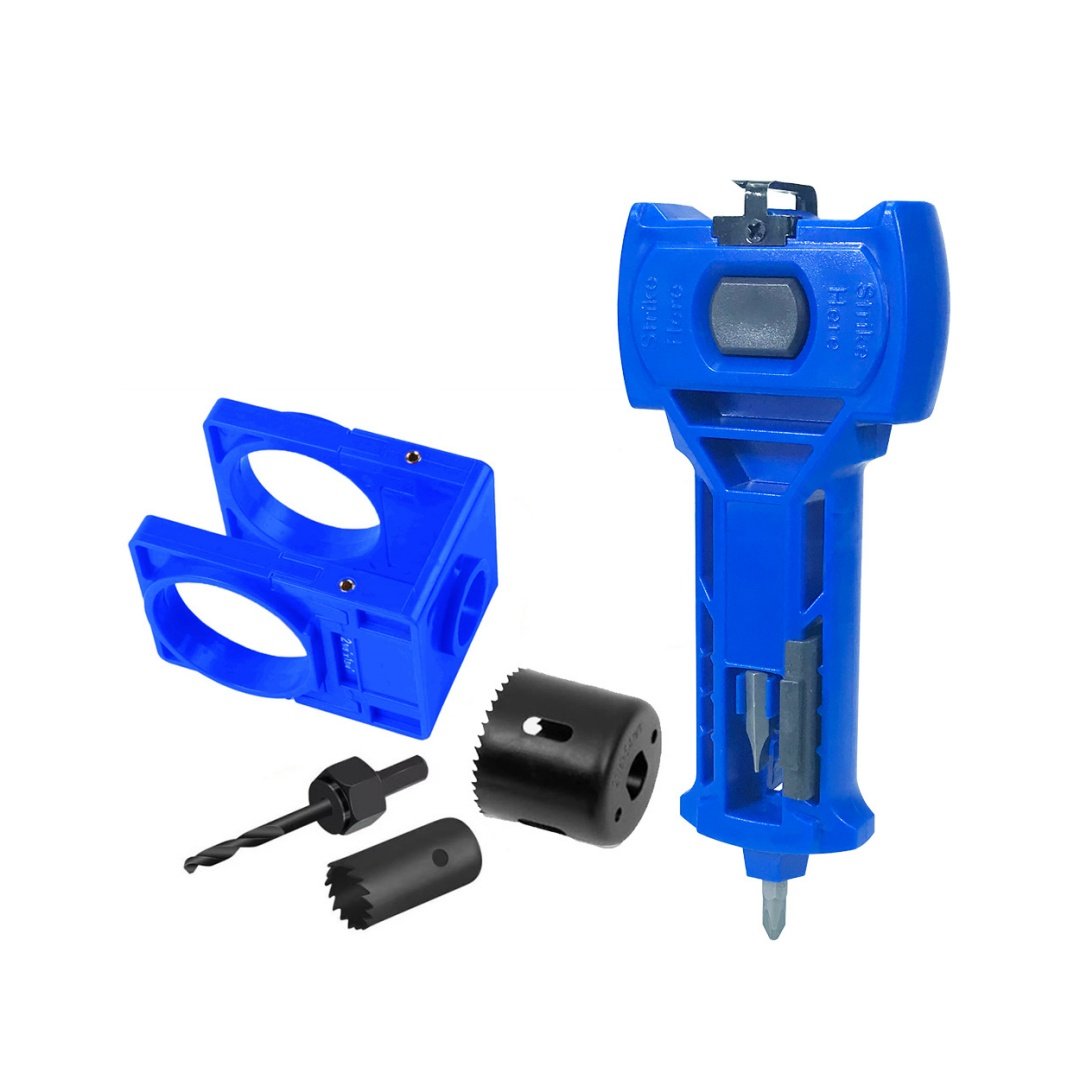
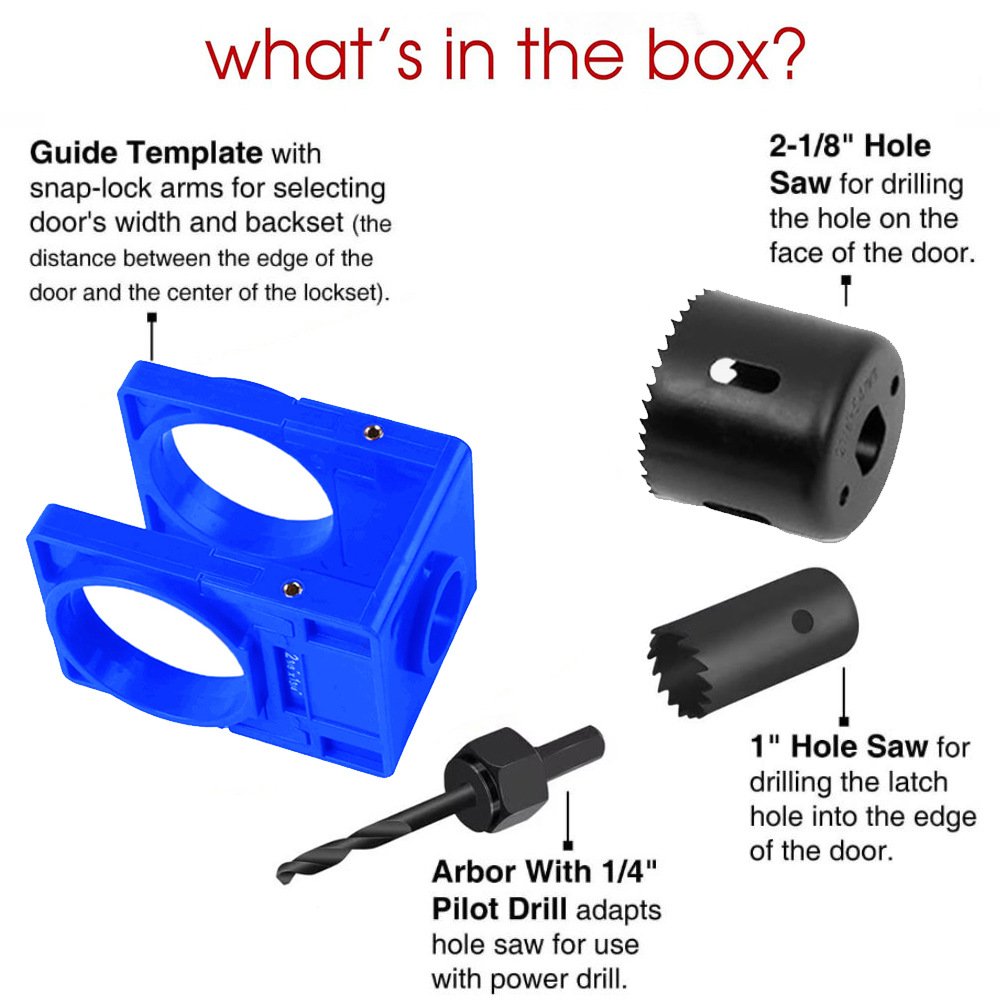
- Clamp the Template: Mark the desired lock height on your door. Adjust the internal slide of the jig to match your door thickness (1-3/8″ or 1-3/4″). Position the tool over the marks and tighten the side clamp securely until it cannot wiggle.
- Bore the Main Face Hole: Attach the large hole saw to the included arbor mandrel and insert it into your power drill. Place the saw into the front guidance track and drill smoothly until the pilot bit exits the opposite side. Pro Tip: Stop and complete the cut from the other side to avoid wood tear-out.
- Drill the Edge Latch Hole: Switch to the smaller hole saw. Insert it into the side guide template on the edge of the door and drill through into the main cylinder chamber.
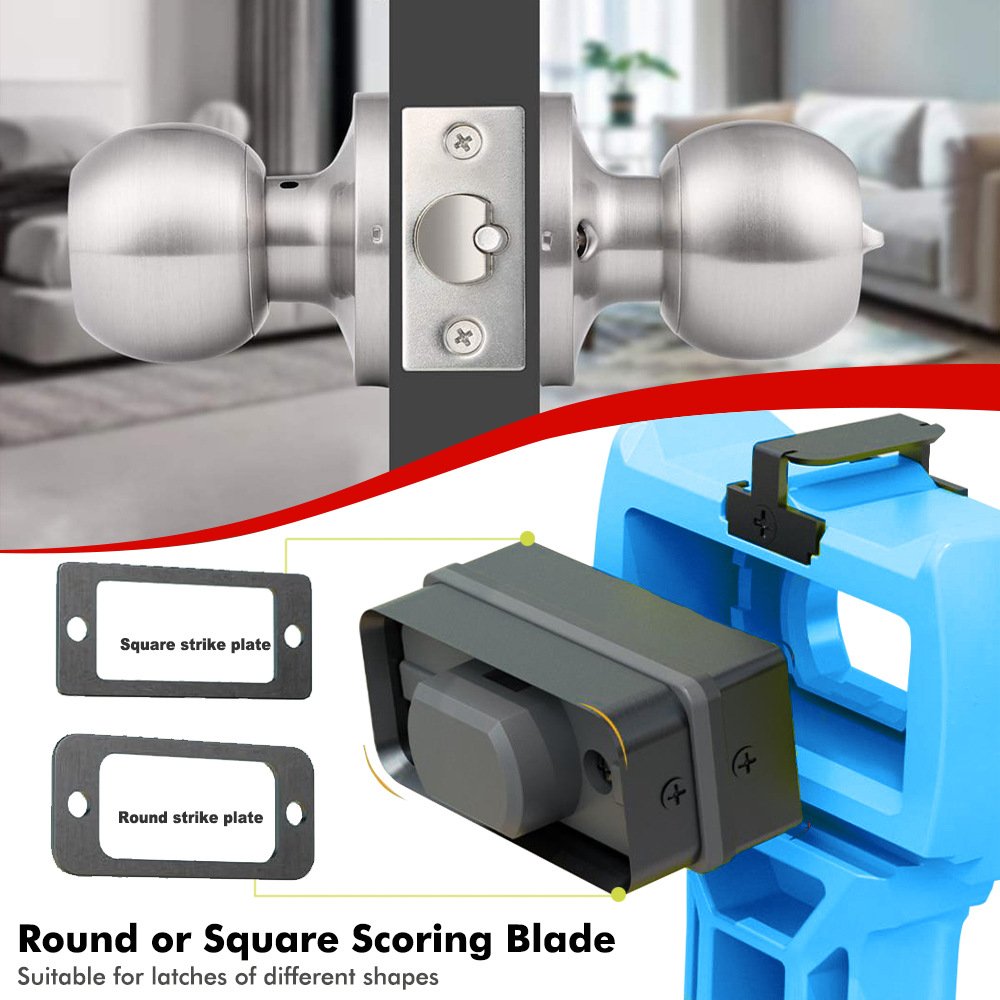
- Chisel the Latch Mortise: Remove the clamping template. Position the integrated latch scoring jig on the door edge, strike it gently with a hammer to outline the boundary, and easily shave away the recess so the lock plate sits totally flush.
⚠️ Operational Maintenance Guard:
When drilling thick solid-core hardwood doors, do not force or jam the power drill at maximum speed. Apply steady, moderate downward pressure and pull the hole saw back slightly every few seconds to clear packed wood chips. This simple trick prevents heat build-up and preserves the sharp teeth of your carbon-steel saws for dozens of installs.
Tech Q&A: Workshop Engineering Insights
❓ Q: Does this kit work on heavy insulated steel or fiberglass exterior doors?
A: This kit is optimized primarily for all wooden doors (including solid oak, pine, and composite MDF cores). While the template clamps onto steel doors, the included hole saws are optimized for high-speed wood cutting. For metal-clad doors, we recommend swapping in bi-metal specialized hole saws onto our mandrel.
❓ Q: Why does this template guide utilize internal widening anti-friction rings?
A: Unlike cheap generic stencils where the rotating steel hole saw cuts directly into the plastic tracking walls, our premium guide features built-in anti-friction relief ribs. This maintains a true 90-degree alignment while keeping the cutting teeth safely isolated from the tool body.
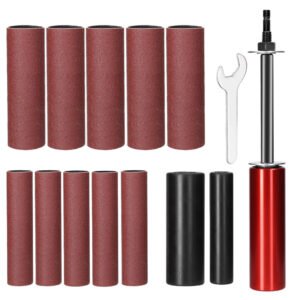
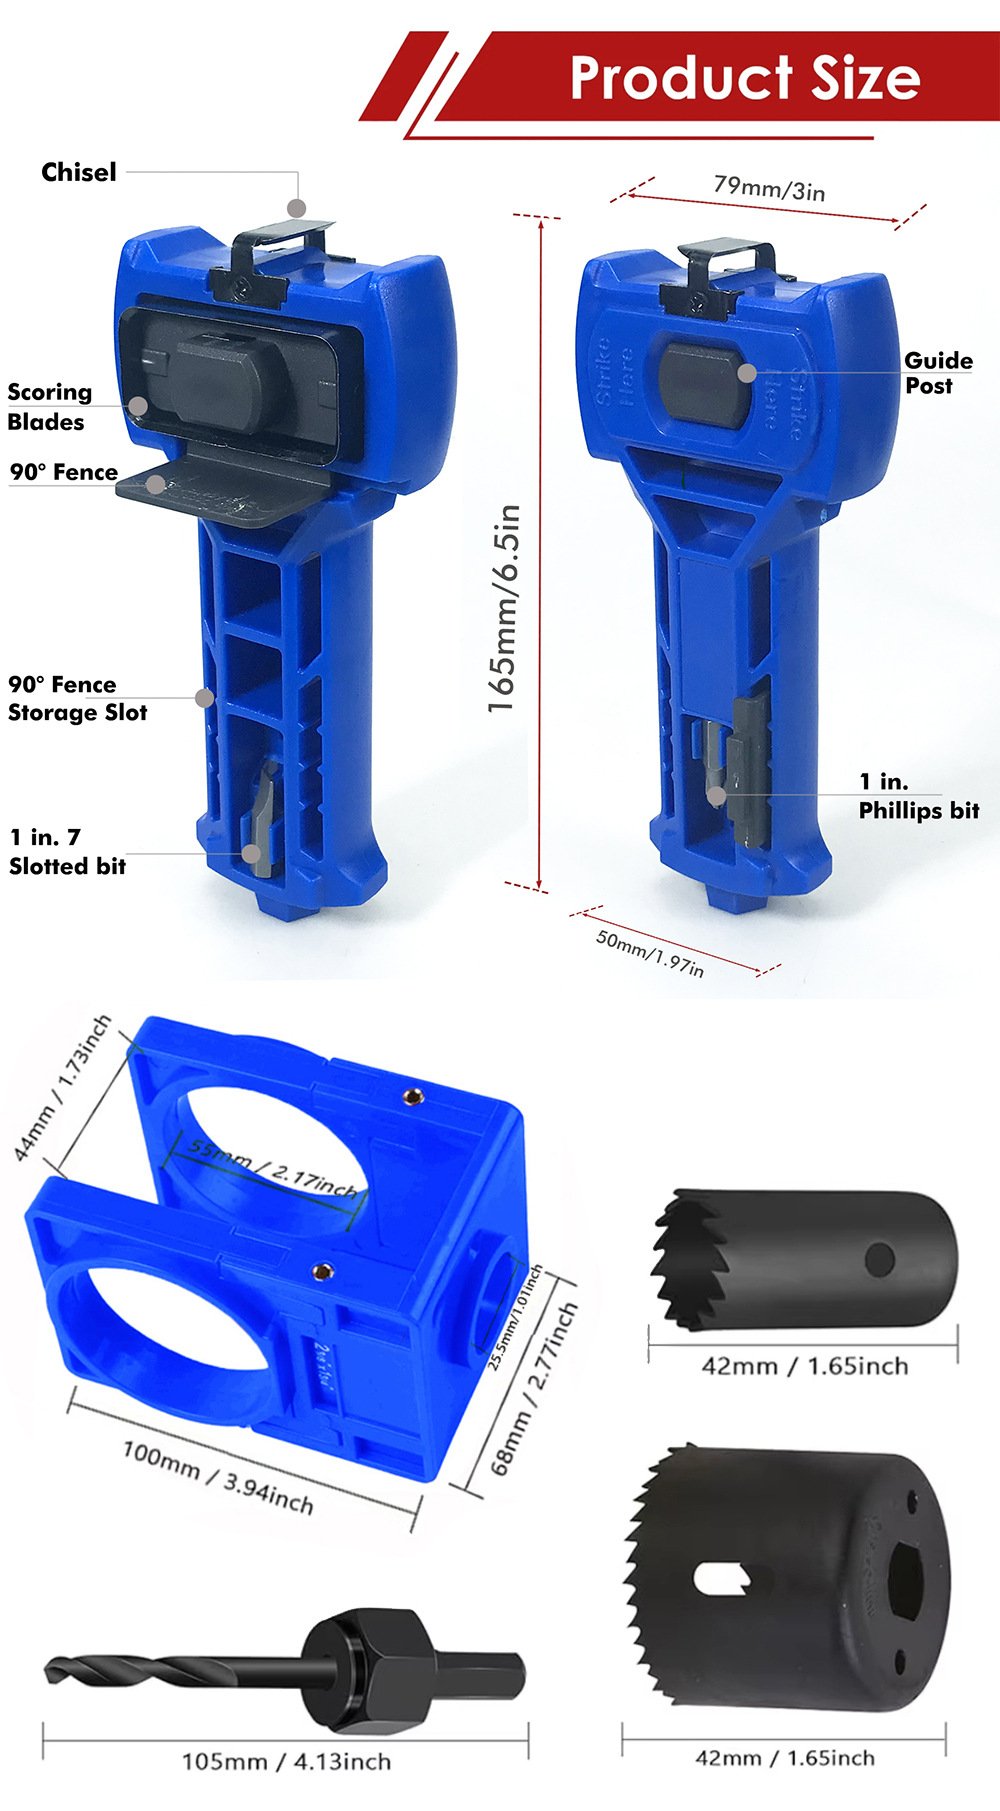
❓ Q: What are the exact dimensions of the two hole saws included in the kit?
A: The set includes a standard 2-1/8″ (54mm) diameter saw for the main spherical knob or deadbolt body cylinder, and a 1″ (25mm) diameter saw for boring the edge latch bolt recess hole.
Ditch the crooked layouts and frustrating alignment fixes. Rebuild your hardware toolbox with the FixPartHub industrial alignment series—engineered for fast setups, smooth feeding, and zero job-site anxiety.
Yes. Nearly all modern electronic smart locks, keypad deadbolts, and biometric handles require the exact same standard 2-1/8″ face bore and 1″ latch hole configuration. This template automatically aligns your cuts to match those specifications perfectly.
Drilling all the way through a wooden door from one side can cause the hole saw teeth to violently splinter the wood grain as it exits the opposite face. Boring until the pilot bit pierces the door, then switching sides, ensures completely crisp, clean edges on both faces.
The direct-clamp frame utilizes widened pressure-distribution panels that grip the door face firmly without biting into the fibers. For pristine or freshly painted doors, you can place a small layer of masking tape underneath the contact pads for an extra layer of scratch protection.