There is nothing more stressful in a cabinetry build than drilling that first hole for a handle. If your pencil mark is off by even a millimeter, the handle will sit crooked, and you have permanently ruined a $150 custom oak cabinet door.
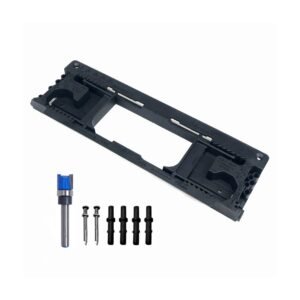
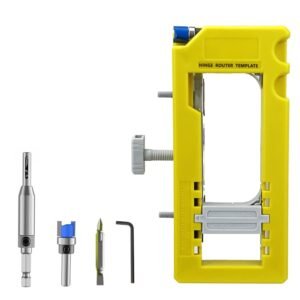
Using a tape measure and a framing square for every single door is an archaic, error-prone nightmare. The Premium Aluminum Cabinet Hardware Jig | FixPartHub Edition transforms an entire kitchen installation into a rapid, foolproof process. By locking your exact handle spacing and edge-offset dimensions into a rigid aluminum exoskeleton, you create a mechanical template. You simply hook the jig over the edge of the door, pull the trigger on your drill, and achieve factory-perfect alignment on every single drawer and cabinet in the room.
Set the jig once and drill 50 identical cabinet doors without remeasuring.
Zero flexing or bending, ensuring your hole centers remain dead accurate.
Steel inserts guide your bit perfectly straight and prevent blowout.
Workshop Workflow: The “Measure Once” Protocol
Outfit an entire kitchen with custom hardware in a fraction of the time. Follow this simple sequence:
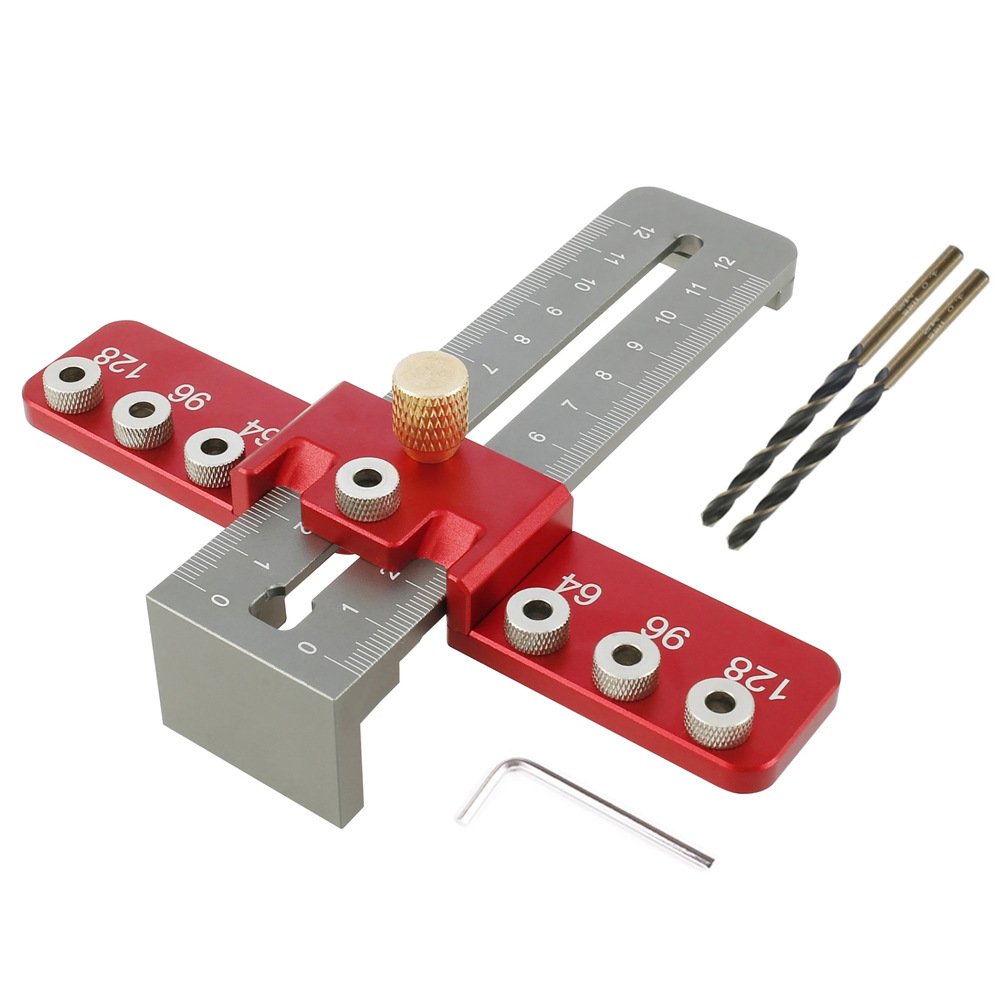
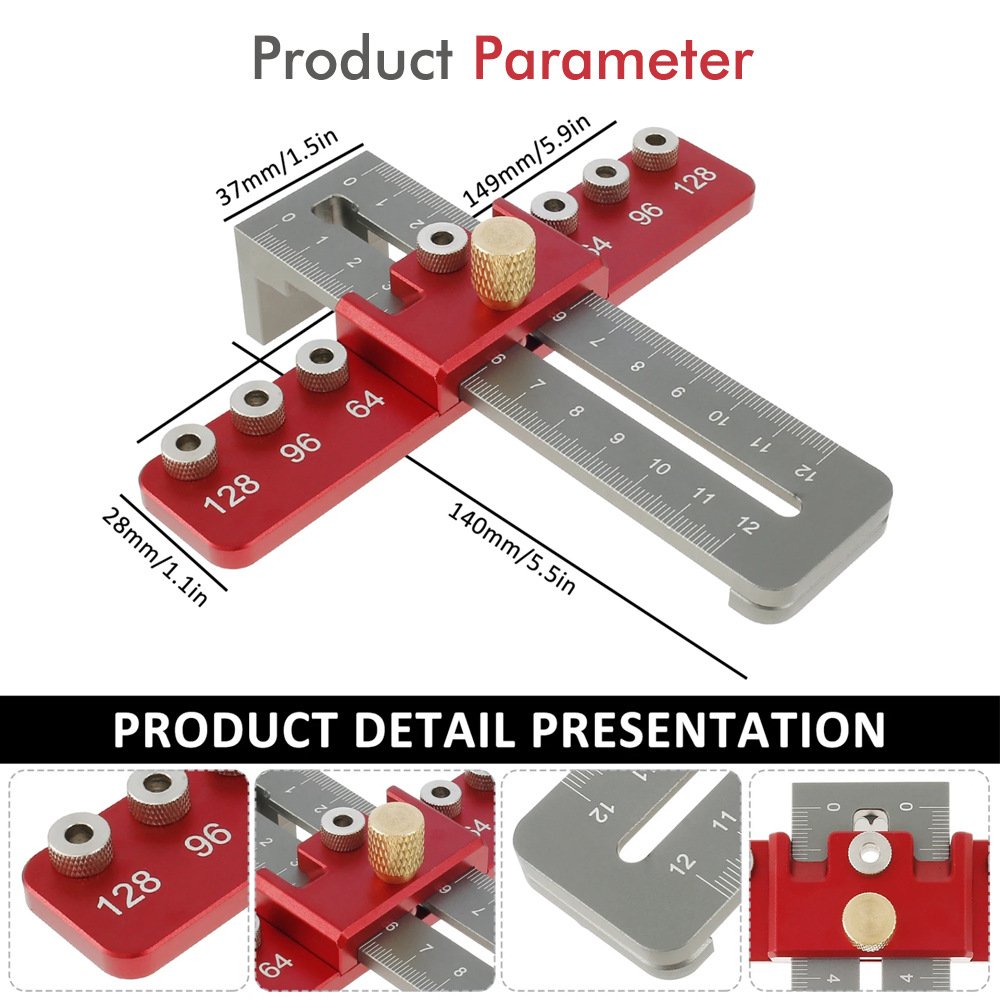
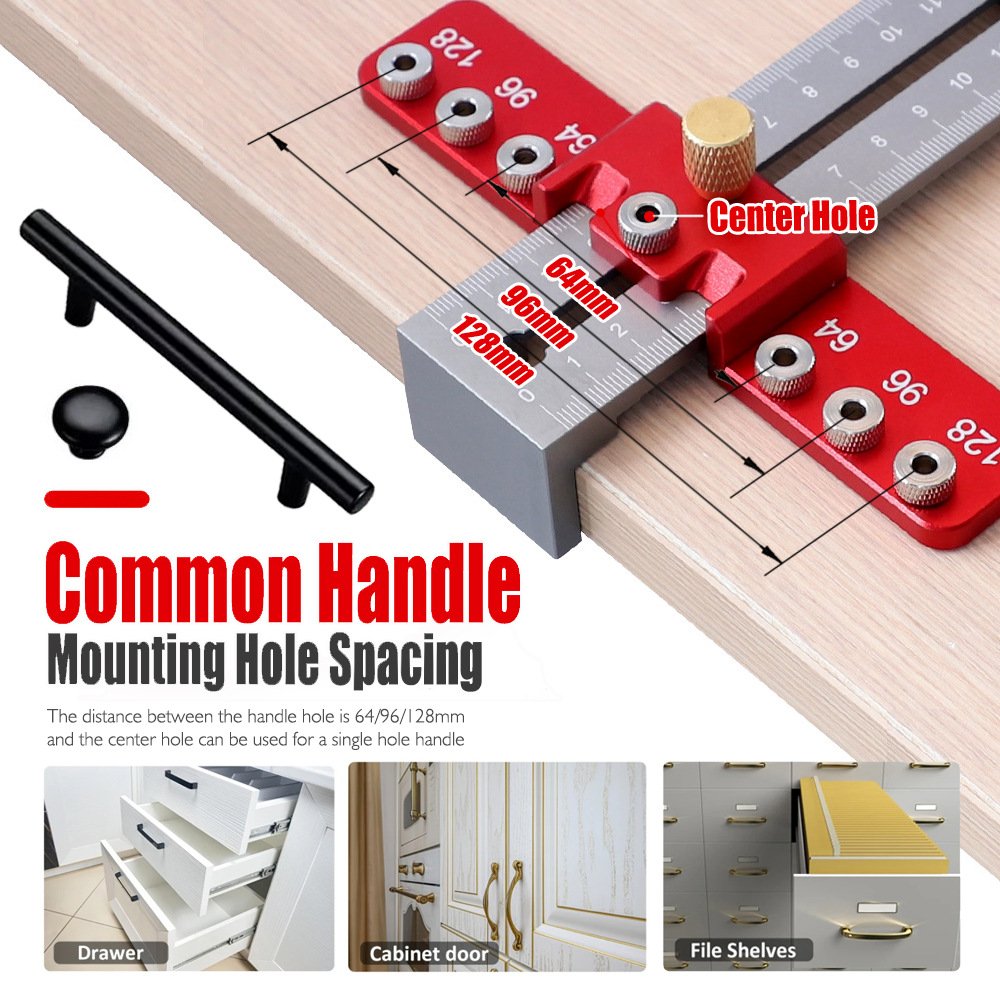
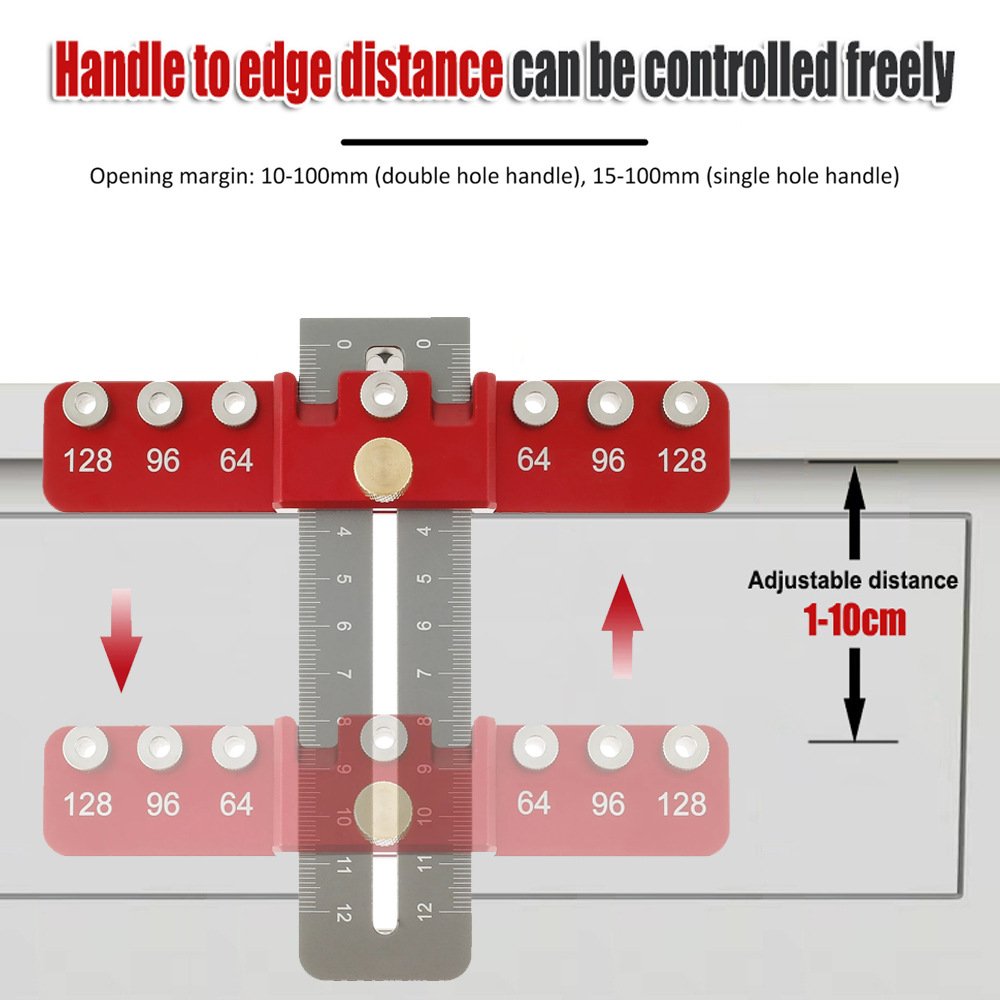
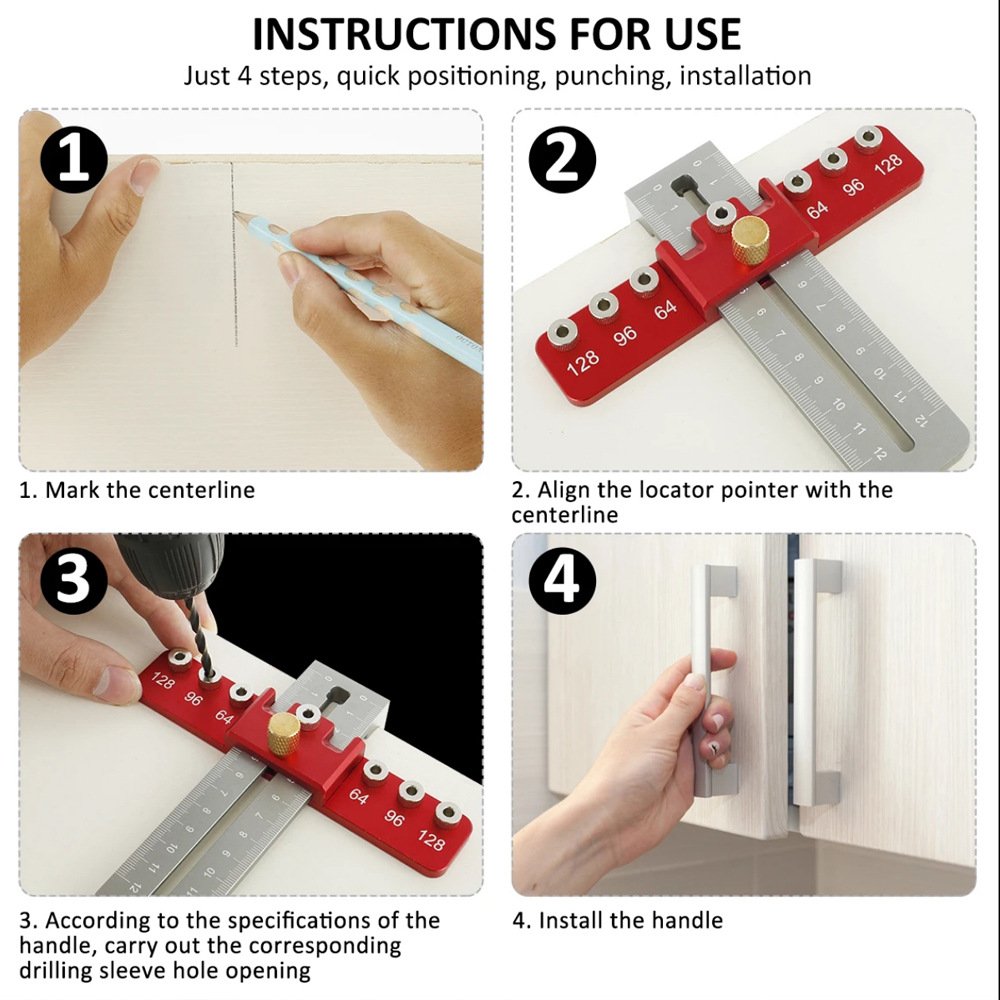
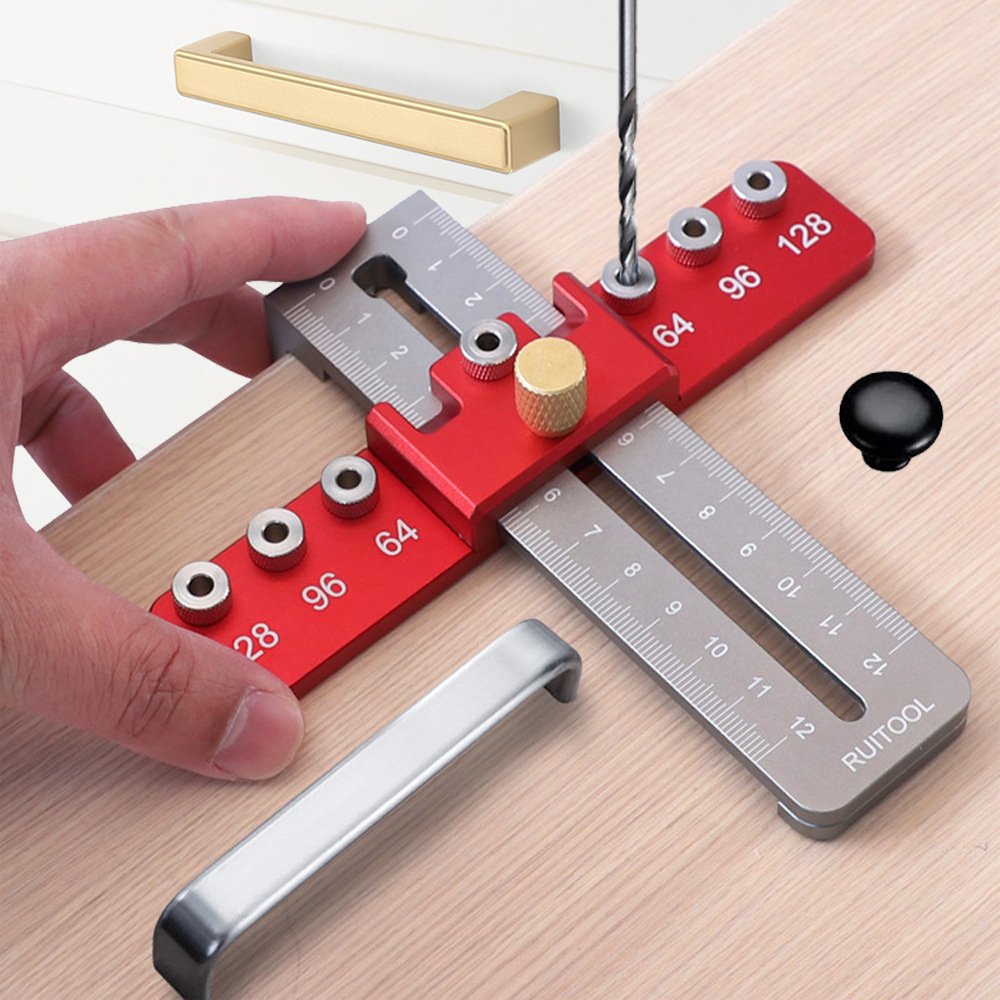
- Calibrate the Spacing: Measure the center-to-center hole distance of your physical handle (e.g., 96mm, 128mm, or 160mm). Slide the two drilling blocks on the horizontal rail to match this exact measurement and lock the thumb screws.
- Set the Offset: Slide the top vertical stop block to determine how far down from the top edge (or side edge) of the cabinet door you want the handle to sit. Lock it in place.
- Hook and Drill: Hook the jig flush against the corner of your cabinet door. Insert your drill bit into the steel bushings and drill your two holes.
- Flip and Repeat: To install the handle on the opposing left/right door, simply flip the jig over and hook it to the opposite corner. The dimensions remain flawlessly mirrored.
⚠️ Pro Drilling Advice:
For the absolute cleanest installation, always use a high-quality Brad Point drill bit (typically 3/16″ or 5mm depending on your hardware screws). A brad point bit slices the wood fibers cleanly, preventing ugly blowout or splintering on the back side of your expensive cabinet doors.
Tech Q&A: Tool Versatility & Specifications
❓ Q: Why is an aluminum jig better than the plastic ones sold at big box hardware stores?
A: Plastic templates are highly susceptible to warping. If a plastic template bends even slightly while you are pressing the drill against it, your holes will be drilled at an angle, making it impossible to thread the screws into the handle. Our solid aluminum alloy chassis guarantees an absolutely rigid, 90-degree perpendicular drilling axis.
❓ Q: Can I use this jig for single-hole cabinet knobs as well as wide drawer pulls?
A: Absolutely. To install single-hole cabinet knobs, simply slide one of the drilling blocks to the exact center alignment mark, set your vertical offset, and drill a single hole.
❓ Q: Does this jig work on extremely wide drawer fronts?
A: Yes. For standard kitchen drawer fronts, you can index the jig off the top edge. For extremely wide custom drawers, you can quickly find the center of the drawer with a tape measure, align the center notch of the jig to your mark, and drill your perfectly spaced handle holes.
The sliding positioning blocks can be infinitely adjusted along the horizontal rail, allowing it to easily accommodate the most common hardware spacing standards, including 64mm, 96mm, 128mm, 160mm, and custom oversized architectural pulls.
No, that is the primary advantage of this tool. You only measure and calibrate the jig once for your first door. Once the thumb screws are locked, you simply hook the jig onto every subsequent door in the kitchen and drill immediately. It guarantees identical placement across the entire project.
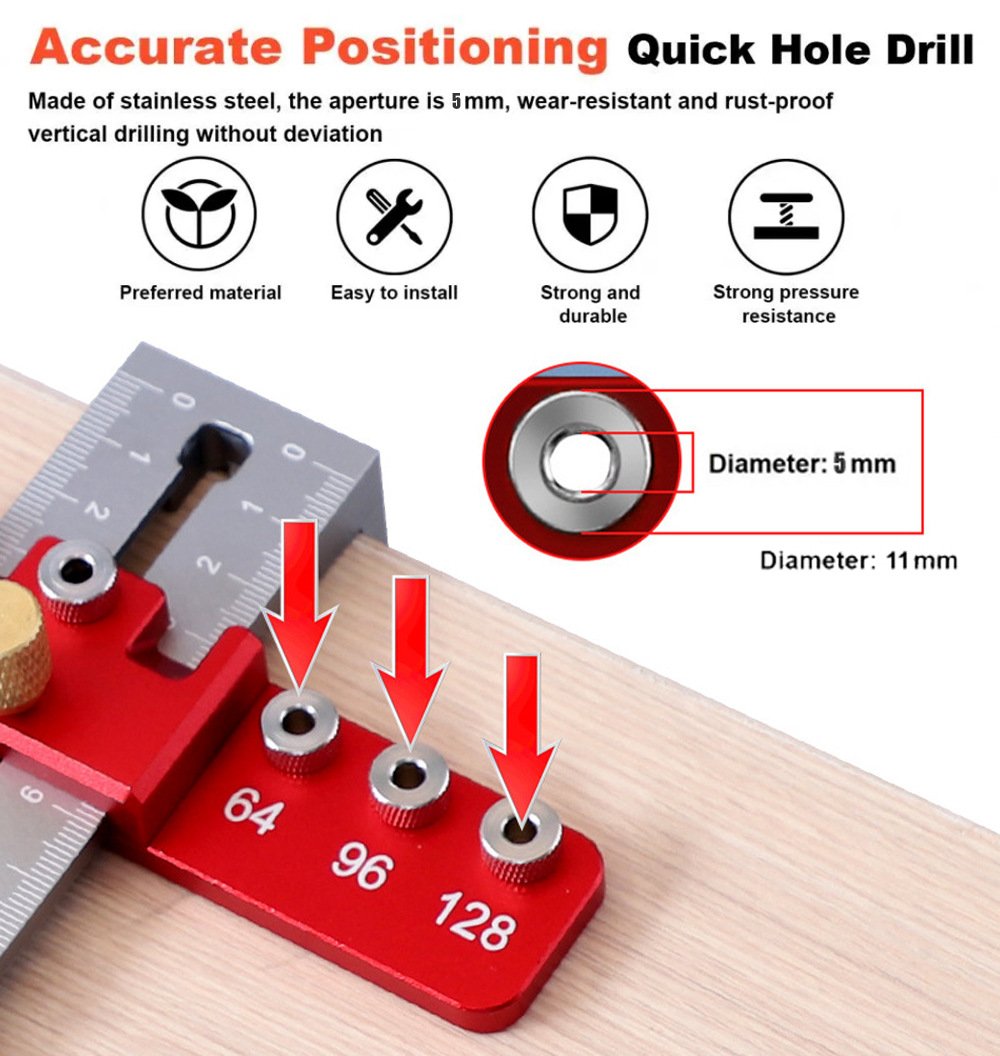
No. The drilling channels in the aluminum blocks are fortified with hardened steel drill bushings. These industrial-grade inserts prevent the flutes of your spinning drill bit from touching or chewing into the aluminum housing, ensuring lifetime accuracy.