Why You Need a Dedicated Flaring Tool
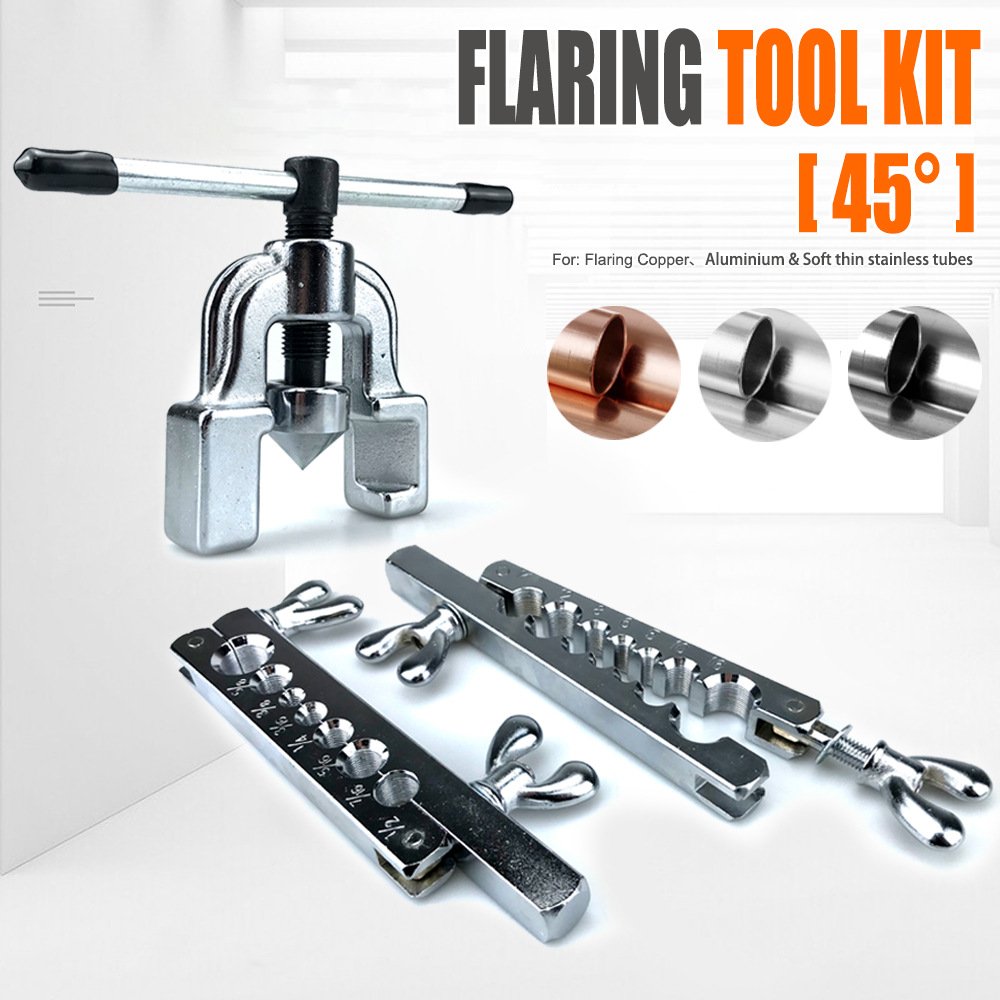
A bad flare means a bad seal, and in custom automotive fluid lines or HVAC systems, a leak is catastrophic. Trying to flare a copper or aluminum tube with improvised tools results in uneven lips, cracked tube walls, and compromised fittings. The CT-195 Heavy-Duty Flaring Tool provides the exact mechanical advantage and geometry needed to cold-form soft metals into a flawless 45-degree mating surface.
💡 Pro Tip: Always apply a single drop of clean machine oil or cutting fluid to the tip of the flaring cone before driving it into the pipe. This drastically reduces friction, preventing the metal from galling and ensuring a mirror-smooth face on the inside of your flare.
How It Works: The Mechanics of a Perfect Flare
Secure the Clamp
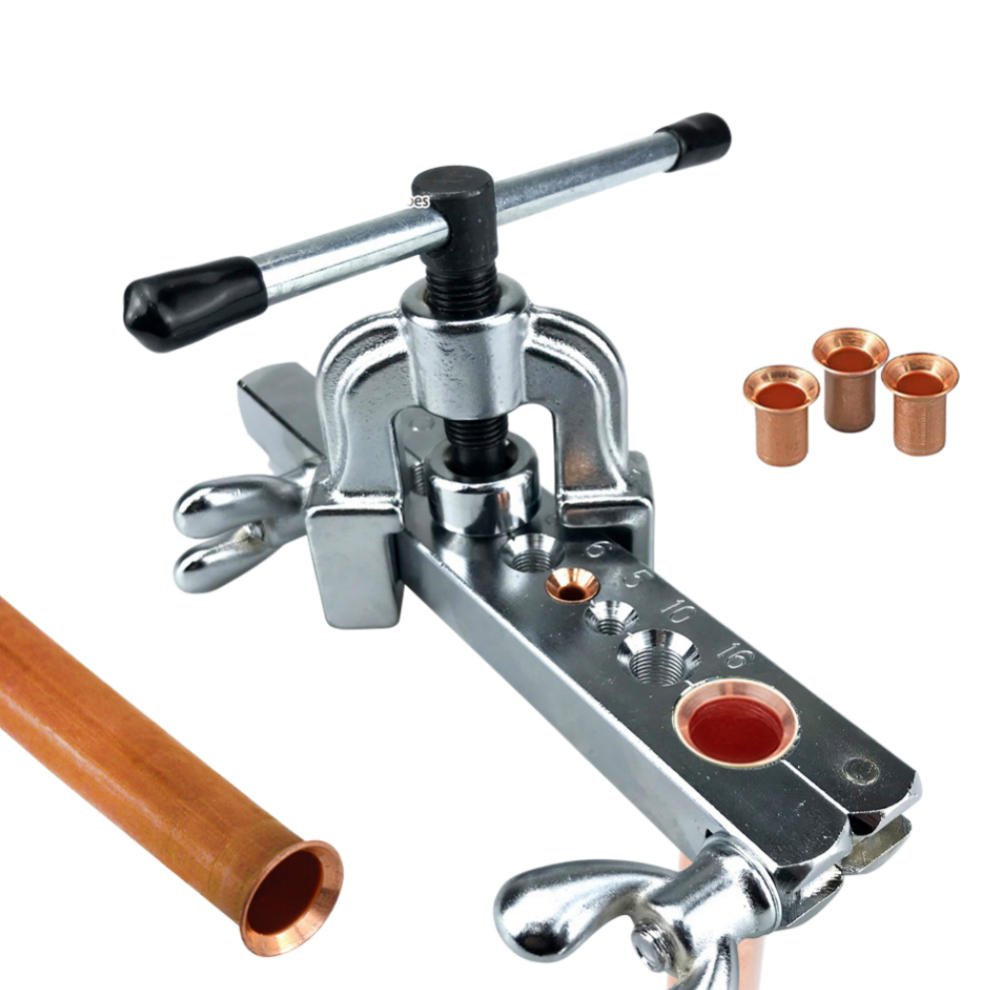
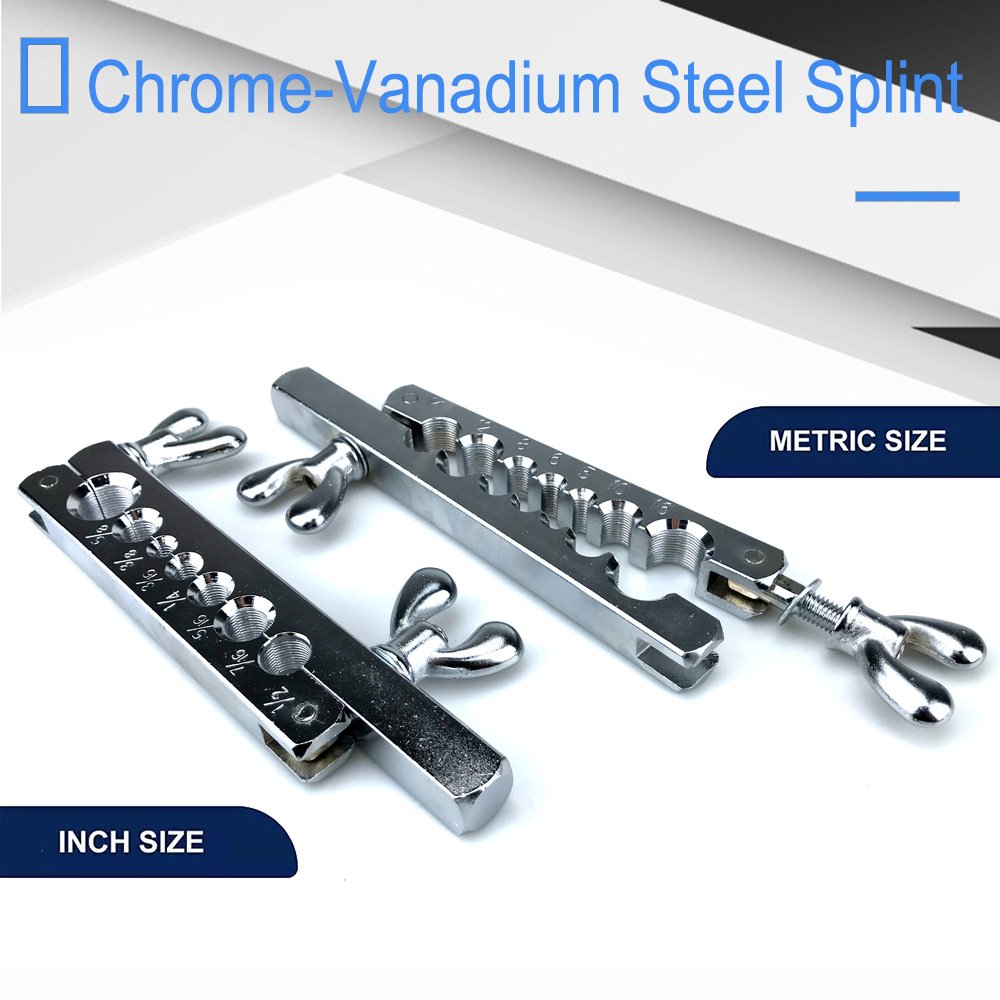
The multi-hole die block grips the tubing tightly around its entire circumference, preventing it from slipping downward or distorting out of round.
Center the Yoke
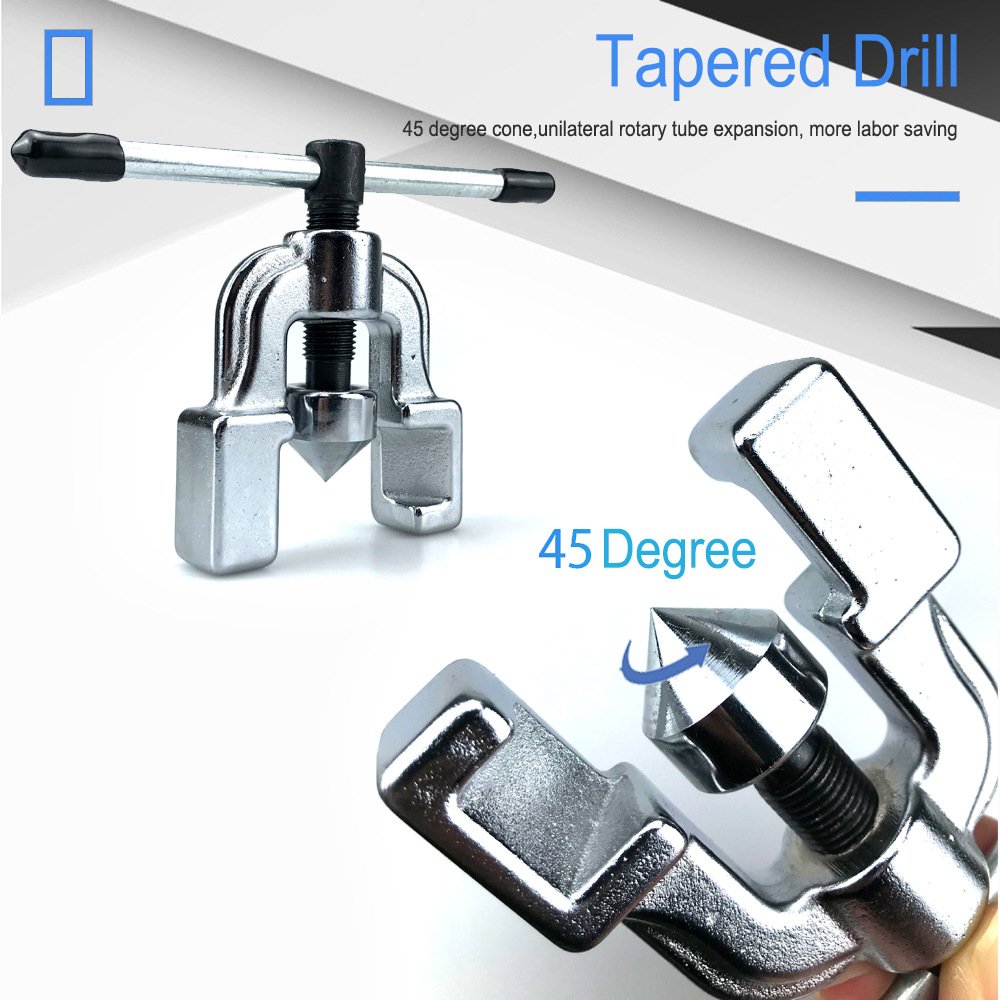
The heavy cast-steel yoke slides over the die block and locks into position, perfectly aligning the hardened cone directly over the center of your tubing.
Cold Form the Metal
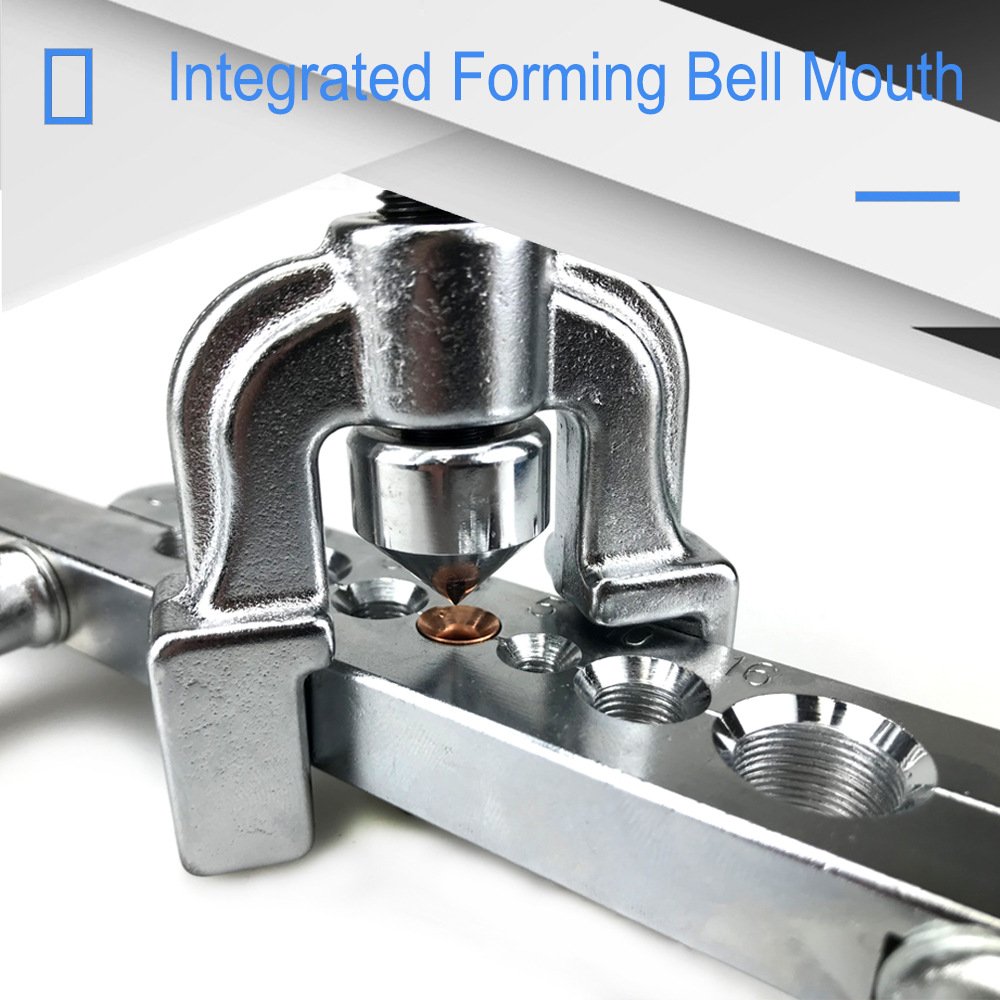
As you turn the T-handle, the cone pushes downward and outward, utilizing extreme leverage to stretch the soft metal into a uniform 45-degree lip.
Why Our Flaring Tool Outperforms the Competition
| Feature | Cheap Generic Flaring Kits | FixPartHub CT-195 Kit |
|---|---|---|
| Yoke Material | Thin stamped steel that bends under pressure. | ✅ 930g Cast steel for zero deflection. |
| Cone Quality | Roughly machined, tearing the copper wall. | ✅ Polished and hardened for smooth metal rolling. |
| Tube Grip | Smooth holes allow the pipe to slip downward. | ✅ Precision-milled gripping channels lock the tube in place. |
Step-by-Step: Creating a Flawless Flare
Prep the Tubing
Cut the pipe perfectly square using a tube cutter. You MUST thoroughly deburr the inside lip of the cut before flaring, or the flare will crack.
Clamp the Pipe
Insert the tube into the correct size hole on the die block. Let it stick out roughly 1/8 inch (or the thickness of a nickel) above the block face. Tighten the wing nuts firmly.
Position the Yoke
Slide the yoke over the block, ensuring the cone is perfectly centered over the pipe opening.
Drive the Cone
Turn the T-handle clockwise. Stop when resistance becomes firm and the flare has seated fully against the 45-degree chamfer of the die block.
Compatible Applications
Tech Q&A: Tool Calibration & Specifications
Whether you are building a custom dust collection pneumatic system, running a new compressed air line across your shop, or doing HVAC repairs, you cannot compromise on your tube flares. A bad flare means a slow leak, and a slow leak means system failure. The CT-195 Heavy-Duty Flaring Tool removes the guesswork. Built from 930 grams of raw, forged steel, this 2-piece setup delivers the mechanical advantage required to roll soft metals into a flawless 45-degree bell, ensuring your fittings seat perfectly airtight on the very first try.
How It Works: Flaring Mechanics
The split die block locks the tubing securely. The chamfered holes prevent the tube from slipping downwards when pressure is applied.
The heavy steel yoke slides directly over the block and hooks securely under the lip, centering the flaring cone perfectly over the tube opening.
Turning the T-handle forces the 45-degree cone downward, slowly expanding the metal outward into a perfect bell shape.
Why Cheap Tools Fail at Flaring
| Failure Point | Budget Flaring Tools | FixPartHub CT-195 Kit |
|---|---|---|
| Yoke Deflection | Thin aluminum yokes bend, creating lopsided flares that leak. | ✅ 930g solid forged steel guarantees dead-straight downward pressure. |
| Tube Slippage | Poorly machined die blocks let the tubing slide down under pressure. | ✅ High-friction grooved blocks lock the tubing aggressively in place. |
| Metal Splitting | Rough, unpolished cones tear and split the copper edges. | ✅ Precision-polished 45-degree cone rolls the metal smoothly. |
Step-by-Step: Perfect Flare Execution
Material & Tubing Compatibility
Tech Q&A: Tool Calibration & Specifications
A: The Imperial (CT-195A) handles 3/16″, 1/4″, 5/16″, 3/8″, 7/16″, 1/2″, and 5/8″ tubing. The Metric (CT-195M) handles 5mm, 6mm, 8mm, 10mm, 12mm, 14mm, and 16mm tubing. Choose the variant that matches your local plumbing/hardware standards.
A: No. This tool is specifically engineered for soft, ductile metals like copper, aluminum, and soft brass. Hardened stainless steel lines require specialized hydraulic flaring presses.
A: This tool produces standard single 45-degree flares. If you require double flares (often required for automotive brake lines in certain regions), you will need a separate double-flaring button adapter.
Safety & Usage Notes
- Always deburr: Flaring a tube with rough inner burrs will cause the metal to split during expansion, guaranteeing a fluid/air leak.
- Lubricate the cone: Placing a single drop of heavy oil on the flaring cone before use will dramatically reduce friction and result in a smoother, shinier metal finish.
- Do not over-torque: Once the cone meets the chamfer of the die block, stop turning. Over-tightening thins out the bell walls and weakens the fitting joint.
The CT-195 flaring tool is designed to easily form 45-degree flares in soft metals, specifically copper, aluminum, and soft brass tubing commonly used in HVAC, refrigeration, and pneumatic systems.
If your tubing and flare nuts are measured in inches (such as 1/4″ or 3/8″ lines common in the US and Canada), select the Imperial version. If your hardware is measured in millimeters (like 6mm or 10mm, common in European and Asian markets), select the Metric version.
Splitting is almost always caused by failing to deburr the inside of the tube after cutting it. Sharp burrs act as stress risers. Always use a dedicated reamer or deburring tool to clean the inner edge before applying the flaring cone.
| Weight | 930 g |
|---|---|
| Imperial / Metric | Imperial, Metric |
Related Products
-
Sale!

Aluminum Alloy Manual Precision Linear Stage – 1-Axis & 2-Axis Micrometer Positioning Slide | FixPartHub
Precision & Teardown Tools Price range: $49.99 through $98.00 Select options This product has multiple variants. The options may be chosen on the product page -
Sale!
Wardrobe Hanging Rod Positioning Ruler – Precision Installation Template for Closet Flange & Bracket Mounting | FixPartHub
Precision & Teardown Tools Original price was: $48.99.$34.99Current price is: $34.99. Add to cart -
Sale!
Thin Rip Table Saw Jig – Precision Narrow Strip Cutting Guide for Repetitive Ripping | FixPartHub
Precision & Teardown Tools Original price was: $48.99.$34.99Current price is: $34.99. Add to cart -
Sale!
Aluminum Alloy 90° Try Square & Multi-Angle Ruler – Precision L-Square for Woodworking, Carpentry & Layout | FixPartHub
Precision & Teardown Tools Original price was: $38.99.$27.99Current price is: $27.99. Add to cart -
Sale!
7-Piece Precision Router Table Setup Bar Set – Aluminum Height Gauge & Setup Blocks for Router & Table Saw Calibration | FixPartHub
Precision & Teardown Tools Original price was: $39.99.$28.99Current price is: $28.99. Add to cart -
Sale!
2-in-1 Slotting & Positioning Bracket – Precision Router Jig for Invisible Connector Mortising | FixPartHub
Precision & Teardown Tools Original price was: $48.99.$34.99Current price is: $34.99. Add to cart -
Sale!
Table Saw Alignment Gauge – Precision Dial Indicator Calibration Tool for Workshop Machinery | FixPartHub
Precision & Teardown Tools Original price was: $48.99.$39.00Current price is: $39.00. Add to cart -
Sale!
15-Piece Precision Setup Block & Height Gauge Set – CNC-Machined Aluminum Setup Bars | FixPartHub
Precision & Teardown Tools Original price was: $49.00.$35.00Current price is: $35.00. Add to cart -
Sale!
Large Radius Router Template Arc Jig Set R100-R300 | FixPartHub
Precision & Teardown Tools Price range: $16.99 through $59.99 Select options This product has multiple variants. The options may be chosen on the product page -
Sale!
3-in-1 Manual Edge Banding Trimmer & Chamfer Plane | FixPartHub
Precision & Teardown Tools Price range: $14.99 through $32.99 Select options This product has multiple variants. The options may be chosen on the product page